Category: Home Office

Desk setup, cable management, and compact work-from-home products.

  • Best Monitor Size for a Small Desk: 24, 27, or 32 Inches?

    Best Monitor Size for a Small Desk: 24, 27, or 32 Inches?

    Disclosure: This article contains one paid Amazon link. If you buy through it, Intuit Chaos may earn a commission at no extra cost to you.

    For most small desks, a 24-inch or 27-inch monitor is the practical choice. A 24-inch screen protects desk depth and leaves room for speakers, a lamp, or a laptop. A 27-inch screen gives you more working area without overwhelming many compact desks, especially when paired with a slim stand or monitor arm. A 32-inch screen can work, but it usually needs more viewing distance, more desk depth, and careful placement.

    Quick answer: 24, 27, or 32 inches?

    Monitor size Usually suits Main advantage Main tradeoff
    24 inches Shallow desks, shared rooms, basic office work Compact footprint and comfortable full-screen view Less room for side-by-side windows
    27 inches Most small home offices Balanced workspace for documents and multitasking Stand depth matters on a shallow desk
    32 inches Deeper desks, detailed creative work, one-screen setups Large canvas and easier window arrangement Can dominate the desk and sit too close

    Screen size alone does not determine comfort. Desk depth, viewing distance, resolution, stand footprint, text scaling, and the work you do are equally important. Measure the setup rather than choosing the largest panel that fits between two walls.

    Measure your desk before choosing the monitor

    Start with usable desk width and depth. Usable space is what remains after accounting for a lamp, speakers, laptop, wall clearance, and anything else that must stay on the surface. Measure the monitor stand as well as the panel. A compact display with a deep V-shaped base may take more working space than a larger display on a shallow rectangular stand.

    Next, sit in your normal working position and measure from your eyes to the expected screen surface. OSHA’s computer workstation guidance gives a general preferred viewing-distance range of 20 to 40 inches (50 to 100 cm), while emphasizing that text should be readable without leaning forward. Treat that as a setup range, not a promise that every screen size will feel right at every point within it.
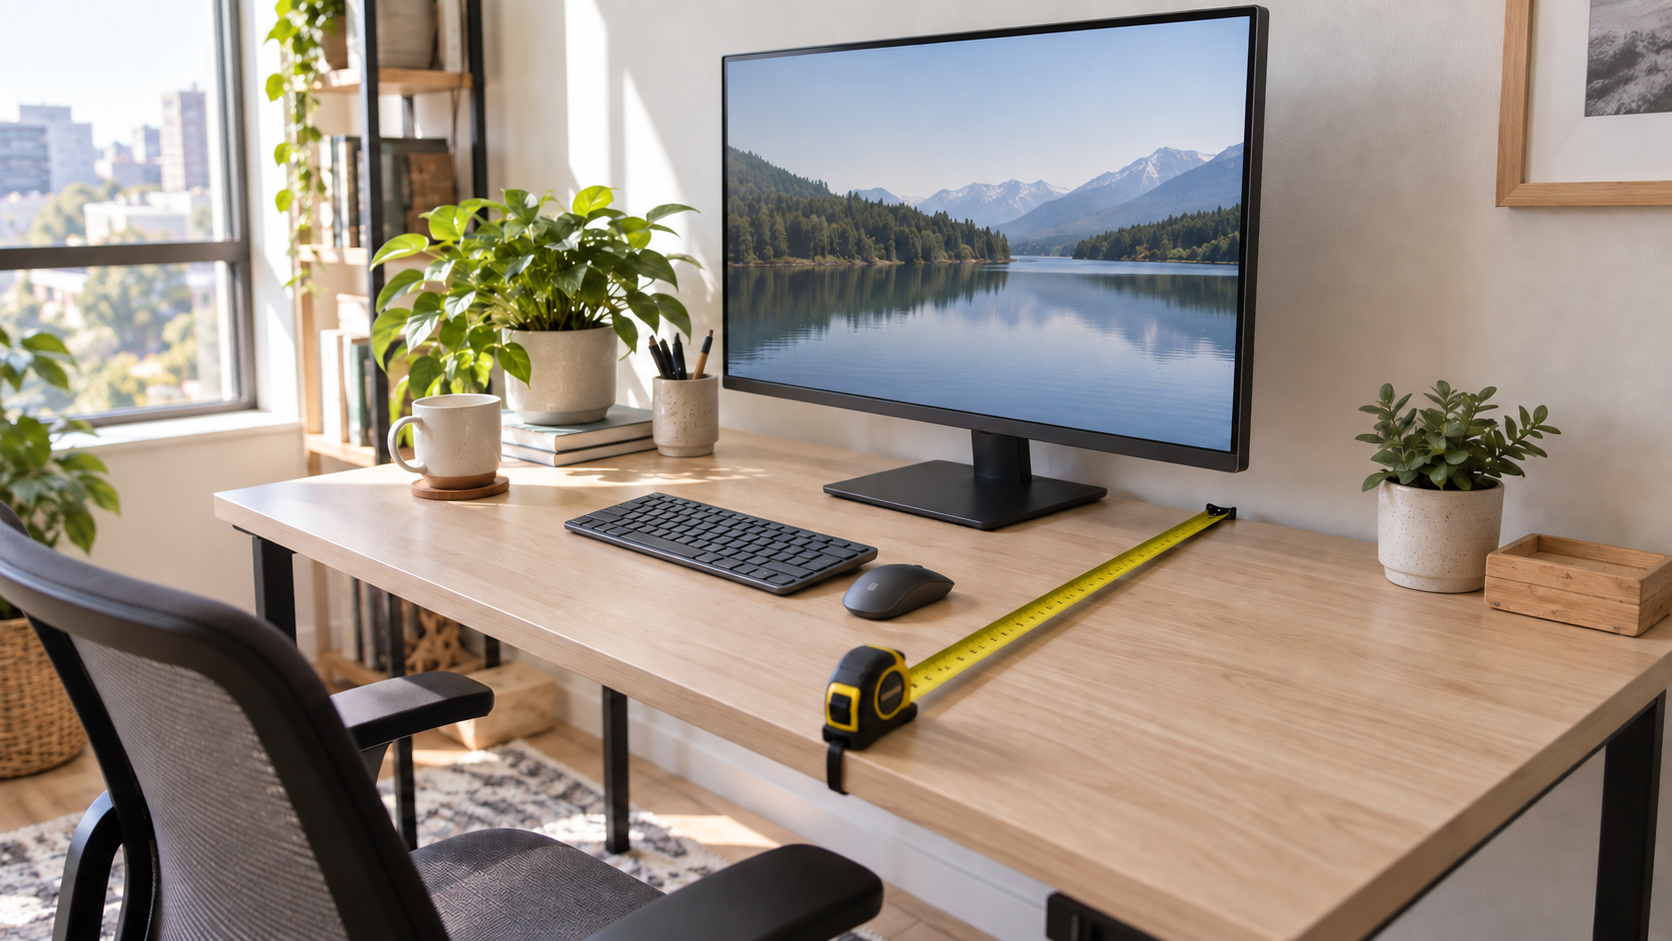
    Tape measure showing the usable depth of a compact desk in front of a monitor
    Measure usable desk depth and the monitor stand, then check the real eye-to-screen distance from your chair.

    When a 24-inch monitor is the best fit

    A 24-inch monitor is a sensible choice for a shallow desk, a bedroom workstation, or a table that must serve more than one purpose. It is easier to view at a shorter distance and leaves more visual breathing room around the screen. It also pairs well with a laptop placed beside it without turning the setup into a wall of displays.

    Full HD resolution is common at this size and can be adequate for general office work. Higher-resolution 24-inch models can make text and interface elements look sharper, but operating-system scaling and app support affect the experience. Choose connection ports and adjustability based on your computer and routine rather than assuming resolution is the only specification that matters.

    Why 27 inches is the balanced small-desk choice

    A 27-inch monitor usually offers the most useful middle ground. It has enough room for two documents, a browser beside a notes app, or a wider timeline, yet it remains manageable on many desks around 48 inches wide. For office and creative work, 2560 x 1440 resolution is a common pairing that provides more workspace than Full HD without requiring the same scaling decisions as a very high-resolution panel.

    The catch is depth. A large stand can push a 27-inch screen toward the front edge. If your desk is shallow, compare stand dimensions carefully or consider a compatible arm. Our guide to choosing a monitor stand for a small desk covers height, stability, and clearance.

    When a 32-inch monitor can work

    A 32-inch display is useful when you want one large canvas for spreadsheets, editing, design, or several windows. On a compact desk, however, it can fill much of your visual field and leave little room for a laptop, lamp, or speakers. The larger panel also makes low pixel density easier to notice at close range, so many shoppers consider 4K models at this size.

    Choose 32 inches only after confirming a comfortable viewing distance and a mounting plan. A corner desk may provide more depth than a straight desk. A monitor arm may reclaim surface area, but the desk edge, thickness, load capacity, wall clearance, and clamp position must all be compatible.

    Resolution changes how each size feels

    Resolution controls how much detail the panel can show, while scaling controls the apparent size of text and interface elements. A higher resolution can provide sharper text and more working space, but tiny default text is not useful if you must lean toward the screen. Check how your operating system handles scaling and whether your most-used applications behave correctly.

    • 24-inch Full HD: straightforward for general work and often budget-friendly.
    • 24-inch or 27-inch 1440p: more workspace and sharper detail for many office setups.
    • 27-inch or 32-inch 4K: high detail with scaling often needed for comfortable text.

    These are common combinations, not strict rules. Panel quality, operating-system support, ports, refresh rate, and your eyesight can matter more than a neat size-and-resolution formula.

    Stand footprint, monitor arms, and storage

    The base is part of the monitor’s size. Check its width and front-to-back depth, then mark that footprint on the desk with removable tape. Make sure the keyboard can sit at a comfortable distance from the front edge and that the mouse has room to move.

    A riser with open storage may be useful when the screen is too low and the keyboard needs a parking place. See our guide to monitor stands with storage. If you use a laptop as a second screen, a dedicated laptop stand for a small desk can align the displays without taking over the center of the workspace.

    Match the monitor to the work

    • Email, writing, and web work: 24 inches may be all you need.
    • Documents side by side: 27 inches usually provides a more comfortable split view.
    • Large spreadsheets or creative timelines: 27 or 32 inches can reduce window switching.
    • Video calls: leave room for the camera, light, and a screen position that does not force you to look sideways.
    • Gaming: consider refresh rate, response behavior, graphics performance, and viewing distance in addition to size.

    A clean setup also needs a plan for charging and display cables. Our home-office cable management guide provides a simple sequence for routing them.

    Common mistakes to avoid

    • Buying by diagonal size alone: stand depth and bezel width affect the real fit.
    • Ignoring viewing distance: a screen that fits the surface may still sit too close.
    • Choosing low resolution on a very large screen: text may look less refined at close range.
    • Placing the monitor off-center: your main screen should normally sit directly in front of you.
    • Raising the screen too high: the top of the screen should generally be at or slightly below eye level.
    • Forgetting ports: confirm the computer, dock, and monitor share compatible connections.

    Small-desk monitor checklist

    • Measure usable desk width and depth.
    • Check the stand footprint, not only the screen dimensions.
    • Confirm a comfortable eye-to-screen distance.
    • Choose resolution and scaling for readable text.
    • Check height, tilt, and mounting options.
    • Confirm ports and cable access.
    • Leave room for the keyboard, mouse, lamp, and anything used daily.

    Frequently asked questions

    Is 27 inches too big for a small desk?

    Not necessarily. It often works well when the desk has enough depth and the stand does not push the screen forward. Measure the real viewing distance and reserve space for the keyboard and mouse before buying.

    Is a 24-inch monitor large enough for working from home?

    Yes for writing, email, browsing, meetings, and many office tasks. People who keep several detailed windows visible at once may prefer 27 inches or a second screen.

    Should I buy a 32-inch monitor for spreadsheets?

    It can be helpful for large sheets, but a 27-inch high-resolution monitor may provide enough workspace with a better fit. Compare usable screen area, scaling, viewing distance, and desk depth.

    Does a monitor arm make a large screen suitable for any desk?

    No. An arm can free surface space, but the panel still needs a comfortable distance and the desk must support the mount and load. Check the desk edge, thickness, wall clearance, arm rating, and VESA compatibility.

    Final recommendation

    Choose 24 inches when space and simplicity matter most. Choose 27 inches for the strongest balance of workspace and compact-desk fit. Move to 32 inches only when you have confirmed the viewing distance, resolution, and mounting plan. The best monitor size for a small desk is the one you can view comfortably while keeping the rest of the workstation usable.

    Browse monitors for small desks on Amazon (paid link).

  • How to Hide Cables Under a Standing Desk Without Restricting Movement

    How to Hide Cables Under a Standing Desk Without Restricting Movement

    Disclosure: This article contains one paid Amazon link. If you buy through it, Intuit Chaos may earn a commission at no extra cost to you.

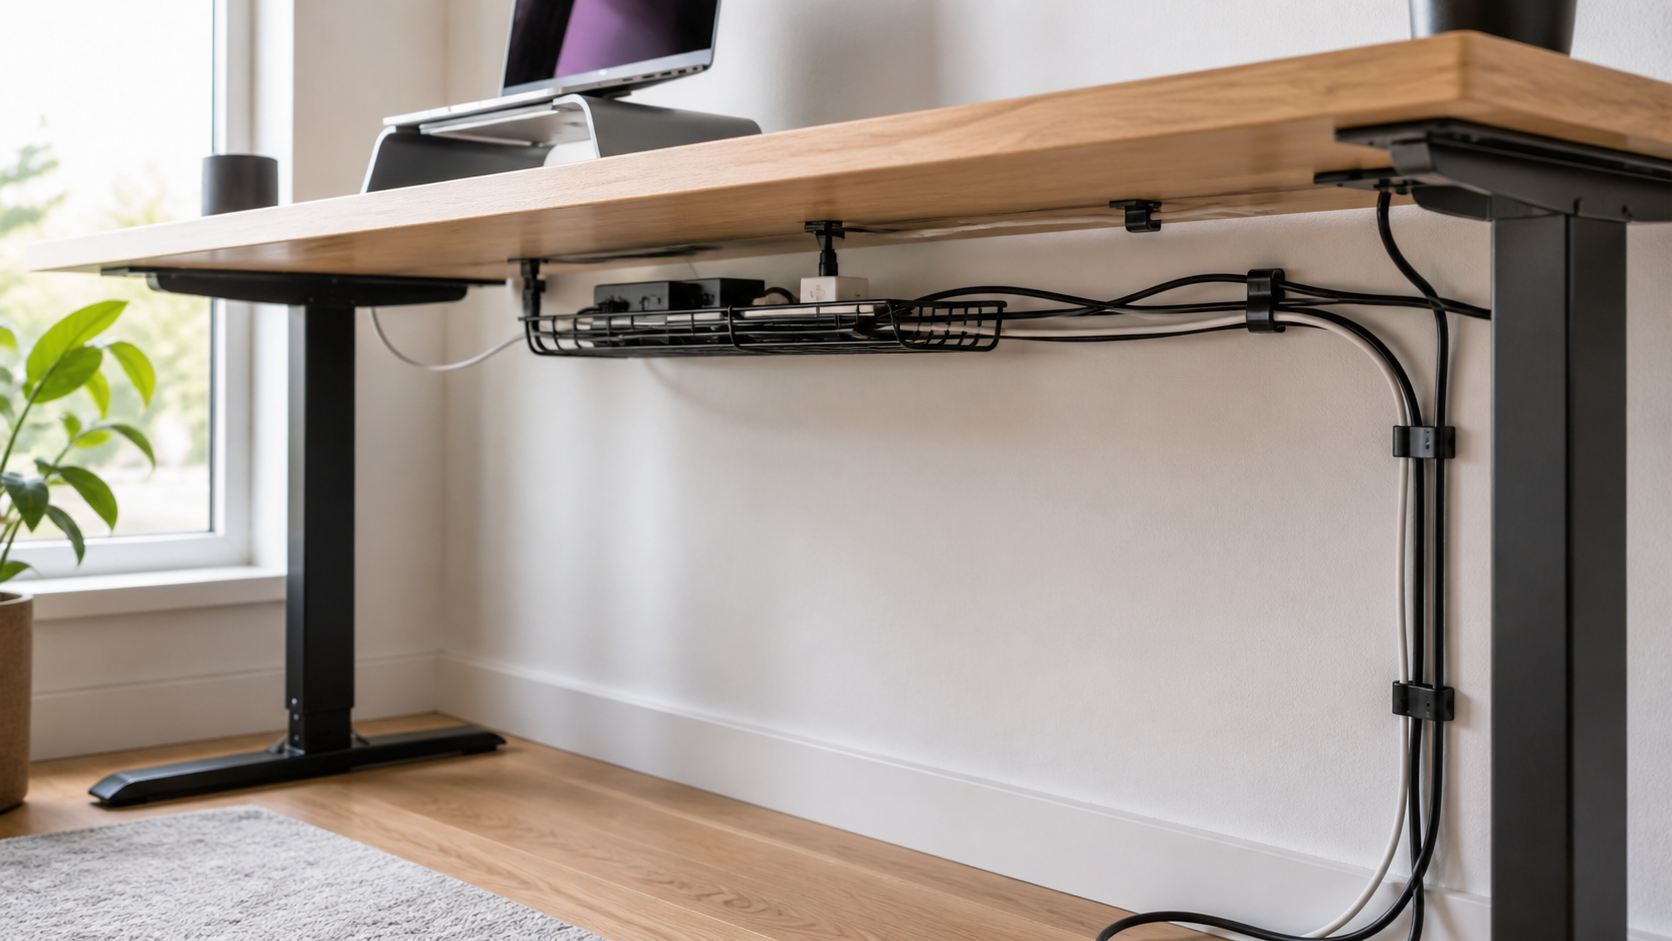
    The simplest way to hide cables under a standing desk is to make most of the wiring move with the desktop. Mount the power strip and excess cable in an under-desk tray, leave controlled slack where each cable must flex, and use one tidy route from the moving desk to the wall outlet. The important part is not making every cable tight. It is giving the desk enough freedom to travel from its lowest to highest position without pulling a plug, trapping a cord, or creating a loop near your feet.

    The quick standing-desk cable plan

    • Move the power strip off the floor and attach it beneath the desktop.
    • Place adapters and extra cable length in an open tray with room for airflow.
    • Route device cables to the tray with reusable hook-and-loop ties.
    • Leave a small service loop at every point that bends or moves.
    • Bring one power cable down through a flexible sleeve or cable spine.
    • Test the desk at full height and full depth before calling the job finished.

    Why a standing desk needs a different approach

    A fixed desk only asks cables to stay in one position. A standing desk changes the distance between the desktop, wall outlet, floor, and anything mounted nearby. A tidy setup at sitting height can become a stretched cable at standing height. A loose cable that looks harmless when the desk is raised can also form a loop near the frame when the desk comes down.

    Think of the cable system as two zones. The first zone is attached to the moving desktop: monitor cables, charger leads, a dock, adapters, and the power strip. The second zone is the single connection between the desk and the room. Keeping these zones separate makes the system easier to inspect and change.

    1. Map the full movement before mounting anything

    Raise the empty desk to its highest setting and look at the route to the outlet. Then lower it and check where the frame, crossbar, control box, and lifting columns travel. Do not place clips or a tray where a moving part can touch them. Also check whether the desk shifts slightly toward or away from the wall as it rises.

    Identify every device that stays on the desk: monitor, laptop charger, lamp, dock, speakers, phone charger, and any other daily equipment. Remove abandoned cables now. Fewer active cables make the final setup safer, cleaner, and easier to troubleshoot.

    2. Make the power strip travel with the desktop

    For most standing desks, the cleanest arrangement is an under-desk tray that holds the power strip, adapters, and extra cable length. Device cords then move together with the desktop instead of stretching from the floor. Our under-desk cable tray guide explains what to measure and when a clamp-on or screw-mounted design makes sense.

    Choose a mounting position that remains reachable without placing the tray against the lifting mechanism. An open tray helps you see the plugs and avoids packing adapters into a closed space. Follow the ratings and instructions for the desk, tray, power strip, and connected equipment. Do not overload a power strip or continue using damaged cords; the U.S. Consumer Product Safety Commission highlights both as electrical fire risks.

    3. Use service loops instead of pulling cables tight

    A service loop is a small, controlled amount of spare cable near a connection or moving point. It prevents tension when you adjust a monitor, move a laptop, or raise the desk. The loop should be large enough to move but small enough that it cannot drop into the frame or brush your knees.

    Use reusable hook-and-loop ties rather than tightening plastic ties directly around cables. Keep connectors accessible, and avoid forcing sharp bends beside USB-C, display, or power plugs. If a cable only reaches when pulled straight, replace it with a suitable longer cable instead of treating tension as part of the design.

    Open cable tray, power strip, service loops, and cable spine beneath a standing desk
    Keep adapters and spare cable with the moving desktop, then use one controlled route toward the outlet.

    4. Create one controlled path from desk to wall

    Once the desk equipment plugs into the mounted power strip, only the strip’s power cable should usually need to travel toward the outlet. A flexible cable spine, fabric sleeve, or a carefully positioned loop can keep that run together. Anchor the upper end to the desk, but leave enough free length for maximum height.

    Keep the floor end away from chair casters and walking paths. If the outlet sits behind the desk, make sure the plug is not crushed when the desktop lowers or when the desk is pushed toward the wall. A cable management box may help with floor-level clutter on a fixed setup, but it should not become an anchor that prevents a standing desk from moving.

    5. Test the entire range slowly

    Before loading the tray completely, move the desk through its full range while watching every cable. Stop immediately if a connector tightens, a loop approaches the frame, or the cable spine buckles. Repeat the test with the monitor, laptop, and other normal equipment connected.

    1. Start at the lowest saved position.
    2. Raise the desk slowly while watching the wall connection.
    3. Pause at standing height and check every plug.
    4. Lower the desk while watching the frame and cable loops.
    5. Repeat the cycle at least twice after making adjustments.

    After the first week, inspect the ties and mounting points again. New cables often settle into a slightly different shape after several cycles.

    Common mistakes to avoid

    • Making every cable perfectly tight: a moving desk needs controlled slack.
    • Leaving the power strip on the floor: several device cables must then stretch individually.
    • Mounting too close to the frame: the tray or clips may interfere with moving parts.
    • Hiding damaged cords: organization does not make worn or cracked wiring acceptable.
    • Bundling every cable into one rigid mass: this makes changes harder and can create sharp bends.
    • Testing only at sitting height: the highest and lowest positions reveal different problems.

    For a broader reset before installing hardware, follow our cable management basics and cleaner desk cable ideas.

    What to look for before buying organizers

    • A tray long and deep enough for the actual power strip and adapters.
    • A mounting method compatible with the desktop material and frame.
    • An open design that keeps plugs visible and accessible.
    • Reusable ties that hold cables without crushing them.
    • A flexible vertical sleeve or spine long enough for maximum desk height.
    • Adhesive clips used only on clean, suitable surfaces and outside the movement path.

    Frequently asked questions

    How much cable slack does a standing desk need?

    There is no universal length because desk travel, outlet position, and equipment differ. Use enough slack for the highest position without tension, then control the excess so it cannot enter the frame at the lowest position.

    Can I use adhesive cable clips?

    They can work for lightweight signal and charging cables on a clean compatible surface. Do not rely on a small adhesive clip to support a heavy power strip or several adapters, and keep clips away from moving mechanisms.

    Should power and data cables be separated?

    Separate routes can make troubleshooting and future changes easier. More important, avoid sharp bends, strained connectors, damaged insulation, and overcrowding. Follow the instructions for each product in the setup.

    What if the desk is against a wall?

    Leave clearance for the desktop, monitor, plugs, and cable route throughout the movement range. Watch for desks that shift toward the wall as they rise, and never let the descending desktop crush a plug or adapter.

    Final recommendation

    Build the system around movement: mount the power strip and excess cable beneath the desktop, use gentle service loops, and bring one controlled cable route to the wall. Measure first and test slowly at both height limits. The result should remain tidy without relying on tension.

    Browse standing-desk cable management options on Amazon (paid link).

  • Under-Desk Storage Solutions for Small Home Offices

    Under-Desk Storage Solutions for Small Home Offices

    Disclosure: This article contains one affiliate link. If you buy through it, Intuit Chaos may earn a commission at no extra cost to you.

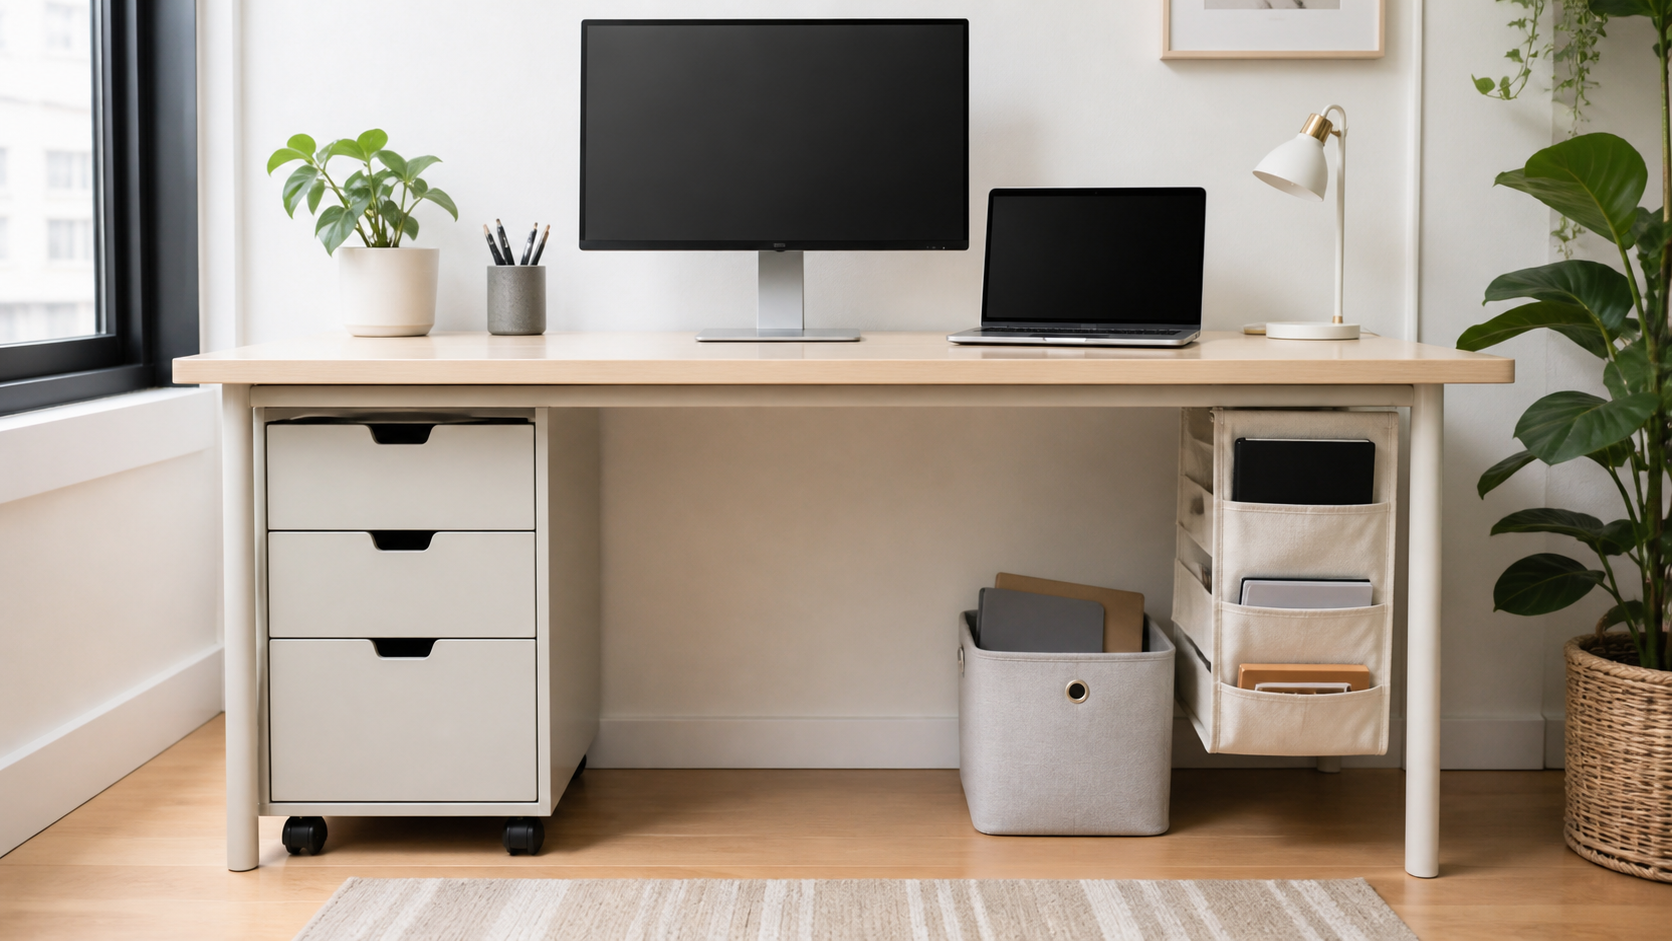
    Under-desk storage can make a small home office feel calmer, but only when it stores useful items without taking over the space where you sit. Drawers, bins, and hanging organizers each solve a different problem. The right choice begins with the clearance below your desk, the objects you reach for most, and how often you need to reset the workspace.

    Measure the open space before choosing a storage type

    Start with the area your chair actually uses, not just the empty rectangle below the desktop. Roll the chair in and out, notice the path of the chair base, and identify the central area that should stay clear. Then measure the depth along the side and back of the desk. This prevents a useful-looking storage piece from becoming an obstacle every day.

    For a wider overview of desktop and drawer options, see our guide to under-desk storage drawers for small home offices.

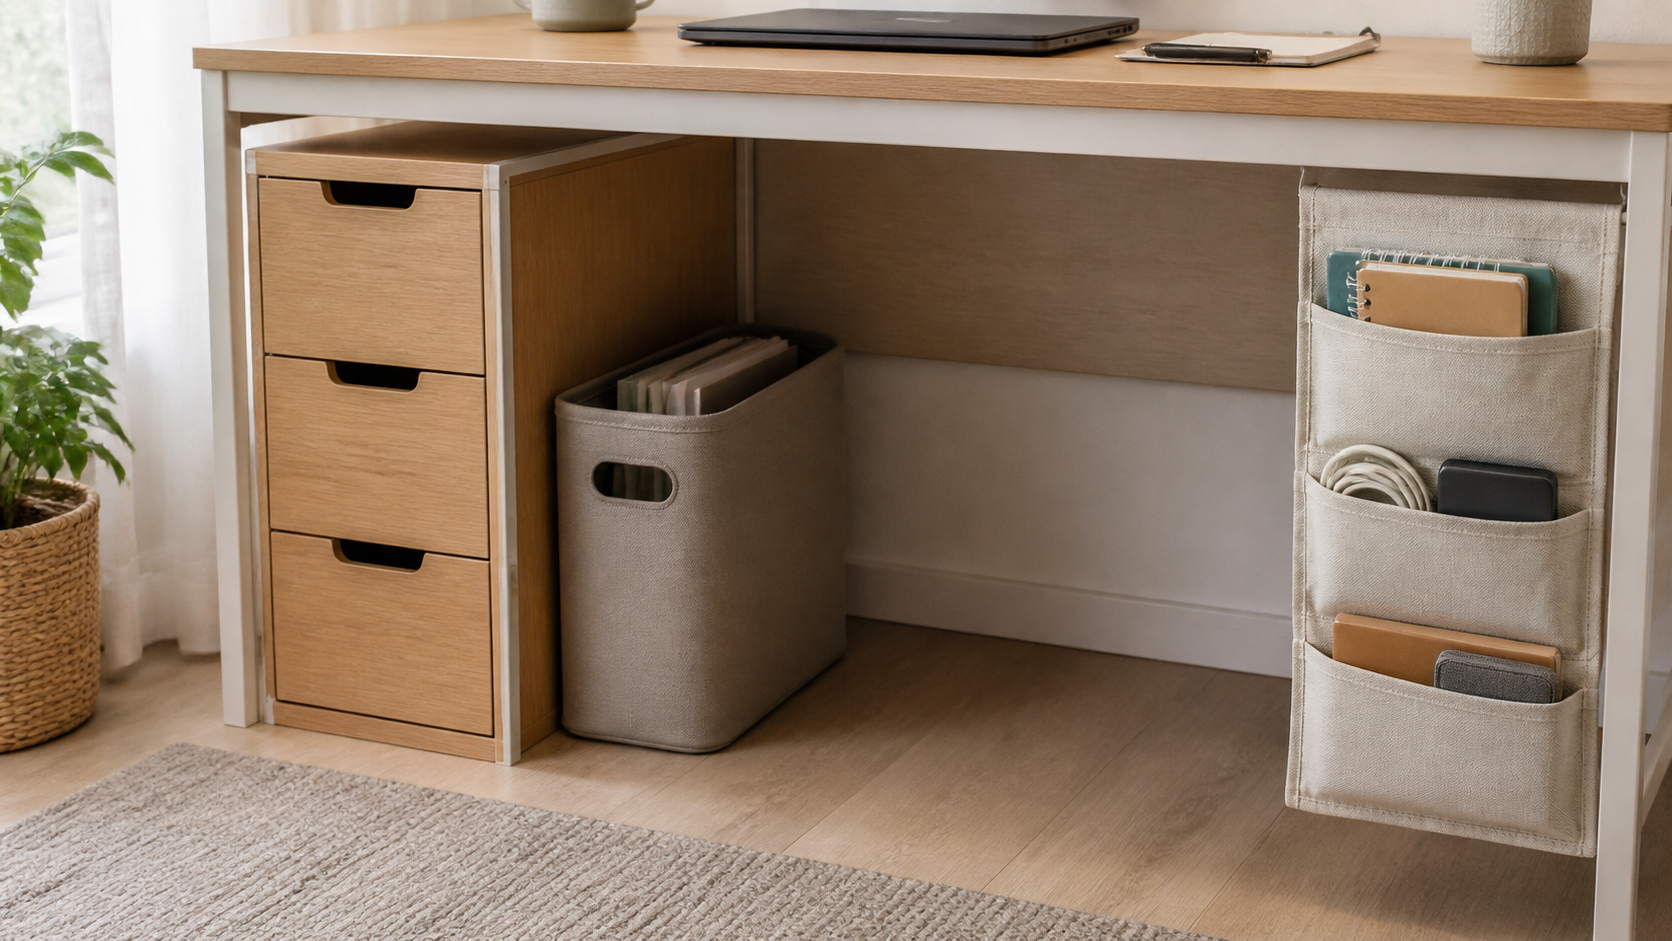
    Under-desk drawer unit, fabric bin, and hanging pocket organizer
    Choose the storage type around desk clearance and the items you need at hand.

    Drawer units work best for small items that need a home

    A narrow drawer unit is useful for cables, notebooks, stationery, adapters, and other small supplies that look messy when left on the desk. Rolling drawers are flexible because they can be pulled out for cleaning or moved to the side when the layout changes. Fixed drawers are a better fit when the desk always stays in one place.

    Before buying, check the height below the desktop and the clearance around the chair base. A deep unit may hold more, but a shallow one can be more practical when the desk is compact. It is also worth separating daily-use supplies from rarely used items, so the top drawer stays genuinely helpful.

    Fabric bins make flexible storage for larger, lighter items

    A bin is a simple solution for paper, headphones, chargers, or a laptop sleeve. It can slide toward the back of the desk when not needed and is easy to lift out during a cleanup. Choose a bin with a firm enough shape to stand upright and a size that leaves the main sitting area open.

    Bins are especially useful when you do not want to attach anything to the desk. The downside is that they can become a catch-all. Give each bin one job, such as meeting supplies or cables waiting to be sorted, instead of filling it with every loose item.

    Hanging organizers use the side of the desk

    A hanging pocket organizer can turn a quiet desk side into storage for notebooks, small devices, mail, or accessories. This works well when floor clearance is limited and the items are light enough to reach without pulling the organizer out of shape. Put it on the far side of the desk so it does not interfere with your legs or chair movement.

    Check the attachment method and the desk edge before choosing one. A solution that suits one desk may not fit another, especially if the frame, drawers, or cable tray occupy the same area. Keep heavier items in a drawer unit or bin rather than overloading a hanging pocket.

    Use a mixed setup only when each zone has a purpose

    Many small offices need more than one type of storage. A sensible mix is a slim drawer unit for small items, one bin for larger supplies, and a hanging organizer for the things you need at arm’s reach. The key is to keep the center beneath the desk free, rather than filling every available inch.

    This approach also makes cleaning easier. You can move one piece at a time, vacuum the floor, and return only the items that still belong in the setup. For additional desktop ideas, our guide to desk organization products for small home offices can help you decide what should stay above the desk instead.

    Plan storage around cable access and cleaning

    Under-desk storage and cable routing should work together. Do not block a power strip, charger, or cable path with a bin that is hard to move. Leave a little access space at the back and avoid resting heavy storage directly on cords. A quick cable plan makes it easier to clean and adjust the desk later.

    Read Cable Management Basics for Home Offices for a simple way to map the desk, power, and cable zones before adding more storage.

    A quick choice guide

    • Choose drawers for small supplies that need to stay sorted and out of sight.
    • Choose bins for flexible, lightweight storage that can move with the workspace.
    • Choose hanging organizers when you need to use a desk side instead of the floor.
    • Combine them carefully when each piece has a specific job and the chair area remains clear.

    The best under-desk storage solution is usually the smallest arrangement that keeps your working surface clear and lets you reach what you need without searching. Measure first, add one zone at a time, and let the setup prove itself for a week before adding more.

    Optional shopping starting point: Browse under-desk storage organizers on Amazon.

  • Best Footrest Material for a Desk: Foam, Mesh, Plastic, or Wood?

    Best Footrest Material for a Desk: Foam, Mesh, Plastic, or Wood?

    Disclosure: This article contains one affiliate link. If you buy through it, Intuit Chaos may earn a commission at no extra cost to you.

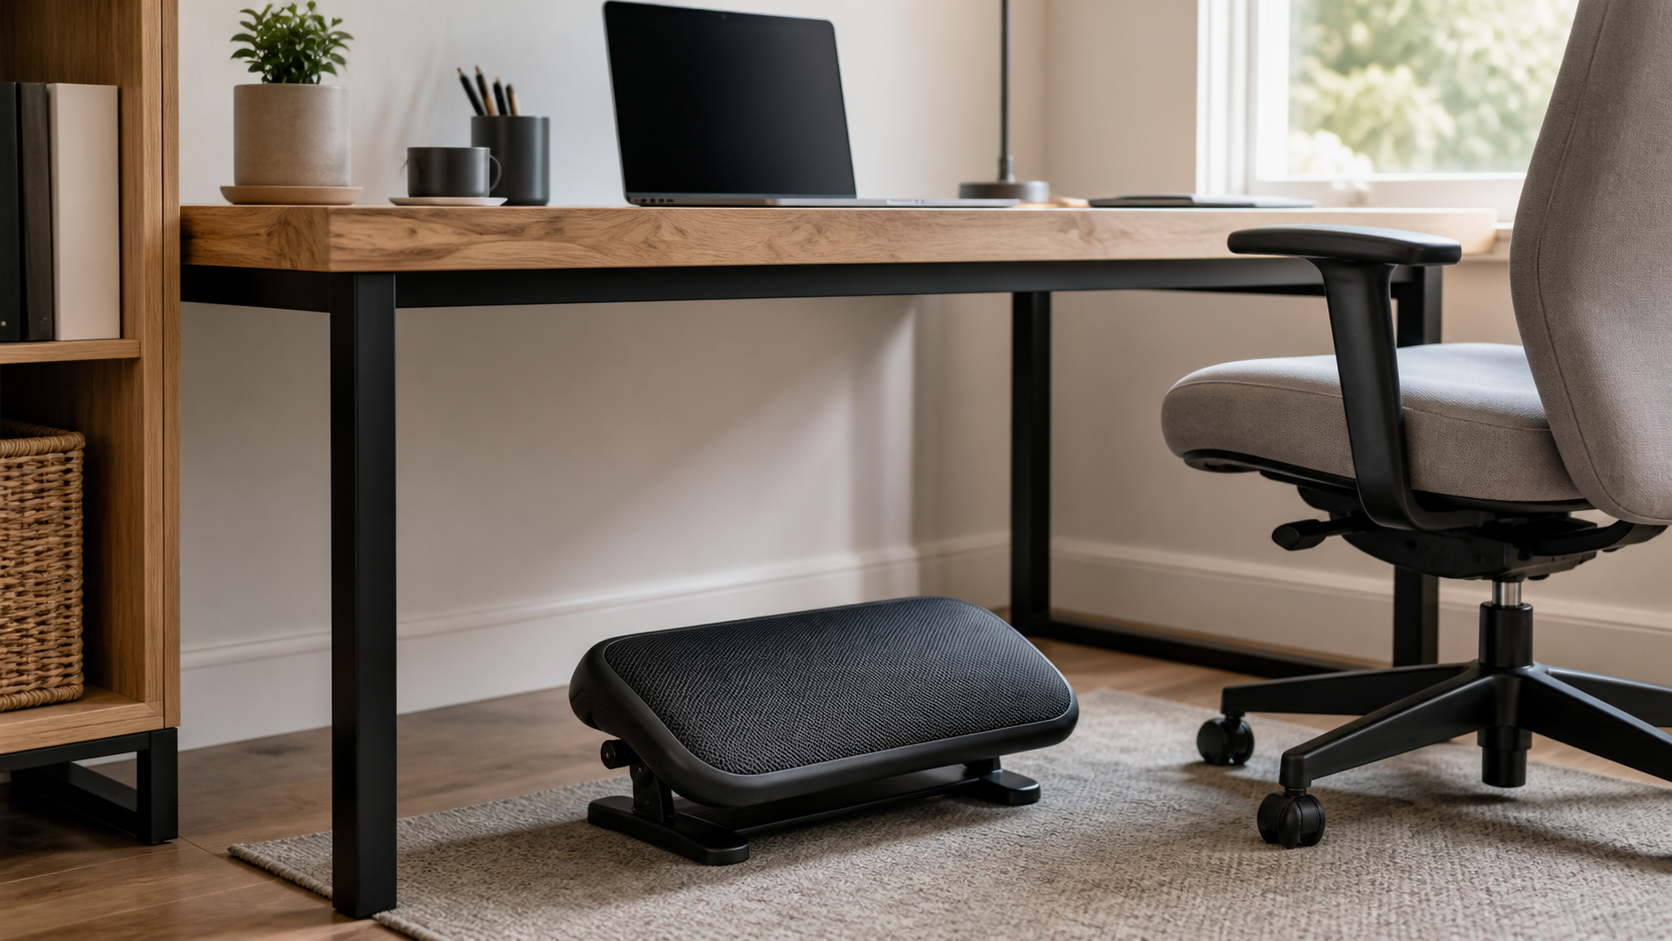
    The best footrest material for a desk is the one that fits how you sit, how much your setup changes, and how easy you need it to be to clean. Foam, mesh, plastic, and wood can all work well, but they create very different surfaces under a small home-office desk. Instead of choosing from a product photo alone, compare the feel, grip, shape, and daily upkeep.

    There is no single best material for every desk

    A footrest is a small part of a workstation, but it competes for limited floor space with a chair base, cables, and sometimes a storage bin. Start with the room you have under the desk. Then think about whether you prefer a soft surface, a firm platform, or a model that can change angle. Material matters most when it changes those everyday details.

    If you are still deciding whether a footrest belongs in your setup, our under-desk footrest guide compares the main product styles to look for.

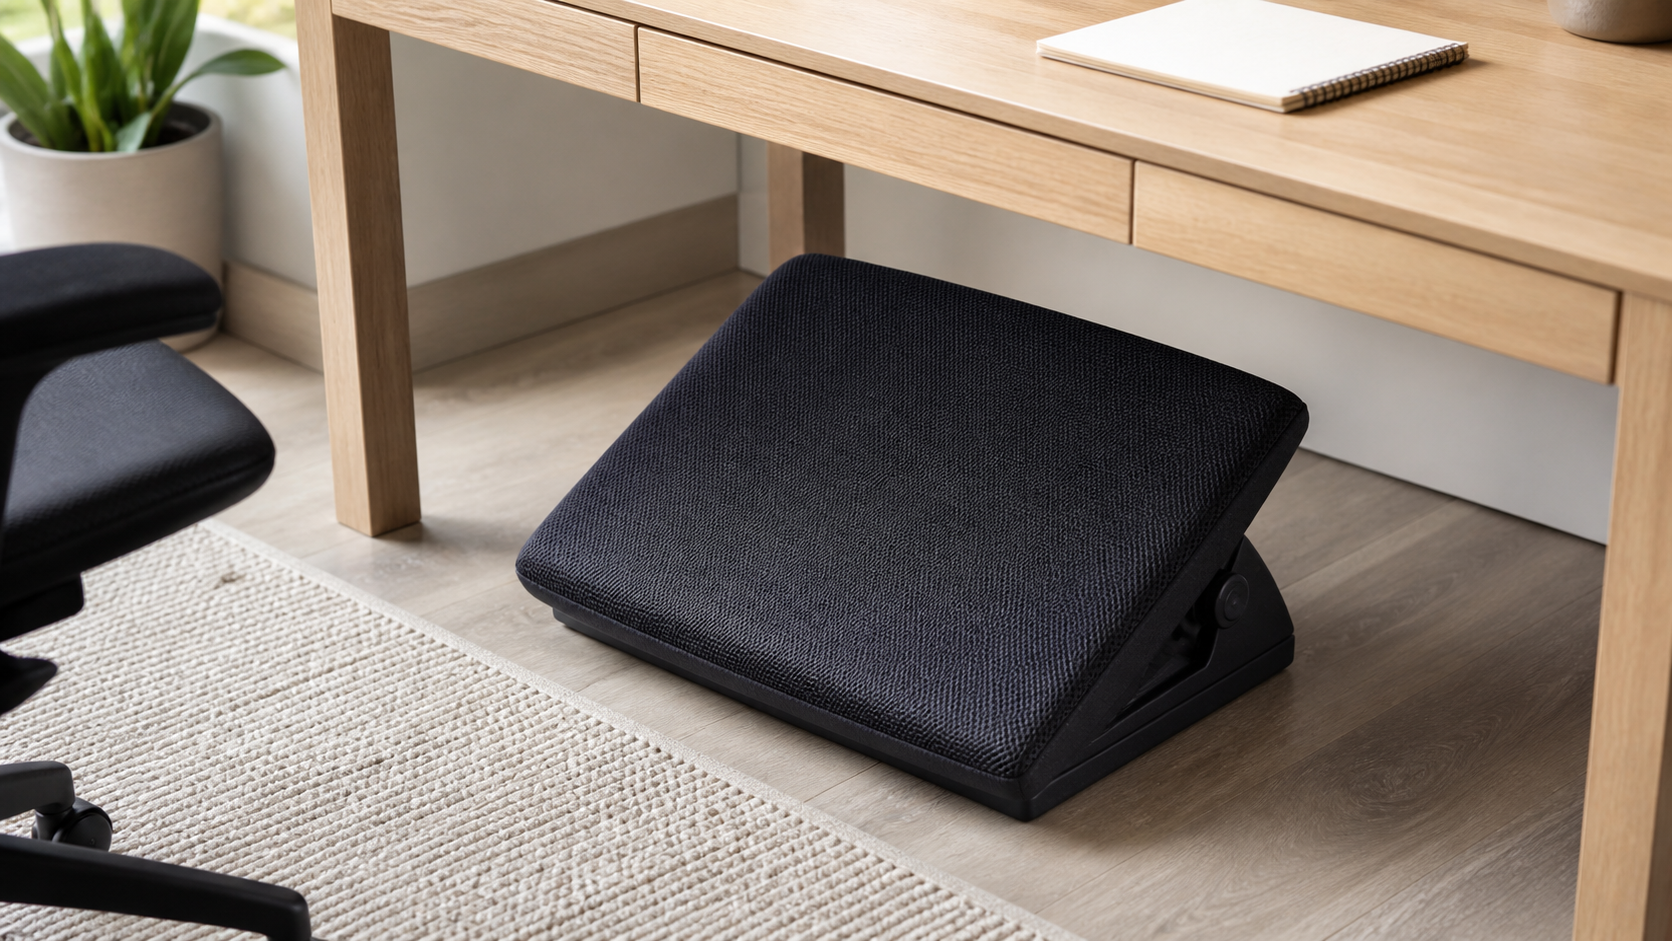
    Close view of a mesh-covered adjustable footrest beneath a light wood desk
    Material texture and an adjustable tilt are practical details to compare before choosing a desk footrest.

    Foam: soft, quiet, and easy to reposition

    Foam footrests are often chosen for a softer surface and low weight. A molded foam model can feel comfortable when you keep your feet in one place for longer work sessions, while a loose cushion-style footrest is easy to move away when you need more open floor space. A textured or washable cover is useful because this item sits close to the floor.

    The tradeoff is that foam does not always hold a precise angle. If you want a fixed platform or a distinct tilt setting, check the construction underneath the cover. Also look at the base: a soft footrest that slides on a smooth floor quickly becomes distracting.

    Mesh and fabric-covered footrests: more texture and airflow

    Mesh or fabric-covered models usually place a breathable surface over foam or a firmer internal frame. They can feel less slippery than bare plastic, and the texture often makes the platform easier to find with your feet without looking down. This is a sensible middle ground when you want a softer top but still prefer a shaped, adjustable base.

    Check how the cover is attached and whether it can be cleaned. A tightly fitted cover is easier to keep neat; a removable cover can be useful in a busy shared workspace. The material itself is only part of the decision, so review the platform size and the edge shape as well.

    Plastic: firm, practical, and simple to clean

    Plastic footrests are usually the most straightforward choice for a firm, wipe-clean surface. Many use ridges, bumps, or a tilting platform rather than a soft cushion. That can suit a desk where the footrest is used briefly throughout the day, or where a fixed shape is more useful than a plush feel.

    Look closely at the underside before choosing one. Rubber feet or a wide base help it stay where you put it. Also consider the platform edge: a compact model can save floor space, but it should still feel stable for the way you normally place your feet.

    Wood or bamboo: a stable platform with a furniture-like look

    Wood and bamboo footrests can be a good fit when you want a simple, sturdy platform that matches a natural desk setup. They are usually easy to wipe down and do not compress like foam. Some people prefer the firm, solid feel, especially when the footrest doubles as a small angled platform.

    Pay attention to finish and surface texture. A smooth platform may need a grip strip or a nonslip base, while an unfinished or rough surface can be harder to maintain. As with plastic, confirm the footprint will not interfere with chair movement.

    Choose the surface and the base together

    Material alone does not tell you whether a footrest will work. A useful comparison list includes:

    • Firmness: Do you prefer a cushioned rest or a solid platform?
    • Grip: Will the feet and base stay in place on your floor?
    • Angle: Does the model stay flat, tilt freely, or offer set positions?
    • Cleaning: Can you wipe it down or remove the cover when needed?
    • Footprint: Does it leave enough room for the chair and nearby storage?

    A desk mat can also help define the working area above the floor. For smaller setups, see our guide to desk mats for small home offices before adding more accessories.

    A quick material decision guide

    Choose foam when a soft, quiet, lightweight option matters most. Choose mesh or fabric over a shaped base when you want texture with a little more structure. Choose plastic when easy cleaning and a firm platform are the priority. Choose wood or bamboo when you prefer a durable, furniture-like platform and have measured the available floor space.

    Whichever material you choose, set it in place and roll the chair through its normal range before committing to the layout. That small check prevents an accessory from turning a clear workstation into a cramped one.

    Optional shopping starting point: Browse under-desk footrests on Amazon.

  • Cable Management Basics for Home Offices: Plan a Safer, Easier-to-Clean Desk

    Cable Management Basics for Home Offices: Plan a Safer, Easier-to-Clean Desk

    Disclosure: This article contains one affiliate link. If you buy through it, Intuit Chaos may earn a commission at no extra cost to you.

    Cable management is not only about making a desk look tidy. A clear routing plan can make equipment easier to move, reduce clutter around your feet, and shorten the time needed to clean the workspace. You do not need an expensive system; start by understanding which cables you use and where they need to go.

    Under-desk cable tray and clips organizing a home office cable route
    A clear cable route keeps a home office desk easier to clean and maintain.

    For a buying guide to the organizer types, see Cable Management Ideas for a Cleaner Desk Setup.

    1. Map the desk before buying organizers

    Unplug and identify each cable, then note its starting point, destination, and required length. Group cables by device, such as monitor, computer, lamp, charger, and audio equipment. Keep power cables easy to distinguish from data and accessory cables. Taking a quick photo before disconnecting everything can help when you rebuild the setup.

    2. Separate fixed cables from daily-use cables

    Some cables stay connected for months, while phone chargers, headphones, and laptop cables move every day. Route fixed cables under or behind the desk. Keep daily-use ends within easy reach with clips or a simple desktop holder. This prevents you from pulling an entire cable bundle apart whenever you need to charge a device.

    3. Choose the right type of organizer

    An under-desk cable tray holds power strips and adapters while keeping the floor clear. Adhesive clips guide one or two light cables along an edge. Reusable hook-and-loop ties are useful for bundles that may change. A cable box can hide a power strip, but it needs enough room and ventilation for the equipment inside. Choose the simplest organizer that matches the weight and number of cables.

    4. Leave room for movement and maintenance

    Do not pull cables tight. Leave a small service loop near devices so you can adjust a monitor, raise a standing desk, or move a laptop without stressing the connector. If the desk changes height, test the cable path at both its lowest and highest positions. Make sure no cable can catch on a drawer, chair wheel, or moving arm. If your monitor position is still changing, use these practical checks for choosing a monitor stand before finalizing the route.

    5. Keep power arrangements sensible

    Follow the power strip and device manufacturers’ instructions, keep ventilation openings clear, and avoid overloading outlets or connecting power strips to one another. Mount heavy adapters securely rather than leaving them hanging by their cords. Keep connections away from liquids and from spots where feet or chair wheels can strike them.

    6. Label both ends of important cables

    Simple labels save time when several black cables disappear behind a desk. Label both ends with the device name, especially for monitors, network equipment, and power adapters that look similar. Use labels that can be removed cleanly so the system remains easy to update.

    7. Design for easier cleaning

    A good cable route keeps most cords off the floor and removes loose loops from the back edge of the desk. Leave enough access to wipe surfaces and vacuum underneath without unplugging the whole setup. Every few months, check adhesive mounts, loosened ties, dust around adapters, and cables that have shifted into moving parts.

    Quick cable management checklist

    • Identify and test every cable before routing it.
    • Separate permanent connections from daily-use leads.
    • Use trays for weight, clips for guidance, and reusable ties for bundles.
    • Leave slack for monitor arms, drawers, and height-adjustable desks.
    • Keep power connections ventilated and protected from impact.
    • Label both ends and keep the floor easy to clean.

    Build the layout in stages rather than tightening every tie immediately. Use the desk for a day, notice which cables still need to move, and make the final adjustments only after the routing works in real life.

    Optional shopping starting point: Browse cable management options for home offices on Amazon.

  • Desk Lamp Buying Guide: How to Pick Light for Video Calls and Late Work

    Desk Lamp Buying Guide: How to Pick Light for Video Calls and Late Work

    Disclosure: This article contains one affiliate link. If you buy through it, Intuit Chaos may earn a commission at no extra cost to you.

    A desk lamp can make a small home office more comfortable, but the best choice is not simply the brightest model. The lamp needs to fit your desk, direct light where you need it, and work with your screen and video-call setup. Use these practical checks before you buy.

    Adjustable desk lamp lighting a compact home office for video calls
    Adjustable desk lamp setup for clearer video calls and comfortable late work.

    For a product-by-product comparison, see our Best Desk Lamps for Video Calls and Eye Comfort.

    1. Match the beam to the work you do

    A wide, diffused beam works well for reading documents, writing notes, and lighting a shared work surface. A narrower adjustable head is useful when you need focused light on a keyboard or notebook. If you switch between tasks, choose a lamp with a movable arm or head so you can redirect the beam without moving the base.

    2. Plan the lamp position for video calls

    For video calls, place the lamp slightly in front of you and off to one side. This can brighten your face without shining directly into your eyes or reflecting in the monitor. A lamp placed behind you may make your face look darker, while a very low lamp can create distracting shadows. Before buying, test the intended position with another light source and check the result in your webcam preview.

    3. Look for useful dimming and color controls

    Room light and screen brightness change throughout the day, so adjustable brightness is usually more useful than one powerful setting. Warm light can feel comfortable for late work, while neutral or daylight-style light can make paper and small objects easier to see. Multiple color-temperature settings are helpful, but simple controls you will actually use matter more than a long feature list.

    4. Protect valuable desk space

    On a compact desk, compare the footprint of the base with the space beside your keyboard and monitor. A clamp lamp can free the work surface, but you should measure the desk edge and check that the clamp will not collide with drawers, a cable tray, or a wall. Also confirm that the arm reaches the center of the work area without blocking the monitor. For related small-space planning, see Best Desk Organization Products for Small Home Offices.

    5. Check controls, power, and cable reach

    Buttons should be easy to reach from your normal sitting position. Touch controls look tidy, but physical buttons can be easier to find in a dark room. Check whether the lamp uses a wall plug, USB power, or a separate adapter, and make sure its cable reaches the outlet without crossing a walkway. If a lamp includes a charging port, treat it as a convenience rather than the main reason to buy. A clear route also makes the lamp easier to live with; use these cable management ideas for a cleaner desk setup to plan where the cord will run.

    6. Avoid glare before it becomes a daily problem

    The light source should sit outside your direct line of sight. A shade, diffuser, or recessed light panel can reduce harsh glare. If you wear glasses, move the lamp higher and farther to the side, then adjust the angle until reflections disappear from your webcam image. Matte desk surfaces also tend to reflect less light than glossy ones.

    Quick buying checklist

    • Adjustable brightness for daytime and evening work.
    • A head or arm that aims light away from the monitor.
    • A base or clamp that fits the available space.
    • Enough reach for your actual desk depth.
    • Controls that are easy to use without interrupting work.
    • A power cable that reaches safely and stays out of the way.

    The right desk lamp supports the setup you already have. Measure first, test the likely position, and choose the controls that solve your everyday lighting problems instead of paying for features you may never use.

    Optional shopping starting point: Browse desk lamps for video calls on Amazon.

  • How to Choose Under-Desk Storage Drawers Without Losing Legroom

    Disclosure: This article may contain an affiliate link. If you buy through it, Intuit Chaos may earn a commission at no extra cost to you.

    Under-desk storage can clear a small home office quickly, but the wrong drawer unit can make a desk uncomfortable to use. The most useful option preserves a natural seated position, keeps essentials close, and does not block cables or cleaning.

    Measure your leg zone first

    Before comparing drawers, sit at the desk and note the open area used by your knees and feet. Measure the distance from the underside of the desktop to your thighs, the clear width between desk legs, and the depth from the rear support to the front edge. This is the space a drawer must not invade.

    Choose the right mounting style

    Clamp-on drawers are practical when you do not want holes in the desktop, but check the thickness range of the clamp. Screw-mounted units are usually steadier for heavier items. Freestanding drawer carts offer flexibility, though their wheels and height can create a collision point under a compact desk.

    Keep storage shallow and intentional

    Shallow drawers work best for chargers, sticky notes, adapters, cables, and writing tools. Large bins are tempting, but they often become a catch-all and take space from your legs. Sort the items you reach for weekly and choose a drawer size that fits that group rather than every object in the room.

    Leave room for cables and cleaning

    Look for a location that does not cover a power strip, cable tray, or the route used by a chair. A little space around the drawer makes it easier to vacuum, retrieve a dropped item, and inspect cables. Smooth drawer movement matters more than extra compartments if the unit will be used every day.

    Quick checklist

    • Measure knee clearance while seated.
    • Check desktop thickness and mounting method.
    • Choose a shallow unit for small essentials.
    • Keep power access and cable routes clear.
    • Test that drawers can open without hitting the chair.

    A well-placed under-desk drawer should disappear into your routine: useful when you need it and invisible when you are working.

    Optional shopping starting point: Browse under-desk storage drawers on Amazon.

  • How to Choose a Monitor Stand for a Small Desk: 7 Practical Checks Before You Buy

    Disclosure: This article may contain an affiliate link. If you buy through it, Intuit Chaos may earn a commission at no extra cost to you.

    A monitor stand can make a small desk feel calmer and more usable, but the right choice is not simply the tallest or widest model. A stand changes the height of your screen, uses part of the desktop, and can either create useful storage or introduce a new obstacle. The best approach is to measure first, then match the stand to the way you actually work.

    1. Start with the desk, not the product photo

    Measure the usable width and depth of your desk before comparing monitor stands. Leave room for the keyboard, mouse movement, and a notebook or drink if those are part of your normal day. A stand that looks compact in a product photo may feel oversized when its feet or side shelves reach into your working zone.

    For a small desk, write down three numbers: total desk width, the clear depth between the wall and the front edge, and the width of the monitor base. These measurements make it much easier to rule out options that will crowd the surface.

    2. Check the monitor base and weight limit

    Most desk risers are designed for a monitor sitting on its original base. Compare the stand’s advertised weight limit with the monitor’s weight, then give yourself a sensible margin. A heavy ultrawide display, a large all-in-one computer, or a second screen can change the requirements quickly.

    Also look at the shape of the monitor base. A wide V-shaped base needs a deeper platform than a small rectangular base. If the base hangs over the edge, choose a different option rather than relying on a careful balancing act.

    3. Choose a height that helps your posture without forcing it

    The goal is a screen position that feels natural when you sit comfortably, not a desk that looks dramatic. When you look straight ahead, your eyes should land around the upper portion of the display. Your exact preference will vary with chair height, screen size, glasses, and the kind of work you do.

    A fixed riser works well when one person uses the desk most of the time. An adjustable stand is more flexible for shared spaces, but check that its legs, clamps, or adjustment mechanism do not consume more room than the fixed model would.

    4. Decide whether the space underneath will be useful

    Storage is one of the strongest reasons to use a monitor riser on a small desk. The open space underneath can hold a keyboard after work, a slim notebook, a docking station, or a few supplies. Treat that storage as a planned zone, though. If you fill it with loose items, the desk can become harder to clean and cables can become harder to reach.

    Before buying, place the items you want to store together and measure their height and width. This simple test tells you whether an open riser, drawer-style stand, or basic shelf is the better fit.

    5. Think about cable paths early

    A monitor stand changes where cables fall. Look for an open rear edge or enough clearance to route a power cable, display cable, and charging cable without bending them sharply. If the stand sits flush against the wall, leave a small gap behind it so the cables are not pinched.

    Keep the monitor’s power adapter accessible. A tidy desk is helpful, but hiding a power brick so completely that you cannot inspect it or unplug it easily creates a different kind of friction.

    6. Match the material to your desk routine

    Wood risers can feel warm and sturdy, while metal stands are often slimmer and easier to wipe clean. Glass may suit a minimal setup, but it shows dust and fingerprints more readily. There is no universal winner: choose the material that matches the desk surface, the amount of cleaning you want to do, and the weight of the equipment.

    Pay attention to non-slip feet or protective pads. They help prevent the stand from sliding and reduce the chance of rubbing the desktop finish over time.

    7. Leave room for the next small upgrade

    A monitor stand is often the first step in a better desk setup. You may later add a desk lamp, laptop stand, cable tray, webcam, or compact speakers. A simple riser with a little open space at the sides is usually easier to build around than a highly specialized model with fixed compartments.

    That does not mean you need to buy for every possible future scenario. It simply means avoiding a stand that uses every available inch on day one.

    A quick decision checklist

    • Does the platform comfortably support your monitor base and its weight?
    • Will the total depth still leave room for your keyboard and mouse?
    • Is the height appropriate for your chair and normal seated position?
    • Can cables exit without sharp bends or being trapped against the wall?
    • Will the space underneath solve a real storage need?
    • Are the feet stable and gentle on the desk surface?

    A good monitor stand should make the desk easier to use every day, not just more photogenic. Once your measurements and priorities are clear, choosing between materials, heights, and storage styles becomes much more straightforward.

    Optional shopping starting point: Browse monitor stands for small desks on Amazon.

  • Best Laptop Stands for Small Desks and Home Offices

    Best Laptop Stands for Small Desks and Home Offices

    Find the best laptop stand for small desks with height tips, adjustable options, airflow advice, posture support, cable clearance, and cleaner setup ideas.

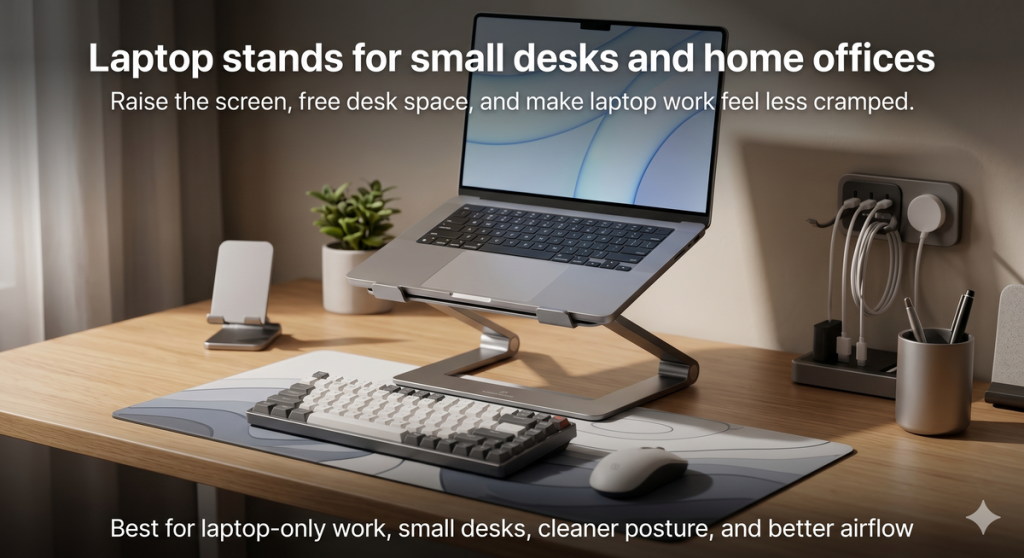
    A laptop stand is one of the simplest upgrades for a small home office. It raises your screen, frees space under and around the laptop, improves airflow, and makes a compact desk feel more intentional. The best laptop stand for a small desk is not always the biggest or most expensive one. It is the stand that lifts your screen to a better height without taking over the whole workspace.

    Affiliate disclosure: As an Amazon Associate, I may earn from qualifying purchases. This does not change the price you pay, and it helps support Intuit Chaos.

    Laptop stand setup for a small desk and home office

    Quick Answer: Which Laptop Stand Should You Choose?

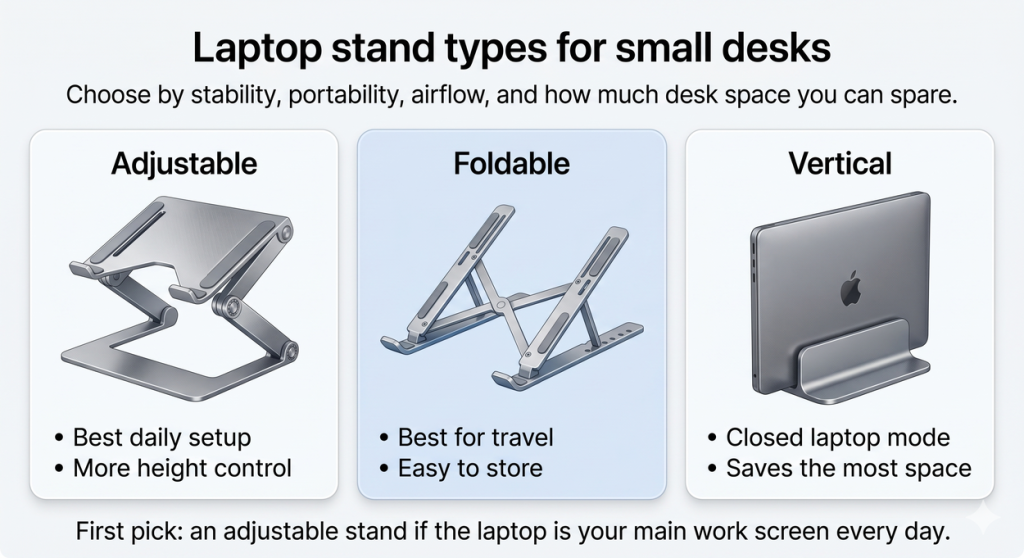
    If your laptop is your main work screen, choose an adjustable laptop stand with enough height range to bring the screen closer to eye level. If you move between rooms or travel often, a foldable stand is easier to store. If you use your laptop closed with an external monitor, a vertical laptop stand saves the most desk space.

    Need Best laptop stand type Why it helps
    Daily home office work Adjustable laptop stand Better screen height and posture control
    Small desk or shared table Foldable laptop stand Easy to move, store, and reset
    Closed laptop mode Vertical laptop stand Saves surface space beside a monitor
    Hot laptop Open-frame aluminum stand Improves airflow under the laptop

    For a broad starting point, compare laptop stands for small desks on Amazon.

    Why a Laptop Stand Helps a Small Desk

    Small desks have two common problems: the screen is too low, and the laptop takes up the center of the work surface. A stand helps both. It lifts the screen and can create space underneath for a keyboard, notebook, docking hub, or small accessories.

    A laptop stand works especially well when paired with a clean desk layout. Use a desk mat to define your work zone, a desk lamp for softer lighting, and cable routing so the setup stays calm after the first week.

    How High Should a Laptop Stand Be?

    The goal is not to make the laptop tall just for the sake of it. The goal is to bring the top third of the screen closer to eye level, so you do not spend the whole day looking down. Once the laptop is raised, use a separate keyboard and mouse whenever possible.

    Laptop on a slim aluminum stand at a comfortable eye-level height on a home office desk.

    If you raise the laptop but keep typing on the built-in keyboard for long sessions, your wrists and shoulders may still feel awkward. A stand is best when it turns the laptop into a better screen, not when it forces your hands into a steep angle.

    Best Laptop Stand Types for Small Desks

    Laptop stand types comparison for adjustable foldable and vertical stands

    Adjustable Laptop Stands

    Adjustable stands are the best choice for most daily home office setups. They let you change the height and angle, which is useful if your chair, desk height, or laptop size changes. Look for a sturdy base, grippy pads, and enough clearance for airflow.

    You can browse adjustable laptop stands for desks on Amazon if the laptop is your main screen.

    Foldable Laptop Stands

    Foldable stands are better for flexible spaces. They are easy to put away, carry to another room, or pack for travel. They may not feel as stable as a heavier desktop stand, but they are practical if your desk has to reset at the end of the day.

    If you work from different rooms, compare foldable laptop stands on Amazon.

    Vertical Laptop Stands

    A vertical stand is useful if you connect your laptop to an external monitor and use it in closed mode. It keeps the laptop upright, saves horizontal desk space, and can make the setup look much cleaner. This is not the best choice if you need the laptop screen open all day.

    What Features Are Worth Paying For?

    • Stable base: A wobbly stand becomes annoying quickly.
    • Height adjustment: More useful than decorative design.
    • Open-frame airflow: Helps laptops that run warm.
    • Grippy pads: Keeps the laptop from sliding.
    • Space underneath: Useful for storing a keyboard or notebook when not in use.
    • Foldability: Worth it if you work in shared spaces or travel.

    If cooling is a priority, search for aluminum laptop stands with airflow on Amazon.

    Laptop Stand vs Monitor Stand

    A laptop stand is best when the laptop itself is the screen you use. A monitor stand is better if you use an external monitor and need storage underneath. If you work with both a laptop and monitor, you may use a laptop stand on one side and a monitor stand in the center.

    For external screen setups, read Best Monitor Stands With Storage for Small Desks. For hidden small-item storage, see Best Under Desk Storage Drawers for Small Home Offices.

    Setup Tips for a Cleaner Laptop Workspace

    1. Place the stand near the back half of the desk so the keyboard has room in front.
    2. Use a separate keyboard and mouse for longer work sessions.
    3. Keep charging cables routed behind the stand or along one side.
    4. Leave airflow space under the laptop, especially if it runs warm.
    5. Pair the stand with a desk mat so the keyboard and mouse area feels intentional.
    6. Use a lamp from the side if video calls look dark or uneven.

    For cable cleanup, use Cable Management Ideas for a Cleaner Desk Setup or a dedicated Under Desk Cable Management Tray for Small Home Offices.

    Common Mistakes to Avoid

    • Buying a stand that is too low: It may improve airflow but not posture.
    • Ignoring keyboard comfort: A raised laptop needs a separate keyboard for long sessions.
    • Choosing a wide stand for a tiny desk: Measure before buying.
    • Blocking vents: Avoid stands that cover laptop cooling areas.
    • Letting cables hang in front: Route charging and hub cables behind the stand.

    FAQ

    Are laptop stands worth it for small desks?

    Yes. A laptop stand can raise the screen, improve airflow, and create more usable desk space. It is one of the easiest upgrades for a compact home office.

    Do I need a separate keyboard with a laptop stand?

    For long work sessions, yes. Raising the laptop makes the screen more comfortable, but typing on the raised laptop keyboard can strain your wrists and shoulders.

    Is an adjustable or foldable laptop stand better?

    An adjustable stand is better for a fixed daily desk. A foldable stand is better if you move around, travel, or need to put the setup away often.

    Can a laptop stand help with overheating?

    It can help if the stand improves airflow under the laptop. Open-frame aluminum stands are usually better for airflow than solid platforms.

    Final Thoughts

    The best laptop stand for small desks should lift the screen, stay stable, allow airflow, and leave enough room for a keyboard and mouse. Choose an adjustable stand for daily work, a foldable stand for flexible spaces, or a vertical stand for closed-laptop setups. When combined with a desk mat, clean cable routing, and better lighting, it can make a small home office feel far more comfortable.

    For the full home office cluster, start with Best Desk Organization Products for Small Home Offices and continue with Top 10 Home Office and Smart Home Upgrades for 2026.

  • Best Under Desk Storage Drawers for Small Home Offices

    Best Under Desk Storage Drawers for Small Home Offices

    Find the best under desk storage drawer for small home offices with placement tips, size advice, clutter control, cable clearance, and cleaner setup ideas.

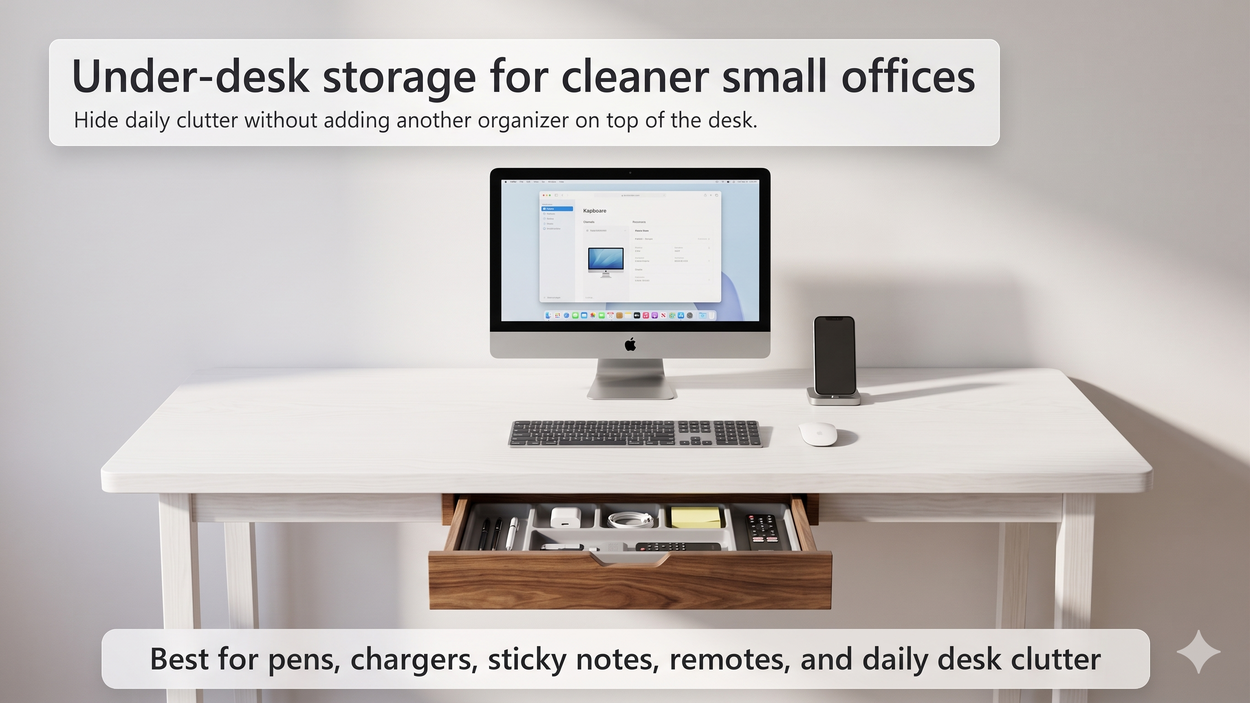
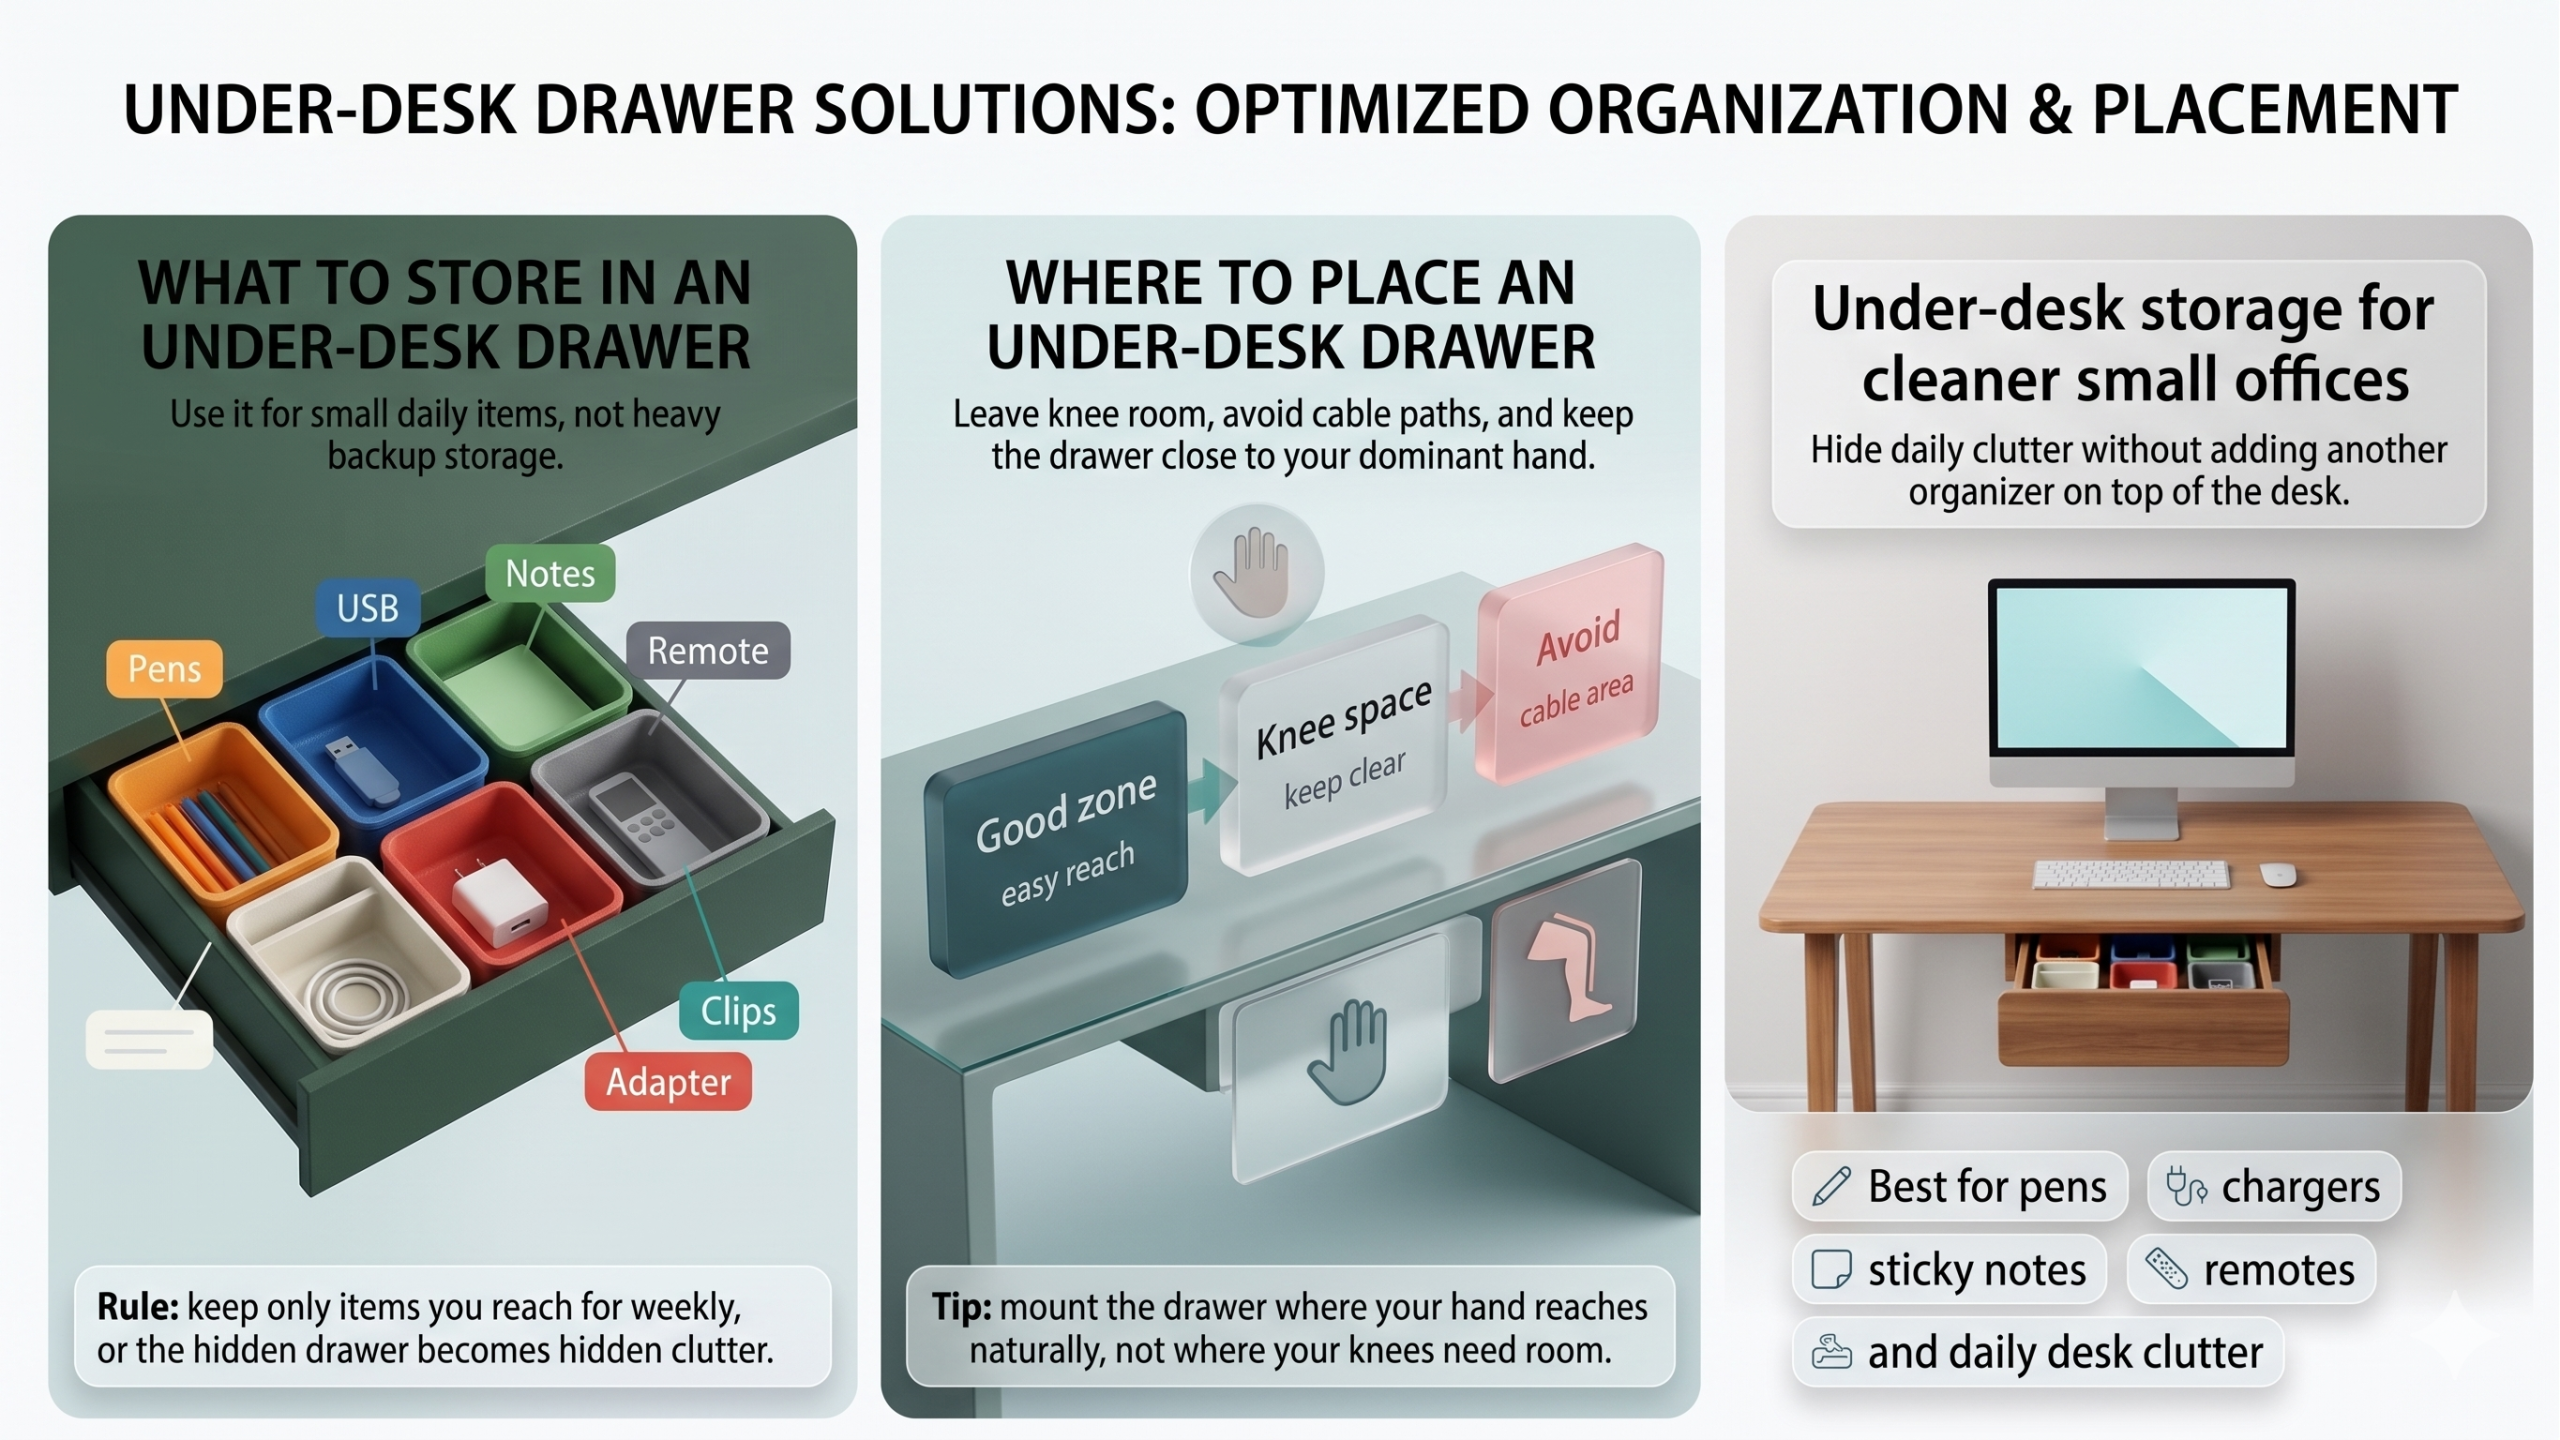
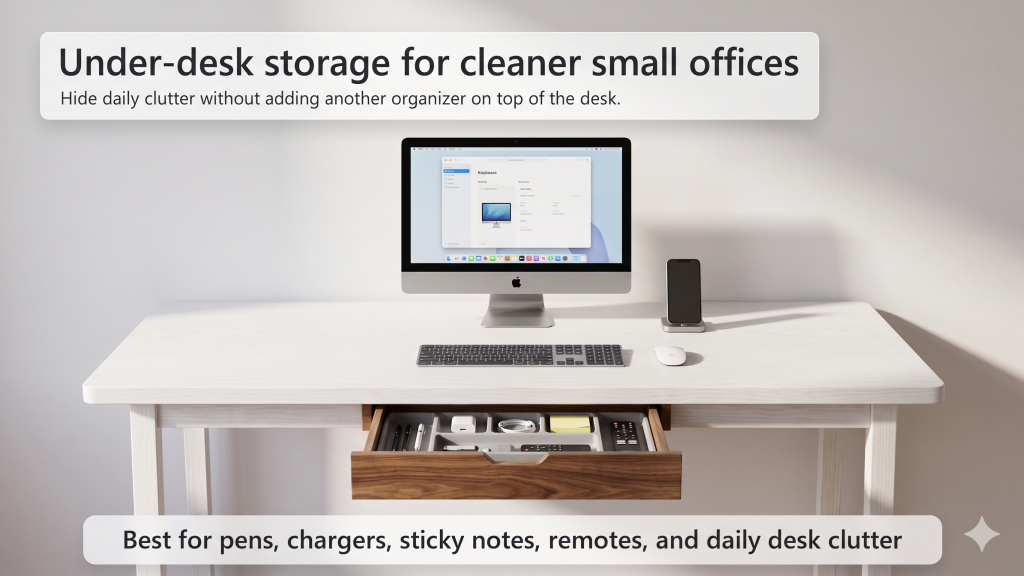
    An under desk storage drawer is a simple way to hide small daily items without adding another tray, box, or organizer on top of your desk. For a small home office, that matters. Pens, chargers, sticky notes, earbuds, remotes, and adapters can make a clean desk feel messy fast. A good under desk drawer keeps those items close, but out of sight.

    Affiliate disclosure: As an Amazon Associate, I may earn from qualifying purchases. This does not change the price you pay, and it helps support Intuit Chaos.

    Under desk storage drawer setup for a cleaner small home office

    Quick Answer: Who Should Buy an Under Desk Drawer?

    An under desk drawer is best for people who want a cleaner desktop but still need small items within easy reach. It is especially useful if your desk has no built-in drawer, if you work on a narrow tabletop, or if your desk mat and monitor stand already take up most of the surface.

    Need Best option Why it helps
    Hide small clutter Adhesive under desk drawer Easy to install and keeps items out of sight
    More secure storage Screw-mounted under desk drawer Better for heavier daily items
    Rental-friendly setup No-drill drawer or clamp organizer Avoids permanent changes to the desk
    Desk with cables underneath Shallow side-mounted drawer Leaves cable paths and knee space clear

    For a broad starting point, compare under desk storage drawers on Amazon.

    Why Under Desk Storage Works So Well in Small Offices

    Small desks do not usually fail because they lack one big organizer. They fail because daily items keep returning to the surface. A drawer under the desk solves a different problem: it creates hidden, reachable storage for the small things you use often.

    This works especially well with a clean surface strategy. Use a desk mat to define your active work zone, a monitor stand with storage for larger desktop structure, and an under desk drawer for small loose items.

    What to Store in an Under Desk Drawer

    The best use for an under desk drawer is not long-term storage. It should hold small items you reach for every week. If you fill it with things you rarely use, it becomes hidden clutter instead of useful organization.

    What to store in an under desk drawer organizer

    • Pens and markers: Keep one or two favorites, not every pen you own.
    • Charging cables: Store short cables or adapters you use often.
    • Sticky notes: Keep a small pad nearby without leaving it on the desk.
    • Earbuds: A drawer keeps them close for calls without visual clutter.
    • Remote controls: Useful for lights, fans, or monitor controls.
    • Cable clips: Small accessories stay easier to find.

    If you mainly need a place for tech accessories, browse under desk drawer organizers for office use on Amazon.

    Adhesive vs Screw-Mounted Under Desk Drawers

    Adhesive Under Desk Drawers

    Adhesive drawers are popular because they are simple. Clean the underside of the desk, attach the drawer, and let the adhesive settle before loading it. They are best for light items such as pens, sticky notes, adapters, and earbuds.

    The tradeoff is weight. Adhesive can fail if the drawer is overloaded or if the desk surface is dusty, textured, or uneven. If you choose adhesive, keep the drawer light and avoid storing heavy tools or large power bricks.

    Screw-Mounted Drawers

    Screw-mounted drawers are more secure. They make sense if you want stronger storage or if your desk surface can handle hardware. They are usually better for heavier daily items, but they take more work to install.

    If you want a more permanent setup, compare screw-mounted under desk drawers on Amazon.

    Where to Place the Drawer

    Placement matters more than people expect. A drawer in the wrong spot can hit your knees, block a cable tray, or make it awkward to reach. Before installing anything, sit at the desk normally and move your hands under the surface. The best location is usually near your dominant hand, slightly off-center.

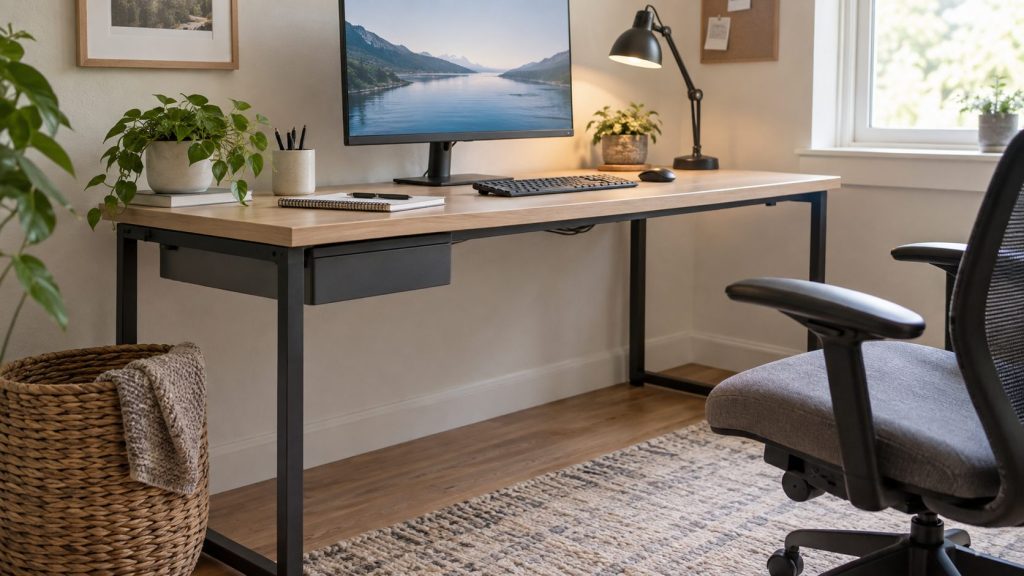
    Slim under-desk drawer mounted beneath a wood desk with clear legroom.

    Avoid the center knee area unless the drawer is very shallow. If you already use an under desk cable management tray, place the drawer on the opposite side or slightly forward so cables and storage do not fight for the same space.

    Best Features to Look For

    • Low-profile depth: A shallow drawer protects knee space.
    • Smooth slide: The drawer should open without shaking the desk.
    • Rounded front edge: More comfortable if your knees or hands brush near it.
    • Dividers: Helpful for small items such as clips and adapters.
    • Strong adhesive or mounting hardware: Match this to how much weight you store.
    • Quiet open/close: Useful for calls and shared spaces.

    If you want a simple light-duty option, compare adhesive under desk drawers on Amazon.

    How to Install an Under Desk Drawer Cleanly

    1. Empty the desk area and sit in your normal working position.
    2. Mark the knee space you need to keep clear.
    3. Check where cables, cable trays, and power strips run under the desk.
    4. Clean the underside of the desk before using adhesive.
    5. Test the drawer location with tape before final mounting.
    6. Load only small items at first and check that the drawer stays stable.

    After installation, reset the desktop. Keep active items on the desk mat, hide small accessories in the drawer, and route cables away from the drawer path. For a full cable cleanup plan, see Cable Management Ideas for a Cleaner Desk Setup.

    Common Mistakes to Avoid

    • Mounting too close to your knees: Comfort matters more than storage volume.
    • Overloading adhesive drawers: Heavy items can pull the drawer loose.
    • Blocking cable access: Leave room to unplug or move cables later.
    • Storing rarely used items: Use the drawer for weekly tools, not forgotten clutter.
    • Skipping the test fit: Tape the drawer in place temporarily before committing.

    FAQ

    Are adhesive under desk drawers strong enough?

    They can be strong enough for light office items such as pens, sticky notes, earbuds, and small adapters. For heavier items, screw-mounted drawers are usually safer.

    Where should I put an under desk drawer?

    Place it slightly to the side of your normal knee space, near the hand you use most. Avoid cable trays, power strips, and any area where your knees naturally move.

    Can an under desk drawer damage my desk?

    Adhesive may leave residue, and screws create permanent holes. Check the desk material first, especially if the desk is rented, very thin, or made from delicate laminate.

    Is an under desk drawer better than a desktop organizer?

    It depends on the goal. A desktop organizer keeps items visible and easy to grab. An under desk drawer keeps the surface cleaner. For small desks, hidden storage is often better.

    Final Thoughts

    The best under desk storage drawer for a small home office should be shallow, easy to reach, and strong enough for the items you actually use. Keep it light, avoid knee space, and use it for weekly essentials. When paired with a clean desk mat, better cable routing, and a simple lighting setup, it can make a small workspace feel much calmer.

    For the full home office path, start with Best Desk Organization Products for Small Home Offices, then continue with Best Desk Lamps for Video Calls and Eye Comfort.