
Author: Micheal Brown

  • 5 Best Under Desk Ellipticals for Seniors in 2026 (Safe & Effective)

    5 Best Under Desk Ellipticals for Seniors in 2026 (Safe & Effective)

    Disclosure: As an Amazon Associate, I earn from qualifying purchases. This article includes affiliate links, which means I may earn a commission if you buy through them, at no extra cost to you.

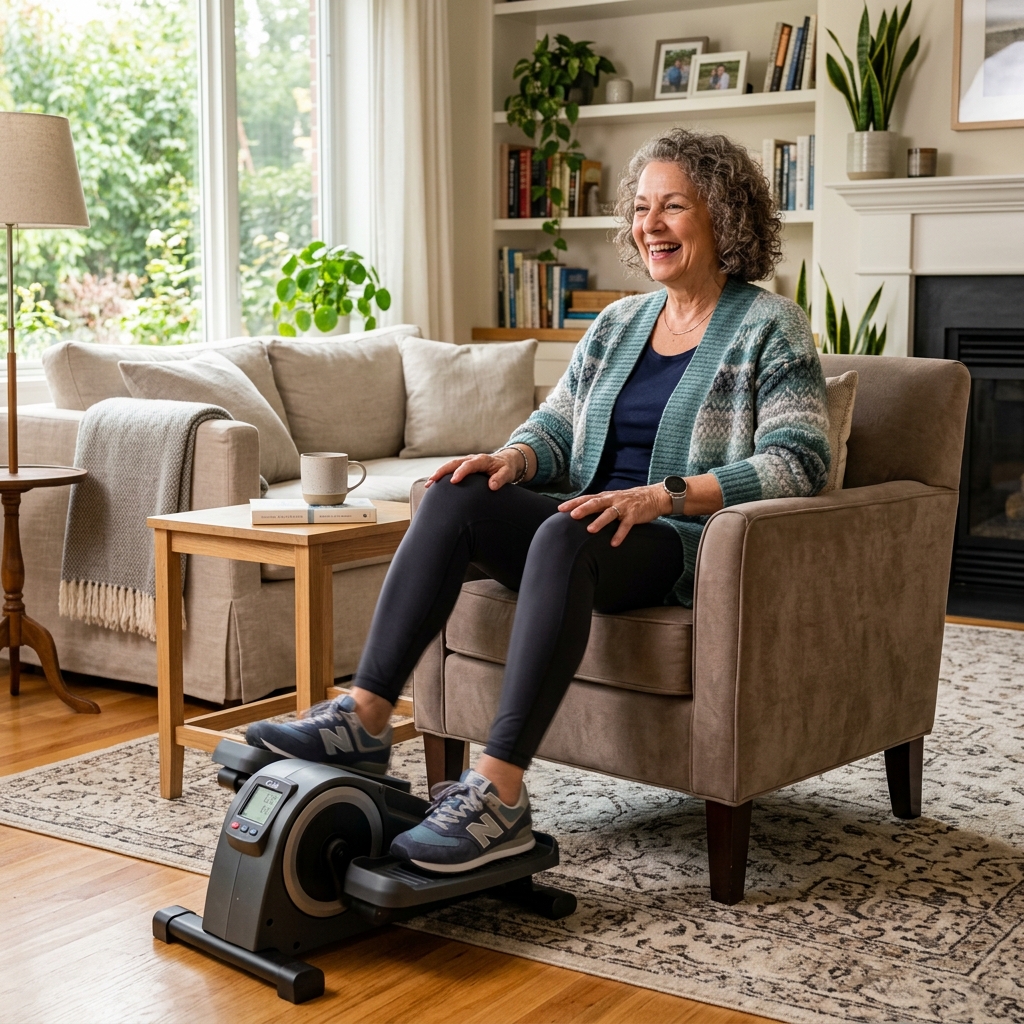
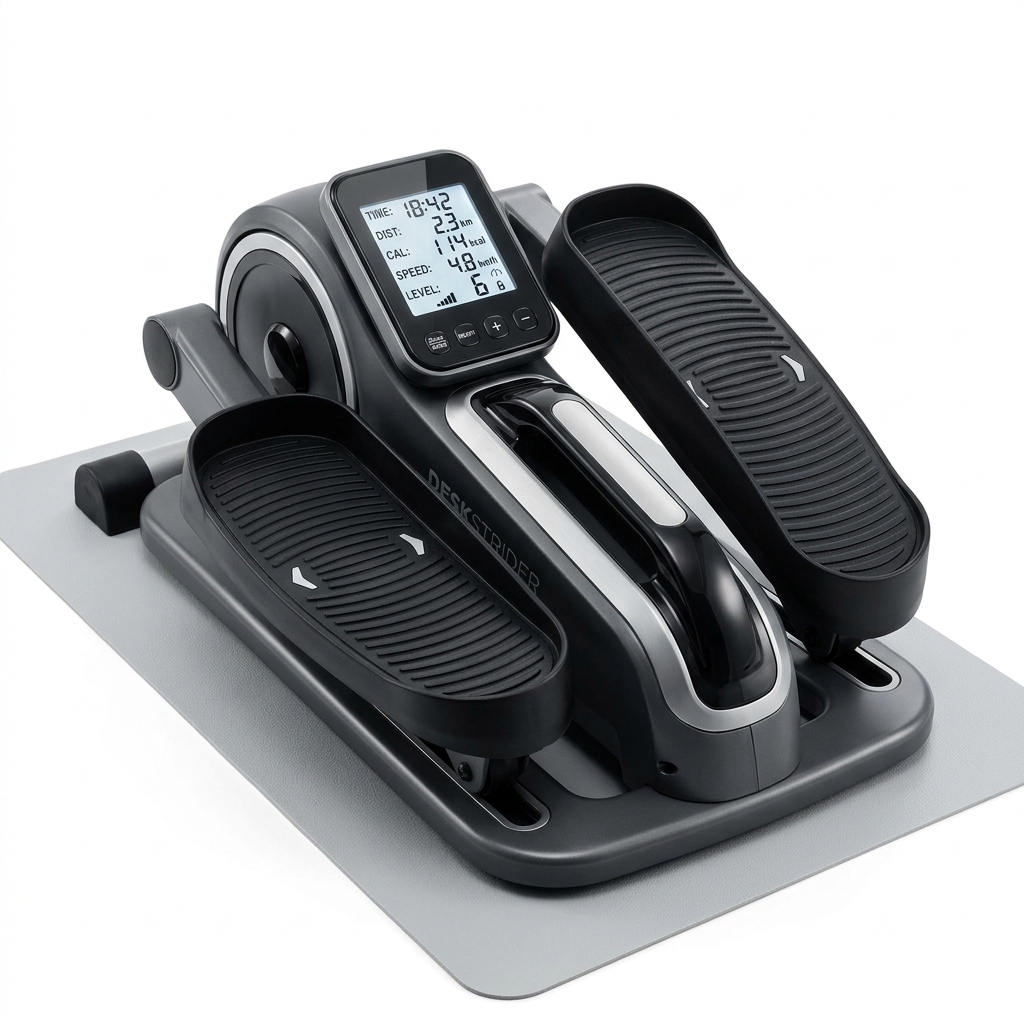
    Senior using an under desk elliptical comfortably at home

    Browse under desk elliptical for seniors on Amazon

    Staying active is one of the most important factors for maintaining health, mobility, and independence as we age. However, traditional exercise equipment like treadmills or upright stationary bikes can be intimidating, hard on the joints, or pose a fall risk. This is where the under desk elliptical becomes a game-changer for seniors. By providing a low-impact cardiovascular workout while safely seated, these compact machines allow older adults to keep their blood flowing, burn calories, and strengthen leg muscles without the stress on knees and hips.

    For seniors, the best under desk elliptical must meet specific criteria: it needs to have a smooth, fluid motion, a highly visible and easy-to-read display, and most importantly, it must be stable so it does not slide away during use. After extensive research and reviewing countless user experiences, we have compiled a list of the top under desk ellipticals specifically tailored for the needs of older adults.


    Quick Comparison

    Product Best Feature Resistance Levels Link
    Cubii JR1 Seated Under Desk Elliptical Best Overall / Smoothest Motion 8 Levels Check Price
    DeskCycle 2 Under Desk Bike Pedal Exerciser Highest Quality / Whisper Quiet 8 Levels Check Price
    LifePro FlexStride Pedal Exerciser Best Value & Portability 8 Levels Check Price
    Sunny Health & Fitness Magnetic Elliptical Best Budget Pick 8 Levels Check Price
    Stamina InMotion E1000 Best for Standing or Seated Use Adjustable Dial Check Price

    1. Cubii JR1 Seated Under Desk Elliptical (Best Overall)

    The Cubii JR1 is widely considered the gold standard of under desk ellipticals, and it is exceptionally well-suited for seniors. Designed with ergonomics in mind, the Cubii provides a whisper-quiet, incredibly smooth elliptical motion that ensures zero impact on vulnerable knee and hip joints.

    Why it’s great for seniors:
    Unlike cheaper pedal models that have a jerky, up-and-down bicycle motion, the Cubii JR1 uses a true elliptical stride. This means seniors don’t have to lift their knees high, preventing their knees from hitting the underside of a table or desk. It is also heavy and robust (weighing nearly 30 pounds), meaning it absolutely will not slide away on hardwood floors while pedaling—a common safety concern for older users.

    • Extremely smooth and zero-impact motion.
    • Built-in LCD monitor tracks calories, strides, and distance.
    • Very stable and heavy base prevents slipping.
    • Whisper-quiet operation won’t disturb TV watching.

    View on Amazon

    2. DeskCycle 2 Under Desk Bike Pedal Exerciser (Best Quality)

    While technically a mini-bike rather than a true elliptical, the DeskCycle 2 deserves a top spot due to its unmatched build quality and incredibly smooth magnetic resistance. It features the same high-quality magnetic resistance mechanisms found in full-sized gym bikes.

    Why it’s great for seniors:
    The DeskCycle 2 has an adjustable pedal height, allowing it to drop down to 9 inches. This is perfect for seniors with limited mobility who might have trouble lifting their feet high onto pedals. Furthermore, the resistance settings are highly calibrated; setting “1” is practically zero resistance, perfect for physical therapy and gentle joint movement.

    • Unmatched, silky-smooth magnetic resistance.
    • Adjustable pedal height for easy access.
    • Large, easy-to-read LCD display.
    • Extremely durable construction.

    View on Amazon

    3. LifePro FlexStride Pedal Exerciser (Best Value)

    The LifePro FlexStride offers premium features at a more accessible price point. It comes with a lifetime warranty, which speaks volumes about the manufacturer’s confidence in their product, making it a risk-free investment for seniors.

    Why it’s great for seniors:
    This model comes fully assembled out of the box (or requires extremely minimal setup), which is a huge relief for seniors who do not want to struggle with tools and heavy lifting. It features wide, textured foot pedals to prevent slipping, and it includes a tether strap to secure it to a chair if extra stability is needed.

    • Excellent lifetime warranty.
    • Wide, anti-slip foot pedals.
    • Comes with a chair tether for maximum safety.
    • Very quiet magnetic resistance.

    View on Amazon

    4. Sunny Health & Fitness Magnetic Elliptical (Best Budget Pick)

    For those on a fixed income, Sunny Health & Fitness offers a highly effective machine that won’t break the bank. It provides a reliable cardiovascular workout without the premium price tag.

    Why it’s great for seniors:
    Despite being affordable, it does not skimp on safety. It uses a magnetic resistance system (which is safer and smoother than friction belts) and has a built-in carrying handle. While a bit lighter than the Cubii, it remains relatively stable during light to moderate use.

    • Highly affordable compared to premium brands.
    • 8 levels of magnetic resistance.
    • Convenient carrying handle for easy moving.
    • Compact footprint fits anywhere.

    View on Amazon

    5. Stamina InMotion E1000 (Best for Standing or Seated)

    The Stamina InMotion is a versatile, compact strider that has been a bestseller for years. It is unique because it is designed to be used both while seated and while standing.

    Why it’s great for seniors:
    For seniors who are undergoing physical therapy and progressing from seated exercises to standing weight-bearing exercises, this machine grows with them. When seated, it acts like a standard mini-elliptical. When they have the balance and strength, they can hold onto a chair and use it standing up for a deeper workout.

    • Dual-use design (seated and standing).
    • Adjustable tension dial allows micro-adjustments.
    • Textured pedals for secure footing.
    • Very compact and easy to store.

    View on Amazon


    Buying Guide for Seniors

    Close-up of elliptical pedals and digital display

    When selecting an under desk elliptical for an older adult, there are a few specific considerations to keep in mind to ensure safety and comfort.

    1. Smoothness of Motion (Magnetic Resistance)

    Always look for machines that specify “magnetic resistance.” Cheaper models use friction belts, which can be jerky and uneven. Jerky motions can jar the knees and cause pain. Magnetic resistance ensures the pedal stroke is perfectly smooth, which is essential for protecting aging joints.

    2. Weight and Stability

    Usually, a heavy machine is considered a drawback, but for seniors using a seated elliptical, heavy is good. A machine that weighs 20 to 30 pounds will stay planted firmly on the floor. Lighter machines will slide forward as you pedal, causing the user to constantly reach down and pull it back—a major fall risk.

    3. Elliptical vs. Bicycle Motion

    A true elliptical motion (like the Cubii) moves the feet in a long, flat oval. A bicycle motion (like the DeskCycle) moves the feet in a circle. Elliptical motions generally require less knee-lift, making them better for seniors with severe arthritis or limited hip mobility.

    4. Display Visibility

    Seniors with failing eyesight need a display that is easy to read. Some displays are quite small. If tracking metrics is important, look for models with large LCD numbers or those that sync to a smartphone app for easier viewing.


    Frequently Asked Questions

    Is an under desk elliptical safe for seniors with bad knees?
    Yes! In fact, many physical therapists recommend them. Because the user is seated, there is no body weight pressing down on the knees. It provides pure, low-impact joint lubrication and muscle engagement without the wear and tear of walking.

    Will it help with circulation?
    Absolutely. Using a seated elliptical keeps the leg muscles pumping, which actively returns blood to the heart. This helps reduce swelling in the feet and ankles and lowers the risk of blood clots from prolonged sitting.

    Do I need to plug it in?
    Most high-quality under desk ellipticals use magnetic resistance and do not need to be plugged into a wall outlet. The digital displays usually run on a small watch battery (LR44 or similar) that lasts for months or years.


    Conclusion

    An under desk elliptical is a phenomenal investment in a senior’s long-term health. It removes the barriers to exercise by allowing them to stay active while reading, watching television, or knitting. We highly recommend the Cubii JR1 for its unrivaled smoothness and stability. Remember to start on the lowest resistance setting and gradually increase activity over time. Stay safe and keep moving!

    Related home office comfort guides

  • 5 Best Power Banks for Steam Deck on Long Flights in 2026

    5 Best Power Banks for Steam Deck on Long Flights in 2026

    Disclosure: As an Amazon Associate, I earn from qualifying purchases. This article includes affiliate links, which means I may earn a commission if you buy through them, at no extra cost to you.

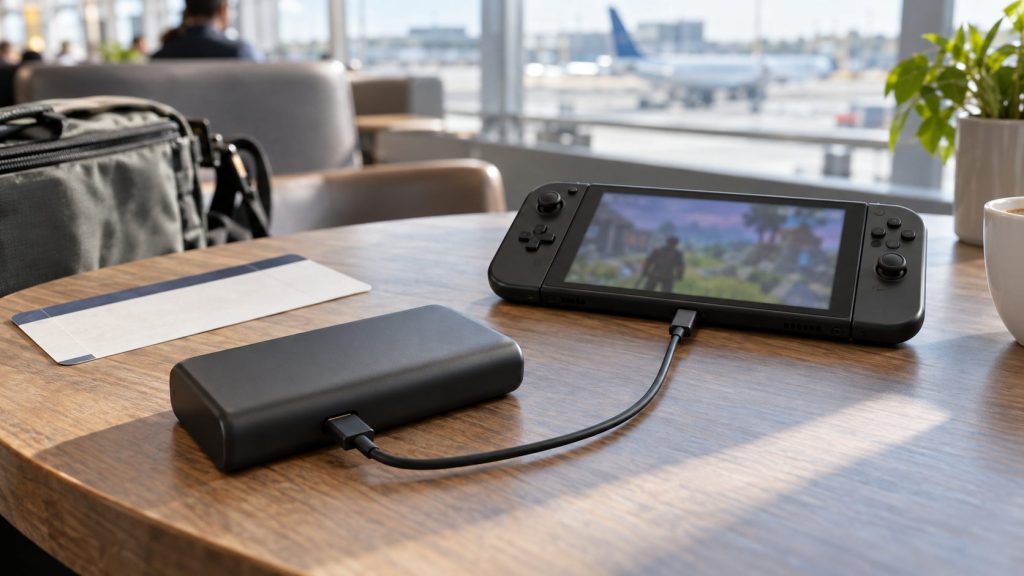
    Playing a portable console like Steam Deck on an airplane flight

    Browse power bank for Steam Deck long flights on Amazon

    The Valve Steam Deck is a marvel of modern gaming, allowing you to play AAA PC titles anywhere in the world. However, this massive processing power comes with a significant drawback: battery life. If you are playing a demanding game like Cyberpunk 2077 or Elden Ring, your Steam Deck will likely die in less than two hours. If you are boarding a 10-hour transatlantic flight, you have a serious problem.

    While some modern airplanes have AC outlets, they are notoriously unreliable and often don’t provide enough wattage to keep the Steam Deck charged while playing. The ultimate solution is a high-capacity, high-output power bank. But you cannot buy just any battery pack. The Steam Deck requires at least 45W of Power Delivery (PD) to charge while in use, and airlines strictly limit the battery size you can bring on board (max 100Wh / ~27,000mAh). We have found the absolute best TSA-approved power banks to keep your Steam Deck alive from takeoff to landing.


    Quick Comparison

    Product Capacity / Max Output Best Feature Link
    Anker 737 Power Bank (PowerCore 24K) 24,000mAh / 140W Best Overall / Smart Display Check Price
    Baseus 65W 20000mAh Power Bank 20,000mAh / 65W Best Budget Pick Check Price
    Shargeek Storm 2 25,600mAh / 100W Premium Cyberpunk Design Check Price
    INIU 65W 25000mAh Power Bank 25,000mAh / 65W Best Value for Max Capacity Check Price
    UGREEN 145W 25000mAh 25,000mAh / 145W Best for Charging Multiple Devices Check Price

    1. Anker 737 Power Bank (Best Overall)

    The Anker 737, also known as the PowerCore 24K, is the absolute gold standard for powering heavy-duty electronics on the go. It hits the perfect sweet spot: it is just under the FAA limit for flights, but packs an enormous punch with 140W of output.

    Why it’s perfect for the Steam Deck:
    The Steam Deck draws a maximum of 45W. The Anker 737 can supply this effortlessly without overheating. It holds 24,000mAh, which will give your Steam Deck approximately 1.5 to 2 full recharges from 0%, adding anywhere from 3 to 6 hours of high-end gaming time. The absolute best feature is the built-in smart LED display, which shows exactly how many watts your Steam Deck is drawing and estimates how much time is left before the battery dies. It completely eliminates battery anxiety on a long flight.

    • 140W max output easily charges the Steam Deck at max speed.
    • Incredible color LED display shows real-time wattage.
    • Charges itself back to 100% very quickly if you have a high-speed wall charger.
    • TSA approved for carry-on luggage.

    View on Amazon

    2. Baseus 65W 20000mAh Power Bank (Best Budget Pick)

    If the Anker 737 is too pricey for your travel budget, Baseus offers an incredibly reliable alternative that still meets all the necessary specifications to keep your Steam Deck running without draining your wallet.

    Why it’s perfect for the Steam Deck:
    It outputs 65W via USB-C PD, which easily clears the Steam Deck’s 45W requirement. This means you can play a heavy game and the battery percentage will still go up. With 20,000mAh, it gives about 1.2 to 1.5 full charges to the Deck. It features a simple but effective digital display showing the remaining battery percentage and has a slim, flat profile that slides easily into a backpack laptop sleeve.

    • Highly affordable compared to premium models.
    • 65W output charges the Deck while playing.
    • Slim, flat design is easier to pack than blocky power banks.
    • Metal casing dissipates heat effectively.

    View on Amazon

    3. Shargeek Storm 2 (Premium Cyberpunk Design)

    If you want a power bank that matches the geeky, tech-enthusiast vibe of the Steam Deck itself, the Shargeek Storm 2 is a showstopper. Featuring a fully transparent casing, you can see all the internal circuitry, control boards, and Samsung battery cells inside.

    Why it’s perfect for the Steam Deck:
    Aside from looking incredible, it is a beast of a charger. It boasts a 25,600mAh capacity—pushing right up to the 100Wh legal flight limit. It outputs 100W, easily covering the Steam Deck. It features a highly detailed IPS screen that provides a deep dive into battery health, temperature, voltage, and output data. It is the ultimate gadget-lover’s travel companion.

    • Unique, transparent cyberpunk aesthetic.
    • Massive 25,600mAh capacity maximizes flight time.
    • Detailed IPS data screen.
    • Excellent thermal management.

    View on Amazon

    4. INIU 65W 25000mAh Power Bank (Best Value for Max Capacity)

    INIU has quietly become one of the most highly rated charging brands on Amazon, known for delivering massive specs at very competitive prices. This model offers an enormous 25,000mAh capacity without the premium price tag.

    Why it’s perfect for the Steam Deck:
    With 25,000mAh, this provides the maximum amount of juice you can bring on an airplane to keep your Steam Deck alive. The 65W output ensures it charges while you game. It features a handy built-in phone holder that pulls out from the side, which is surprisingly useful on an airplane tray table if you switch from the Deck to watching a movie on your phone.

    • Maximized 25,000mAh capacity for long-haul flights.
    • Excellent price-to-capacity ratio.
    • Built-in slide-out phone stand.
    • Includes a high-quality USB-C cable in the box.

    View on Amazon

    5. UGREEN 145W 25000mAh (Best for Multiple Devices)

    If you are traveling with a Steam Deck, a smartphone, and perhaps a laptop or iPad, you need a power bank that can handle multiple high-draw devices simultaneously. The UGREEN 145W is up to the task.

    Why it’s perfect for the Steam Deck:
    It has a total output capacity of 145W. This means you can have your Steam Deck plugged into one port drawing its max 45W, and still have 100W of overhead left to fast-charge a MacBook Pro at the exact same time. It has a massive 25,000mAh battery to back up this heavy power draw, ensuring all your devices survive the flight.

    • 145W total output allows charging a Deck and a laptop simultaneously.
    • Huge 25,000mAh capacity.
    • High-quality, matte space-grey finish.
    • Smart power distribution between ports.

    View on Amazon


    Buying Guide: Power Banks and Airplane Rules

    Close-up of a high-tech power bank showing 100 percent battery

    Before you buy a massive battery and head to the airport, there are strict rules and technical requirements you must understand.

    1. TSA and FAA Regulations (The 100Wh Limit)

    Aviation regulations stipulate that you cannot bring a lithium-ion battery larger than 100 Watt-hours (Wh) onto an airplane without special airline approval. In milliamp-hours (mAh), this translates roughly to 26,800mAh to 27,000mAh. All the power banks on this list fall under this limit and are perfectly legal to bring in your carry-on luggage. Never put a power bank in checked luggage in the cargo hold.

    2. The 45W Output Rule

    The Steam Deck’s official charger provides 45W of power. If you buy a cheap power bank that only outputs 15W or 20W, the Steam Deck will display a “Slow Charger” warning. If you are playing a game, the battery will still drain because it is using power faster than the cheap power bank can refill it. You must buy a power bank with at least 45W of USB-C Power Delivery (PD).

    3. Don’t Forget the Cable!

    A 100W power bank is useless if you use a cheap gas-station cable that only supports 15W. You must use a USB-C to USB-C cable that is rated for high wattage (look for cables rated for 60W or 100W data/power transfer). Many of the premium power banks above include a compatible cable in the box.


    Frequently Asked Questions

    How many extra hours of gameplay will a 24,000mAh power bank give me?
    The Steam Deck has a ~5,300mAh battery (40Wh). Because of energy lost to heat during transfer, a 24,000mAh power bank will give you about 1.5 to 1.8 full charges. If a heavy game lasts 2 hours on the Deck’s battery, the power bank will add roughly 3 to 3.5 extra hours, giving you over 5 hours total.

    Can I charge the Steam Deck while playing?
    Yes. As long as your power bank outputs 45W or more, the power bank will directly run the system and trickle charge the internal battery simultaneously.

    Why is my power bank draining so fast?
    Converting voltages and pushing power generates heat, which is wasted energy. Power banks are only about 70-80% efficient. Also, if your screen brightness is maxed out and you are running a game at 60FPS, it draws maximum power.


    Conclusion

    A long flight is the perfect opportunity to finally tackle your Steam backlog, provided you have the right equipment. To avoid the heartbreak of a black screen over the Atlantic Ocean, invest in the Anker 737 Power Bank. Its smart display and flawless 140W delivery make it the absolute best companion for the Steam Deck. If you are on a budget, the Baseus 65W will get the job done reliably. Grab your cables, download your games, and enjoy your flight!

    Related travel tech guides

  • 5 Best Bone Conduction Headphones for Small Heads in 2026

    5 Best Bone Conduction Headphones for Small Heads in 2026

    Disclosure: As an Amazon Associate, I earn from qualifying purchases. This article includes affiliate links, which means I may earn a commission if you buy through them, at no extra cost to you.

    Female runner with small head wearing bone conduction headphones outdoors

    Browse bone conduction headphones for small heads on Amazon

    Bone conduction headphones have revolutionized how we listen to audio while running, cycling, or working in the office. By transmitting sound vibrations directly through your cheekbones to your inner ear, they leave your ear canal completely open, allowing you to hear traffic, nature, and your surroundings perfectly. It is the ultimate fusion of safety and entertainment.

    However, there is a catch: most bone conduction headphones are manufactured with a “one size fits all” titanium band that wraps around the back of the neck. If you have a smaller head size—whether you are a petite adult, a teenager, or just have a narrower skull—the standard band will protrude far past the back of your head. This bounce wildly when you run, interfere with hoodie collars, and push the transducers out of alignment, ruining the sound quality. Fortunately, top brands have recognized this issue and released specialized “mini” or highly adjustable versions. Here are the best bone conduction headphones specifically designed for smaller heads.


    Quick Comparison

    Product Best Feature Band Design Link
    Shokz OpenRun Mini Best Overall / Perfect Small Fit Shorter Titanium Band Check Price
    Shokz OpenMove Best Value Pick Standard (Snug clamping force) Check Price
    Mojawa Run Plus Best for Swimming & Running Ergonomic Snug Fit (IP68) Check Price
    YouthWhisper Bone Conduction Best Budget / Kids & Teens Specifically Sized for Kids/Teens Check Price
    Tayogo Bone Conduction Good Cheap Alternative Flexible Silicone Band Check Price

    1. Shokz OpenRun Mini (Best Overall)

    Shokz (formerly AfterShokz) is the undisputed pioneer and market leader in bone conduction technology. Recognizing the complaints from users with smaller heads, they released the “Mini” version of their flagship OpenRun headphones, and it is a masterpiece of ergonomic design.

    Why it’s perfect for small heads:
    The OpenRun Mini contains the exact same premium audio technology, battery life, and waterproofing as the standard OpenRun, but the titanium wraparound band is exactly 0.83 inches (2.1 cm) shorter. This eliminates the annoying gap at the back of the head. It sits flush against the neck, meaning you can tilt your head back, wear high-collared jackets, or lie down on a bench press without the headphones shifting forward and losing sound contact.

    • Specifically engineered shorter band for a perfect, secure fit.
    • IP67 waterproof rating (withstands heavy sweat and rain).
    • 8-hour battery life with quick charge feature.
    • Premium audio quality with PremiumPitch 2.0+ technology.

    View on Amazon

    2. Shokz OpenMove (Best Value)

    If you want the trusted Shokz brand quality but cannot justify the premium price tag of the OpenRun Mini, the OpenMove is their entry-level model. While it only comes in one size, its geometry makes it surprisingly well-suited for smaller heads.

    Why it’s perfect for small heads:
    The OpenMove has a slightly different clamping mechanism and a tighter inward curve compared to standard models. Many users with small heads report that while there might still be a slight gap at the back, the clamping force on the cheekbones is highly secure. It grips firmly enough that it does not bounce during light jogging or gym workouts.

    • Excellent entry-level price for premium brand technology.
    • Strong, secure clamping force prevents slipping.
    • Charges via standard USB-C (very convenient).
    • 6-hour battery life.

    View on Amazon

    3. Mojawa Run Plus (Best for Swimming & Running)

    Mojawa is a rising star in the bone conduction space, founded by former Apple engineers. The Run Plus is their flagship model, designed for triathletes who need a headset that transitions seamlessly from the running trail into the swimming pool.

    Why it’s perfect for small heads:
    The Mojawa Run Plus has an incredibly refined, ergonomic titanium band that sits very close to the skull. It is highly flexible and exerts a gentle but secure pressure. Because it is designed to be worn under a tight swimming cap while doing laps in a pool, the profile is inherently low and tight, making it a fantastic choice for smaller heads.

    • IP68 fully waterproof (can be completely submerged for swimming).
    • Built-in 32GB MP3 player (Bluetooth doesn’t work underwater).
    • Very snug, low-profile design ideal for smaller skulls.
    • Excellent bass response for bone conduction.

    View on Amazon

    4. YouthWhisper Bone Conduction (Best Budget / Kids & Teens)

    As the name suggests, YouthWhisper specifically targets the demographic that traditional bone conduction brands ignore: kids, teenagers, and petite adults. If you are struggling to find a fit anywhere else, this is your solution.

    Why it’s perfect for small heads:
    These headphones are physically scaled down. The band is significantly shorter and the over-ear hooks have a tighter radius. They are incredibly lightweight, meaning they won’t weigh down or cause ear fatigue on smaller frames. They are perfect for children who want to listen to music but need to remain aware of traffic while riding their bikes.

    • Specifically sized down for youths and petite adults.
    • Very budget-friendly.
    • Extremely lightweight and comfortable.
    • Great safety device for kids outdoors.

    View on Amazon

    5. Tayogo Bone Conduction (Good Cheap Alternative)

    Tayogo offers a highly flexible, budget-conscious alternative to the big premium brands. While the sound quality won’t satisfy a hardcore audiophile, it is more than adequate for listening to podcasts and gym playlists.

    Why it’s perfect for small heads:
    Unlike rigid titanium bands, the Tayogo utilizes a highly flexible silicone and plastic blend. It molds and bends much easier. While it might still have a small gap at the back, the flexibility allows you to easily wear it over a hat or pair it with thick sunglasses without it pinching or feeling rigidly locked in a bad position.

    • Very affordable entry point into bone conduction.
    • Highly flexible band accommodates hats and glasses well.
    • Decent battery life for the price.
    • Good for casual listening and podcasts.

    View on Amazon


    Buying Guide: Fitting Bone Conduction Headphones

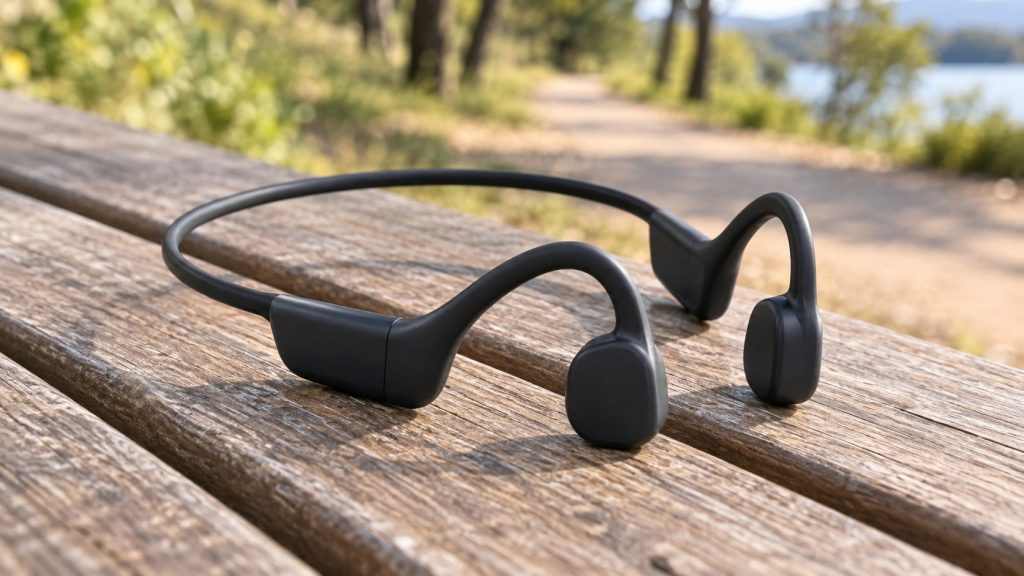
    Close-up of bone conduction headphones flexing to show band elasticity

    Buying bone conduction headphones requires understanding how the technology interacts with your facial anatomy. If they do not fit correctly, the sound quality drops dramatically.

    1. Measuring Your Head for “Mini” Sizes

    Shokz provides a simple measuring trick to see if you need the “Mini” size. Take a flexible tailor’s measuring tape (or a piece of string). Measure from behind the midpoint of your left ear, around the back of your head, to behind the midpoint of your right ear. If the measurement is less than 9.25 inches (23.5 cm), you absolutely need a Mini size model. A standard size will bounce and shift.

    2. The Importance of Clamping Force

    Because these do not go inside your ear canal, they rely on gentle pressure (clamping force) against your cheekbones to transmit vibrations. If the band is too big, the headphones will droop, pulling the vibrating pads away from the optimal sweet spot just in front of your ear. A proper fit ensures maximum bass and volume.

    3. Wear with Glasses and Helmets

    Bone conduction headphones hook over the top of the ear—the exact same place your glasses or sunglasses sit. If you have a small head, the real estate behind your ear is limited. Look for models with very thin, contoured ear hooks (like the Shokz models) so they don’t battle with your glasses frames for space.


    Frequently Asked Questions

    Are bone conduction headphones safe for kids?
    Yes, they are generally considered safer than earbuds. Earbuds blast sound directly against the eardrum, which can cause hearing damage if turned up too high. Bone conduction bypasses the eardrum entirely. Furthermore, they keep the ears open, allowing kids to hear cars and traffic while riding bikes.

    Do they leak sound? Can others hear what I’m listening to?
    At moderate volumes, no. However, at maximum volume, bone conduction headphones will “leak” a tinny, high-pitched sound. If you are sitting in a dead-silent library next to someone, they might hear a faint buzzing. But in a gym or outdoors, no one will hear them.

    How is the bass response?
    You must manage your expectations. Because they don’t seal the ear canal, bone conduction headphones will never have the booming, chest-thumping bass of traditional over-ear headphones. The sound is clear and crisp, but lacks deep sub-bass. You will actually “feel” heavy bass lines as a vibration tickle on your cheekbones!


    Conclusion

    Stop settling for standard headphones that flop around the back of your neck. Having a proper fit is the difference between enjoying your run and constantly adjusting your headset. For anyone with a smaller head size, the Shokz OpenRun Mini is arguably the most perfect piece of audio gear you can buy. The exact engineering of the shorter band provides an uncompromising, rock-solid fit. Stay safe, stay aware, and enjoy the music!

    Related travel tech guides

  • Best Magnetic Measuring Spoons: The Ultimate Kitchen Organization Hack

    Best Magnetic Measuring Spoons: The Ultimate Kitchen Organization Hack

    Disclosure: As an Amazon Associate, I earn from qualifying purchases. This article includes affiliate links, which means I may earn a commission if you buy through them, at no extra cost to you.

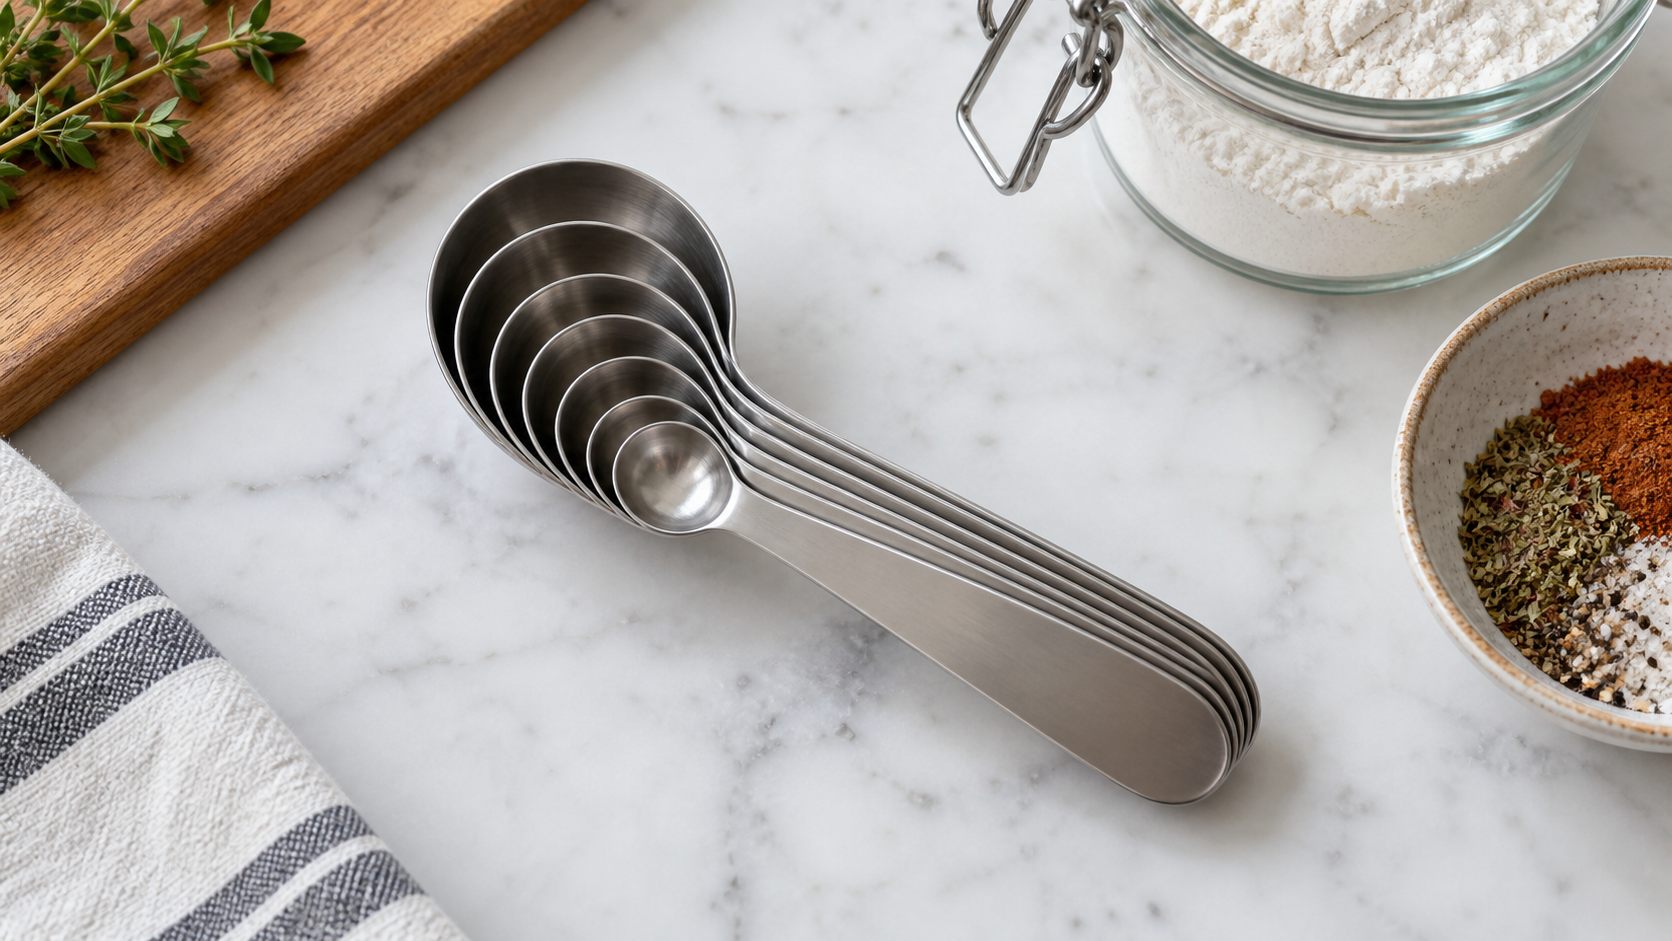
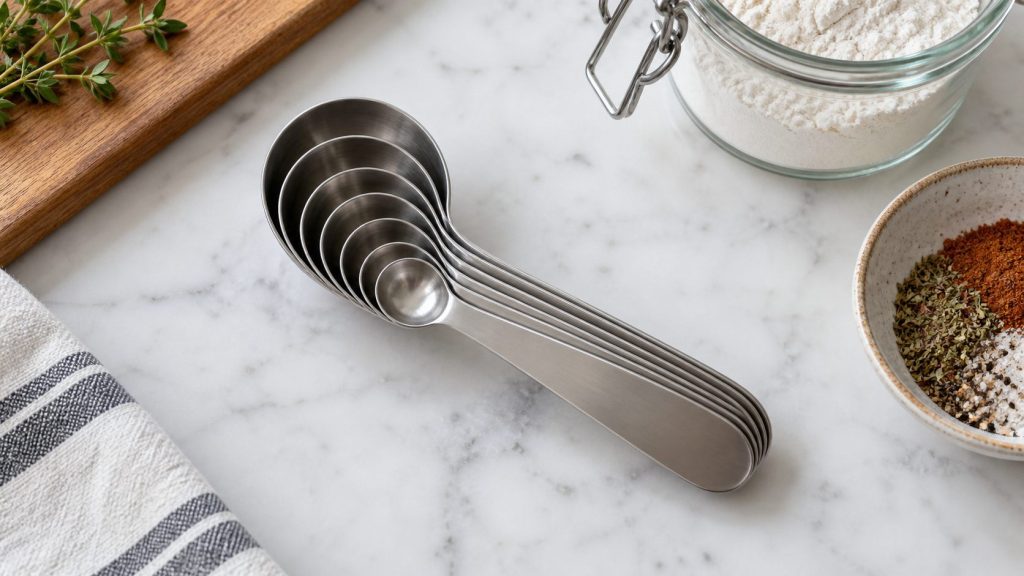
    Magnetic measuring spoons neatly stacked in a kitchen drawer

    Check magnetic measuring spoons stainless steel on Amazon

    We’ve all been there: you’re in the middle of baking, hands covered in flour, frantically rummaging through a messy kitchen drawer trying to find the elusive 1/2 teaspoon. Standard measuring spoons on a ring are clunky, hard to wash, and inevitably get tangled up with your whisks.

    Enter the ultimate kitchen hack: magnetic measuring spoons. This design keeps individual spoons removable while allowing the set to nest in one stack. The useful question is whether the shape, markings, and included sizes match the way you cook or bake.

    Why Switch to Magnetic Measuring Spoons?

    Standard spoon rings require you to wash the whole bunch even if you only used one, or you have to pry the metal ring open to detach the one you need. Magnetic spoons solve all of this by nesting neatly together with a strong magnetic center.

    • No More Lost Spoons: Because they stick together, your drawer stays perfectly organized. You grab the whole stack, easily slide off the one you need, and snap it back when you're done.
    • Space-Saving: They lay completely flat and compact, freeing up valuable drawer real estate.

    Essential Features to Look For

    When searching for the best stackable measuring spoons on Amazon, keep an eye out for these premium features:

    1. Dual-Sided Design: The best models feature an oval head on one end (perfect for sliding into narrow spice jars) and a round head on the other (great for liquids). It’s like getting two sets in one!
    2. Material and finish: Compare the listed steel grade, edge finish, handle stiffness, and care instructions. Stainless steel is easy to clean, but every set should still be dried and maintained according to its manufacturer.
    3. Readable measurements: Etched or stamped markings are easier to identify after repeated use than faint surface printing. Check that the units you use most are clearly shown.
    4. Leveler Included: Many top-rated sets come with a straight-edge leveler tool to help you get precise measurements for baking.

    Conclusion

    Magnetic measuring spoons are most useful when drawer space is limited or individual spoons are used frequently. Compare the included sizes, handle shape, markings, and care instructions before choosing a set.

    Shop magnetic measuring spoons stainless steel on Amazon

    Check the Included Spoon Sizes

    Do not assume every set contains the same measurements. A basic set may cover teaspoon and tablespoon fractions, while a larger set can include less common sizes. Compare the list with recipes you make often. If you regularly use metric recipes, confirm whether milliliter values are marked clearly rather than relying only on approximate conversions.

    The smallest spoon should fit inside your spice jars without forcing you to pour ingredients into your hand. The largest spoon should remain level when filled and should not be too wide for the containers you commonly use.

    Dual-Sided vs. Single-Sided Spoons

    Dual-sided spoons can be convenient because a narrow end reaches into spice containers and a rounded end handles liquids. The tradeoff is that one end may touch the counter while the other is being used. A single-sided set is simpler to rest on a work surface and may be easier to load into some dishwashers.

    If you frequently alternate between dry and wet ingredients, consider whether the set is easy to rinse and dry between measurements. Magnetic storage helps organization, but it does not replace normal food-safety practices.

    How to Get More Consistent Measurements

    • For flour, cocoa, and similar dry ingredients, fill the spoon gently and level the top without packing it down unless the recipe specifically says otherwise.
    • For liquids, place the spoon on a stable surface when possible and fill to the rim indicated by the design.
    • Use separate clean spoons for ingredients that should not be cross-contaminated.
    • Confirm whether a recipe uses US volume measures, metric volume, or weight before substituting units.

    For precise baking, a digital kitchen scale may be more repeatable for flour and other bulk ingredients. Measuring spoons remain useful for small quantities such as salt, spices, extracts, and leavening agents.

    Magnet Strength and Storage

    The magnets should keep the empty spoons aligned in a drawer but still allow one spoon to slide away without excessive force. Reviews can help identify sets that separate too easily or collect metal debris around exposed magnet areas. Store the stack in a clean, dry section of the drawer away from loose blades and small metal tools.

    Cleaning and Care

    Follow the care instructions for the specific set. Even when dishwasher use is permitted, separating the spoons improves water exposure and drying. Dry around seams or embedded magnets before restacking. If a spoon develops a loose magnet, sharp edge, corrosion, or damaged coating, stop using it with food.

    Who Benefits Most from This Design?

    A magnetic set suits cooks who want removable spoons without a connecting ring and people organizing a narrow utensil drawer. It may be less important for someone who already stores measuring tools in an open container or prefers a single spoon with adjustable markings. For broader cabinet planning, see our guide to kitchen cabinet organizers for small kitchens.

  • Best Under-Desk Foot Rests for Home Office Comfort

    Best Under-Desk Foot Rests for Home Office Comfort

    Disclosure: As an Amazon Associate, I earn from qualifying purchases. This article includes affiliate links, which means I may earn a commission if you buy through them, at no extra cost to you.

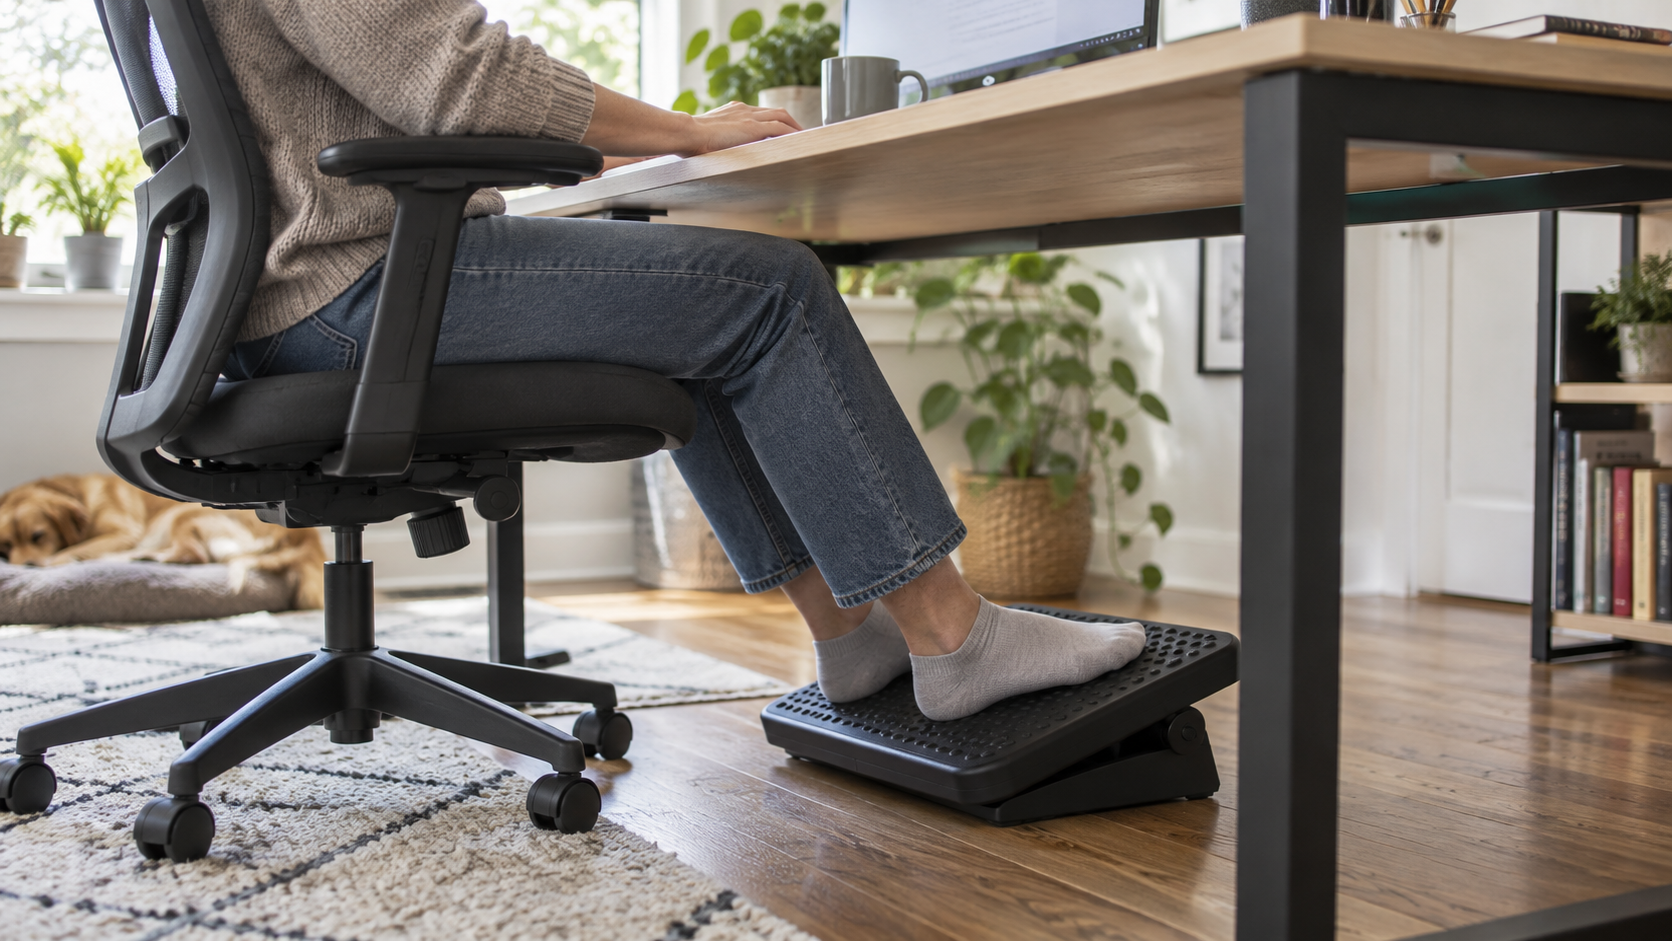
    Ergonomic under desk foot rest in a home office setup

    Check under desk foot rest ergonomic memory foam on Amazon

    An under-desk foot rest can provide a stable surface when a chair is adjusted to the desk but the user’s feet do not rest comfortably on the floor. It is one part of a workstation setup and should be chosen for fit, adjustability, stability, and ease of movement.

    This guide explains when a foot rest may be useful, how to measure the available space, and how foam, rocking, and adjustable platform designs differ.

    Why You Need an Ergonomic Foot Rest

    A foot rest gives the feet a supported contact point and may make it easier to use the chair back while keeping the desk at a practical height. Comfort and posture needs vary, and a foot rest does not diagnose, prevent, or treat back pain, swelling, circulation problems, or other medical conditions.

    What to Look for in the Best Foot Rest

    When browsing for an ergonomic foot stool for your office, keep these features in mind:

    1. Foam firmness: A foam rest feels softer under bare or socked feet, but it should be firm enough not to collapse during normal use. Compare dimensions and cover care rather than assuming memory foam is best for everyone.
    2. Non-Slip Bottom: There is nothing more annoying than a foot rest that slides away on a hardwood floor. Look for one with a textured, non-slip rubberized bottom.
    3. Removable, Washable Cover: Since it lives on the floor (and you might use it with bare feet), being able to unzip the cover and toss it in the washing machine is essential.
    4. Rocking option: Some curved designs allow gentle position changes. The motion should remain controlled and should not cause the feet or chair to slide.

    Conclusion

    A well-sized foot rest can make a workstation more adaptable when the floor is too low for the current chair and desk combination. It works best alongside regular position changes, suitable chair adjustment, and a desk layout that does not force the user to reach or twist.

    Shop under desk foot rest ergonomic memory foam on Amazon

    Related home office comfort guides

    Start with Chair and Desk Height

    Adjust the chair so the keyboard and mouse can be used with relaxed shoulders and forearms supported near the working surface. If that position leaves the feet without stable support, measure the vertical distance to the floor. A foot rest should fill part of that gap without pushing the knees sharply upward or pressing behind the thighs.

    Measure the clear width and depth below the desk, including chair wheels, drawer units, and frame supports. The platform should be wide enough for both feet to change position and shallow enough that it does not block the chair from moving closer to the desk.

    Foam, Rocking, and Adjustable Platforms

    • Foam cushion: quiet and soft, but height is normally fixed and the material can compress over time.
    • Rocking rest: supports small position changes, but may be distracting or unstable for some users.
    • Adjustable platform: offers several height or angle settings and is easier to share between users, although it may require more space.
    • Fixed rigid platform: provides a predictable surface and is simple to clean, but fit depends heavily on choosing the correct height.

    Angle and Surface Grip

    An angled platform can support the feet without requiring the ankles to hold one position. If the angle is adjustable, check whether it locks or rocks freely. A textured top helps footwear remain in place, while a stable base matters on both hard floors and carpet.

    Non-slip materials still need testing on the actual floor. Dust can reduce grip, and a light foam unit may move when the user changes position. Stop using a rest that causes the chair, feet, or platform to slide unexpectedly.

    Movement Still Matters

    No foot rest makes prolonged sitting risk-free or comfortable for everyone. Change position regularly and stand or walk when appropriate for your work and health circumstances. Avoid keeping pressure behind the knees or sitting on one foot for long periods simply to reach the floor.

    Persistent pain, numbness, swelling, weakness, or circulation concerns require advice from a qualified health professional. For individual workstation needs, an occupational health or ergonomics professional can assess the complete setup rather than one accessory.

    Cleaning and Durability

    A removable washable cover is useful for foam products, but confirm the washing and drying instructions. Rigid platforms should have accessible hinges and surfaces that can be wiped without trapping dust. Inspect adjustable mechanisms, seams, and non-slip pads periodically.

    Compare the manufacturer’s stated dimensions with your measurements and read recent reviews for long-term compression, squeaks, slipping, or difficult adjustment. A return policy is particularly useful because comfort cannot be judged from dimensions alone.

    Complete the Workstation

    A foot rest addresses only lower support. Screen height, input-device placement, lighting, and cable routing also influence how easily the desk can be adjusted. Our guides to laptop stands for small desks and desk lamps for home offices cover two other common setup decisions.

  • Best Dog Lick Mat for Anxiety: A Simple Solution for Calmer Pets

    Best Dog Lick Mat for Anxiety: A Simple Solution for Calmer Pets

    Disclosure: As an Amazon Associate, I earn from qualifying purchases. This article includes affiliate links, which means I may earn a commission if you buy through them, at no extra cost to you.

    Dog using a silicone lick mat for calm enrichment

    Check dog lick mat for anxiety suction cups on Amazon

    If you have an anxious dog, you know how heartbreaking it can be to watch them stress over thunderstorms, fireworks, or even just a routine bath. While there are many calming products on the market, one of the simplest, most effective, and budget-friendly solutions is gaining massive popularity among pet parents: the dog lick mat for anxiety.

    In this post, we'll dive into why these simple silicone mats are highly rated by pet owners, what features to look for, and how they can transform your dog's stressful moments into a calming, tasty experience.

    Why Use a Calming Lick Mat for Dogs?

    Licking is a naturally soothing behavior for dogs. When your dog licks a textured surface, their brain releases endorphins—the "feel-good" hormones. This natural chemical response helps soothe their nervous system, making a lick mat an excellent distraction tool during stressful events.

    A peanut butter lick pad for dogs is incredibly versatile and can be used for:

    • Grooming and Bathing: Distract your dog while you clip their nails or give them a wash.
    • Storms and Fireworks: Keep their mind occupied during loud noises.
    • Crate Training: Build positive associations with their crate.
    • Separation Anxiety: Keep them busy for up to 30 minutes when you leave the house.

    Key Features to Look For

    When browsing Amazon for the best dog distraction toy for grooming or anxiety relief, keep an eye out for these essential features:

    1. Food-Grade Silicone: Safety first! Ensure the mat is made from 100% BPA-free, non-toxic, food-grade silicone.
    2. Strong Suction Cups: The best mats feature powerful suction cups on the back. This allows you to stick the mat to your bathtub, refrigerator, or glass doors without it sliding around.
    3. Multiple Textures: Different sections with varying textures (crosses, dots, waves) challenge your dog and slow down their eating pace even more.
    4. Dishwasher Safe: You want something that is easy to clean. Dried peanut butter can be tough to scrub, so being top-rack dishwasher safe is a must-have feature.

    How to Use It Effectively

    Using a dog lick mat is incredibly straightforward:

    1. Spread the Treat: Use a spatula or butter knife to spread a dog-safe treat over the textured surface. Popular options include xylitol-free peanut butter, plain Greek yogurt, pumpkin puree, or wet dog food.
    2. Freeze for Extra Time (Optional): For an even longer-lasting challenge, place the prepared mat in the freezer for a few hours before giving it to your dog. This makes the treat harder to lick off and provides cooling relief on hot days.
    3. Serve and Supervise: Stick it to a wall or place it on the floor, and let your dog enjoy! Always supervise your pet during the first few uses to ensure they don't try to chew the silicone.

    Conclusion

    Dealing with a stressed pet doesn't always require expensive gadgets or medications. Sometimes, a simple, thoughtfully designed product like a dog lick mat is all you need to provide significant relief. It’s an affordable, easy-to-use tool that belongs in every pet parent's arsenal.

    Shop dog lick mat for anxiety suction cups on Amazon

  • Best Cat Window Hammock: Give Your Indoor Cat the Ultimate View

    Best Cat Window Hammock: Give Your Indoor Cat the Ultimate View

    Disclosure: As an Amazon Associate, I earn from qualifying purchases. This article includes affiliate links, which means I may earn a commission if you buy through them, at no extra cost to you.

    Cat relaxing on a window hammock with a sunny view

    Check cat window hammock suction cup perch on Amazon

    Cats are natural climbers and observers. Many indoor cats enjoy watching movement outdoors, but a narrow window sill may not provide a stable resting surface. A purpose-built perch can create a dedicated viewing spot when the window, mounting method, and stated weight limit are suitable.

    That’s where the cat window hammock comes in. This space-saving type of cat furniture attaches to glass with suction cups or mounts to the sill, depending on the design. Installation quality and routine inspection matter because the bed is elevated.

    The Benefits of a Suction Cup Cat Window Perch

    • Vertical Space: Cats feel safest when they are elevated. A window bed gives them a dedicated high spot without taking up floor space with a massive cat tree.
    • Sunbathing: Cats love warmth. A window hammock allows them to soak up the sun's rays directly.
    • Observation: A window-facing resting place gives an interested cat another location from which to watch everyday activity.

    What Makes a Great Cat Window Bed?

    Safety is the number one priority when buying a suspended bed for your pet. When shopping on Amazon for the best cat window hammock for large cats, check for these crucial elements:

    1. Suction cups and rated load: Compare the manufacturer’s stated weight capacity with your cat’s weight and follow its installation instructions. Larger cups and locking mechanisms may improve stability, but the rating and condition of the mounting surface are more important than marketing terms.
    2. Sturdy Frame: The frame should be made of durable PVC pipes or tough steel wire. Avoid flimsy plastics that might bend under the weight of a chunky cat.
    3. Breathable, Washable Fabric: The resting pad should be made of tough, scratch-resistant fabric (like outdoor canvas or Oxford cloth). It should also be easy to remove and toss into the washing machine to clean up shedding fur.
    4. Strong Supporting Cables: The cables that hold the front of the bed up should be made of steel wire coated in plastic, ensuring your cat can't chew through them.

    Conclusion

    A window hammock can add an elevated resting place without using floor space, but it is appropriate only when the window, mounting hardware, and stated load rating are suitable. Observe how your cat uses it and inspect every attachment regularly.

    Shop cat window hammock suction cup perch on Amazon

    Check the Window Before Buying

    Measure the clear glass area rather than the full window frame. The suction cups need flat, clean glass with enough space between trim, locks, handles, blinds, and curtains. Textured or filmed glass may not be compatible with suction mounting, so check both the window information and the perch instructions.

    Consider how the window is used. A perch should not block an emergency exit, prevent the window from closing, or place the cat against a hot heater or air-conditioning vent. If the window receives strong direct sun, provide another shaded resting option and monitor the surface temperature.

    Weight Capacity and Bed Size

    Use your cat’s current weight and body length when comparing products. The stated capacity should come from the manufacturer, and every component must be installed as directed for that rating to apply. In a multi-cat home, assume that more than one cat may climb onto the perch at the same time unless access can be controlled.

    The resting platform should allow the cat to turn around and lie down without hanging over an unsupported edge. A larger bed also needs a larger clear mounting area, so compare both dimensions before ordering.

    How to Install a Suction-Mounted Perch

    1. Clean the glass and suction cups as directed and remove dust, oil, and cleaning residue.
    2. Allow all surfaces to dry unless the manufacturer specifies a different installation method.
    3. Attach the cups in the required sequence and confirm that cables or braces are not twisted.
    4. Apply gradual hand pressure to test stability before allowing the cat to climb onto it.
    5. Supervise the first uses and recheck every attachment after the perch has carried weight.

    Do not place fragile objects beneath the perch. Stop using it if a cup repeatedly releases, a cable frays, the frame bends, or any mounting part becomes damaged.

    Help a Cat Use the New Perch

    Some cats investigate immediately while others prefer a gradual introduction. Keep the perch low enough for a comfortable first step or provide a stable route such as nearby furniture designed to support the cat. Place familiar bedding on the surface if it does not interfere with the frame or ventilation.

    Never force a cat onto an elevated perch. If the cat has limited mobility, poor balance, recent surgery, or another health concern, ask a veterinarian whether the height and access route are appropriate.

    Cleaning and Routine Inspection

    Remove hair regularly and wash the fabric according to its care label. Inspect suction cups, seams, frame joints, and support cables each week. Temperature changes and direct sun can affect materials over time, so reinstall or replace components when the manufacturer recommends it.

    Suction Perch Alternatives

    If the window is unsuitable for suction cups, consider a sill-mounted perch, a stable cat tree positioned near the window, or a low padded bench. The best option is the one that fits the room and provides a secure route up and down. For another pet enrichment option, see our guide to a dog lick mat for calm enrichment.

  • Best Cable Management Box: How to Hide Messy Desk Cords Instantly

    Best Cable Management Box: How to Hide Messy Desk Cords Instantly

    Disclosure: As an Amazon Associate, I earn from qualifying purchases. This article includes affiliate links, which means I may earn a commission if you buy through them, at no extra cost to you.

    Cable management box hiding a power strip and messy desk cords

    Check cable management box for power strip on Amazon

    You’ve finally set up your dream home office or entertainment center. The monitor is perfectly aligned, the desk is clean… but underneath, there is a chaotic, tangled nest of power strips, chargers, and cords. Not only is it an eyesore, but it also gathers dust and can be a tripping hazard or a tempting chew toy for pets.

    A cable management box can conceal a compatible power strip and excess cable length while keeping the setup accessible. It improves appearance, but it must be sized and ventilated correctly and should never be treated as a waterproof, childproof, or pet-proof electrical enclosure.

    Why a Cable Organizer Box is a Must-Have

    • Instant Aesthetics: You don't need to spend hours zip-tying cables. You simply drop your entire power strip into the box, close the lid, and the mess magically disappears.
    • Reduced access: A lid can discourage casual contact with plugs, but the box is not a substitute for electrical safety products, supervision, or keeping liquids away from power equipment.
    • Easier Cleaning: No more trying to vacuum around a spiderweb of cords. You just dust the top of the box.

    Features of the Best Cable Management Boxes

    When browsing Amazon to hide your messy cords, look for these design elements:

    1. Aesthetically Pleasing Design: Since the box will be visible, it shouldn't look like an ugly plastic bin. Top-rated models feature sleek matte finishes (white or black) with beautiful, natural bamboo or wooden lids that blend in with home decor.
    2. Sufficient Size: Check the dimensions! You want a box large enough to comfortably fit a bulky surge protector along with massive laptop charging bricks. (Often, buying a set of large and medium boxes is the best value).
    3. Ventilation Holes: Chargers get hot. Ensure the box has slits or holes on the sides and bottom to allow heat to dissipate safely.
    4. Multiple Wire Exits: The box should have cutouts on both ends and sometimes the sides, allowing you to route cables in whichever direction you need.

    Conclusion

    Don't let a spaghetti monster of wires ruin your carefully curated room. A cable management box is a highly affordable, satisfying solution that instantly elevates the look of your space.

    Shop cable management box for power strip on Amazon

    Related desk organization guides

    Measure the Power Strip and Adapters

    Measure the complete power strip, including the plug, on/off switch, and any cable strain relief. Then place the chargers you normally use into their actual outlets and measure the total occupied width and height. Large laptop adapters can overlap neighboring sockets or sit higher than expected.

    The box should close without pressing on plugs or sharply bending cables. Allow open space around heat-producing adapters and confirm that the manufacturer’s ventilation design is suitable for the equipment you plan to place inside. If the components cannot fit comfortably, use a larger box or a different cable-routing method.

    Cable Box vs. Under-Desk Tray

    A box is usually better when the power strip stays on the floor, beside a media console, or near a nightstand. It is portable and does not require mounting hardware. An under-desk tray keeps the power strip off the floor and can reduce the number of visible cables, but installation and desk compatibility require more planning.

    For a sit-stand desk, a tray attached to the moving desktop may provide more controlled cable travel. Read our detailed guide to under-desk cable management trays before choosing between the two systems.

    Electrical and Heat Precautions

    • Follow the power strip and charger manufacturers’ ventilation and placement instructions.
    • Do not cover ventilation openings with fabric, paper, rugs, or stored objects.
    • Keep the box away from sinks, drinks, plant watering, and other sources of moisture.
    • Do not connect power strips to one another or exceed the stated electrical load.
    • Stop using damaged, loose, discolored, or unusually hot plugs and adapters.

    Periodically touch the outside of the box and inspect the equipment during normal use. If heat builds up or the equipment smells unusual, disconnect it safely and reconsider the arrangement. A closed appearance is never more important than ventilation and access.

    How to Route Cables Cleanly

    1. Unplug equipment and place the box close enough to the outlet that no cable is stretched.
    2. Route the power-strip cable through one end opening and device cables through the most direct exits.
    3. Bundle only the excess length with reusable ties, keeping bends loose near connectors.
    4. Label plugs that are frequently removed so the box does not need to be emptied.
    5. Leave the lid easy to open for inspection and access to the power switch.

    Placement Around Children and Pets

    A cable box may reduce visual interest, but ordinary lids and openings do not make electrical equipment inaccessible. Use appropriate outlet covers or other products designed for the specific hazard, supervise children and pets, and consult a qualified professional when the location presents an electrical-safety concern. Replace chewed or damaged cables immediately.

    Cleaning and Maintenance

    Disconnect power according to the equipment instructions before cleaning. Remove dust from ventilation openings and inspect the power strip, adapters, and cables. Avoid spraying cleaner into the box. As your setup changes, remove unused chargers rather than allowing the enclosure to become tightly packed.

  • Best Rechargeable Book Light for Reading in Bed (Without Waking Your Partner)

    Best Rechargeable Book Light for Reading in Bed (Without Waking Your Partner)

    Disclosure: As an Amazon Associate, I earn from qualifying purchases. This article includes affiliate links, which means I may earn a commission if you buy through them, at no extra cost to you.

    Rechargeable book light clipped to an open book for reading in bed

    Check rechargeable amber book light for reading in bed on Amazon

    There is nothing quite like winding down at the end of the day with a good book. However, reading in bed can become a point of contention if your partner is trying to sleep, and leaving the bright bedside lamp on isn't an option.

    The perfect solution is a clip-on rechargeable book light. A focused clip-on light can illuminate the page while leaving more of the room dark. Models differ in beam spread, brightness, color temperature, clip design, weight, and charging method.

    Why You Need an Amber Book Light

    An amber or warm setting may feel more comfortable to some readers at night and can be less visually intrusive to another person in the room. Comfort is individual, so choose a model with adjustable brightness and compare the available color settings rather than relying on an “eye-care” label alone.

    Key Features to Look for on Amazon

    When hunting for the best eye-care book light, keep these essential features on your checklist:

    1. Multiple Brightness and Color Modes: A great light will let you switch between Amber (warm), Mixed, and White light, as well as offer dimming options so you can find the perfect brightness.
    2. USB rechargeable: Check the connector type, stated runtime at each brightness level, charging indicator, and whether the light can be used while charging. Actual runtime depends on brightness and battery condition.
    3. Adjustable neck: A neck that holds its position lets you direct the beam across both pages and away from the rest of the room.
    4. Lightweight Clip: The clamp should open wide enough to grip thick hardcover books or Kindle e-readers, but the device itself must be lightweight so it doesn't make the book heavy to hold.

    Conclusion

    A rechargeable book light can be a practical choice for reading in bed, travel, or other places where a full room lamp is inconvenient. Compare the beam, controls, weight, and clip with the type of book or device you use most.

    Shop rechargeable amber book light for reading in bed on Amazon

    Related small workspace guides

    Beam Shape Matters More Than Maximum Brightness

    A very bright LED is not automatically better for reading. The beam should cover both pages without creating a sharp hotspot in the center or spilling far beyond the book. Look for several usable brightness steps, including a low setting that can be selected without cycling through every brighter mode.

    Controls should be easy to find by touch and should not require squeezing the clip while the light is attached. Memory for the last-used setting is convenient, although it is not essential if the controls are simple.

    Choose a Clip for Your Reading Material

    Paperback pages need a light clip that is gentle and light enough not to pull the cover backward. Hardcovers can support a stronger clamp, but thick padded jaws may not open wide enough. For an e-reader, make sure the clip does not cover the power button, charging port, or screen.

    • Paperback: prioritize low weight and a broad, padded contact area.
    • Hardcover: check maximum clip opening and grip.
    • E-reader: confirm bezel clearance and avoid pressure on the display.
    • Travel: choose a neck that folds without switching on inside a bag.

    Position the Light to Reduce Glare

    Clip the light near the top or side of the book and angle it across the page rather than directly toward your eyes. On glossy pages or an e-reader screen, move the beam until reflections are outside your viewing angle. Use the lowest brightness that keeps the text clear in the surrounding room.

    If reading causes persistent discomfort, headaches, blurred vision, or eye pain, stop and seek advice from an appropriate health professional. A product marketed with “eye-care” language is not a treatment for a vision or sleep problem.

    Battery and Charging Details

    Compare runtime claims at the brightness setting you expect to use, because maximum brightness can drain a small battery much faster. USB-C is convenient when it matches your other travel gear, but some compact lights still use Micro-USB or a built-in plug. Check whether a charging cable is included and whether the battery indicator gives enough warning before the light turns off.

    Do not charge the light under bedding or use a damaged battery, swollen housing, frayed cable, or unusually hot charger. Follow the manufacturer’s charging and storage instructions.

    Reading Without Disturbing Someone Nearby

    Direct the light toward the book and away from the other side of the bed. A narrow beam, low brightness setting, and warm color option can reduce spill, but no clip light is completely invisible in a dark room. Agreeing on placement and brightness is more reliable than depending on a product claim.

    Care and Storage

    Wipe the lens and clip with a dry or lightly damp cloth as directed. Avoid bending the neck repeatedly at the same sharp point. Before packing, switch the light off, fold it without stressing the hinge, and protect the power button from accidental activation.

    For a desk-based alternative with broader illumination, compare our guide to desk lamps for video calls and visual comfort.

  • 5 Best Pickleball Paddles for Tennis Elbow in 2026 (Play Pain-Free)

    5 Best Pickleball Paddles for Tennis Elbow in 2026 (Play Pain-Free)

    Affiliate disclosure: As an Amazon Associate, we may earn from qualifying purchases. This helps support Intuit Chaos at no extra cost to you.

    Pickleball is undeniably one of the fastest-growing sports in the world. It is incredibly fun, social, and a fantastic cardiovascular workout. However, with the massive surge in popularity comes a frustrating rise in a familiar, nagging injury: pickleball elbow. Medically known as lateral epicondylitis, this condition is identical to “tennis elbow” and is characterized by a sharp pain on the outside of your elbow joint.

    If you are suffering from elbow pain after spending a few hours on the court, your mechanics might need some tweaking—but more often than not, your paddle is the primary culprit. A paddle that is too heavy, excessively light, or lacks proper shock absorption will send harsh, high-frequency vibrations straight down the shaft, into your hand, and right up your arm. Over time, these micro-traumas inflame the tendons, leaving you sidelined and in pain.

    The good news? You do not have to quit the game you love. By switching to a paddle engineered specifically for vibration dampening and shock absorption, you can drastically reduce the stress on your arm. In this comprehensive guide, we have thoroughly researched, analyzed, and selected the best pickleball paddles for tennis elbow. These paddles feature advanced core technologies, the perfect weight balance, and forgiving sweet spots to keep you on the court, playing pain-free.


    At a Glance: Top Picks for Tennis Elbow

    Product Best Feature Weight Range Link
    ProKennex Kinetic Pro Speed Best Overall / Ultimate Shock Absorption 7.9 – 8.1 oz Check Price
    JOOLA Ben Johns Hyperion CFS 16 Best for Spin & Vibration Dampening 8.2 – 8.4 oz Check Price
    Engage Encore EX 6.0 Best for Control & Feel 7.8 – 8.2 oz Check Price
    Selkirk Vanguard 2.0 Invikta Premium Pick for Soft Touch 7.7 – 8.2 oz Check Price
    Paddletek Tempest Wave Pro Best Balanced Sweet Spot 7.6 – 8.0 oz Check Price

    1. ProKennex Kinetic Pro Speed (Best Overall for Tennis Elbow)

    When it comes to treating and preventing tennis elbow in racquet sports, ProKennex is the undisputed king. For decades, they have manufactured tennis racquets specifically designed to eliminate arm pain, and they have successfully brought that exact same medical-grade technology into the pickleball world with the ProKennex Kinetic Pro Speed.

    Why it’s great for tennis elbow:
    The secret lies in ProKennex’s patented Kinetic Technology. The perimeter of the paddle is lined with micro-tungsten beads housed within specialized chambers. When the paddle strikes the ball, these beads instantly move to the point of impact, absorbing the shock and vibration before it ever has a chance to travel down the handle into your arm. It is effectively a built-in shock absorber for your elbow. Furthermore, the paddle features a very thin core and an edgeless design, making it incredibly maneuverable at the kitchen line, meaning you won’t have to strain your arm to react quickly.

    Pros:

    • Patented Kinetic technology actively prevents arm injuries.
    • Edgeless design reduces the chance of mishits on the rim.
    • Exceptional maneuverability and hand speed at the net.
    • Quiet impact sound.

    Cons:

    • The tungsten beads make a slight shaking noise, which takes getting used to.
    • Edgeless design means it can chip if scraped on the ground (though it comes with edge tape).

    View on Amazon

    2. JOOLA Ben Johns Hyperion CFS 16 (Best for Spin & Vibration Dampening)

    If you watch professional pickleball, you have seen this paddle. Designed in collaboration with the world’s #1 player, Ben Johns, the JOOLA Hyperion CFS 16 is a masterpiece of modern paddle engineering. While it is built for elite performance, its construction inherently makes it one of the most arm-friendly paddles on the market.

    Why it’s great for tennis elbow:
    The “16” in the name stands for its 16mm core thickness. Thicker cores (14mm-16mm) are vastly superior for tennis elbow compared to thin 10mm-12mm cores because the extra polymer material absorbs a massive amount of impact energy. JOOLA takes it a step further with their Hyperfoam Edge Wall—specialized foam injected into the perimeter of the paddle. This expands the sweet spot and drastically dampens vibrations. You get a plush, soft feel on every dink and drop, protecting your elbow joints from harsh impacts.

    Pros:

    • Incredible vibration dampening thanks to the 16mm core and foam edges.
    • Carbon Friction Surface (CFS) generates massive amounts of spin.
    • Elongated shape provides extra reach.
    • Very forgiving sweet spot.

    Cons:

    • It is on the heavier side (usually around 8.2 – 8.4 oz), so it might feel sluggish to some.
    • Premium price tag.

    View on Amazon

    3. Engage Encore EX 6.0 (Best for Control & Feel)

    Engage has a reputation for building paddles that provide exceptional control, and the Encore EX 6.0 is the crown jewel of their control-oriented lineup. If you are an all-court player looking for a paddle that feels soft but can still put the ball away when needed, this is a top contender.

    Why it’s great for tennis elbow:
    The magic of the Encore EX 6.0 lies in its proprietary Control ProCore technology. The core is specially engineered to maximize the amount of time the ball stays on the paddle face (dwell time). A higher dwell time means the energy transfer is smoother, rather than a sharp, harsh ping. This drastically cuts down on the vibration spikes that aggravate lateral epicondylitis. Furthermore, its mid-weight range (around 7.8 – 8.2 oz) provides the perfect balance—heavy enough to absorb shock naturally, but light enough to prevent muscle strain during long rallies.

    Pros:

    • Excellent dwell time for a buttery soft feel.
    • Great balance of power and control.
    • Standard shape gives it a large, reliable sweet spot.
    • Made in the USA.

    Cons:

    • The grip shape might feel slightly boxy to some players.
    • Design aesthetics are somewhat basic compared to newer brands.

    View on Amazon

    4. Selkirk Vanguard 2.0 Invikta (Premium Pick for Soft Touch)

    Selkirk is an absolute powerhouse in the pickleball industry, known for premium craftsmanship and incredible warranties. While they offer many models, the Vanguard 2.0 series is widely considered their most arm-friendly line, specifically for players who prioritize the soft game (dinking, third shot drops, and resets).

    Why it’s great for tennis elbow:
    The Vanguard 2.0 features a bi-directional cross-weave carbon fiber face paired with an advanced Quantum-Carbon Fiber face material. What does this mean for your elbow? It means the paddle face absorbs the ball’s energy rather than acting like a rigid trampoline. When combined with its thick 16mm core, the Vanguard 2.0 delivers an incredibly muted, soft impact. If you suffer from pain when hitting hard drives or blocking smashes, the plush feeling of this paddle will be a massive relief.

    Pros:

    • Industry-leading soft feel and shock absorption.
    • Unmatched control for the short game and dinking.
    • Premium build quality with an excellent warranty.
    • Comfortable, premium grip.

    Cons:

    • Lacks the sheer put-away power of stiffer paddles.
    • One of the most expensive paddles on the market.

    View on Amazon

    5. Paddletek Tempest Wave Pro (Best Balanced Sweet Spot)

    Paddletek has been a trusted brand for years, and the Tempest Wave Pro is a classic that has stood the test of time. It is highly regarded for its precision, accuracy, and exceptionally forgiving nature on the court.

    Why it’s great for tennis elbow:
    One of the hidden causes of tennis elbow in pickleball is mishitting the ball. When you hit the ball off-center (outside the sweet spot), the paddle twists violently in your hand, sending a massive shockwave directly into your forearm tendons. The Tempest Wave Pro utilizes Smart Response Technology and a textured graphite surface to create one of the largest and most consistent sweet spots available. Even if you don’t hit the dead center of the paddle, the impact remains smooth and stable, saving your arm from unnecessary twisting and torque.

    Pros:

    • Massive, highly forgiving sweet spot reduces off-center torque.
    • Excellent touch and precision for placing shots.
    • Very consistent performance across the entire face.
    • Lightweight to midweight options available.

    Cons:

    • Not ideal for players looking for max power.
    • Grip tends to wear out slightly faster than competitors.

    View on Amazon


    Buying Guide: How to Choose a Pickleball Paddle for Tennis Elbow

    If you are shopping for a paddle to protect your arm, you cannot just pick the one with the coolest graphic. You need to pay close attention to the structural specifications. Here are the four golden rules for choosing an arm-friendly paddle:

    1. Avoid the Extremes in Weight

    Weight is the most critical factor. Do not buy a paddle that is too light (under 7.4 oz). While a light paddle feels easy to swing, it lacks mass. When a fast-moving ball hits a light paddle, the paddle cannot absorb the force, meaning the shock transfers directly into your elbow. Conversely, a paddle that is too heavy (over 8.5 oz) will fatigue your forearm muscles, leading to strain. The “Goldilocks Zone” for tennis elbow is a mid-weight paddle, ideally between 7.6 oz and 8.2 oz. This provides enough mass to plow through the ball and absorb shock without fatiguing your arm.

    2. Thicker Cores are Better

    The core of a pickleball paddle acts as its suspension system. Thin paddles (10mm to 12mm) are built for “pop” and power, but they are rigid and jarring on the arm. For elbow pain, you want a thicker core (14mm to 16mm). The extra polymer honeycomb material acts as a sponge, dampening the vibration before it reaches the handle.

    3. Grip Size Matters

    Playing with the wrong grip size forces you to squeeze the handle too tightly (“death-gripping”). This constant tension in your forearm muscles will aggravate tennis elbow rapidly. You want a grip where, when you hold the paddle, there is about a finger’s width of space between your fingertips and the heel of your hand. If in doubt, buy a smaller grip size; you can always build it up by adding overgrips, which also add extra cushioning.

    4. Shock Absorbing Technologies

    Always look for paddles that advertise vibration dampening. Technologies like ProKennex’s Kinetic tungsten beads, JOOLA’s perimeter foam injection, or Selkirk’s specialized carbon fiber weaves are explicitly designed to mute vibrations.


    Frequently Asked Questions (FAQ)

    Can playing pickleball cause tennis elbow?
    Yes, absolutely. The repetitive motion of swinging, combined with the harsh impact of hitting a hard plastic ball with a solid paddle, creates micro-tears in the forearm tendons. If you do not rest or use equipment that absorbs shock, it will quickly develop into lateral epicondylitis (tennis elbow).

    Does a heavier paddle help tennis elbow?
    To a certain degree, yes. A heavier paddle (around 8.0 oz) has more mass, which means it absorbs the impact of the ball better than a feather-light 7.2 oz paddle. However, if the paddle is *too* heavy, the sheer effort of swinging it will strain your muscles. Stick to the mid-weight range.

    Will changing my paddle instantly cure my elbow pain?
    No paddle is a magical cure. A shock-absorbing paddle will drastically reduce the stress and prevent further damage, allowing your arm to heal. However, if you are currently in severe pain, you should rest, apply ice, perform physical therapy stretches, and consider wearing an elbow brace until the inflammation subsides.


    Conclusion

    Dealing with tennis elbow is frustrating, but it does not mean your pickleball days are over. Upgrading your equipment is the single most effective step you can take to protect your joints. For the ultimate peace of mind, the ProKennex Kinetic Pro Speed is our top recommendation thanks to its scientifically proven medical technology. However, if you prefer a thicker core with a plush feel, the JOOLA Hyperion 16 and Selkirk Vanguard 2.0 are spectacular alternatives.

    Remember to pair your new paddle with proper stretching, a relaxed grip, and good mechanics. See you on the courts!

    Related low-impact comfort guide