Disclosure: This article contains one affiliate link. If you buy through it, Intuit Chaos may earn a commission at no extra cost to you.
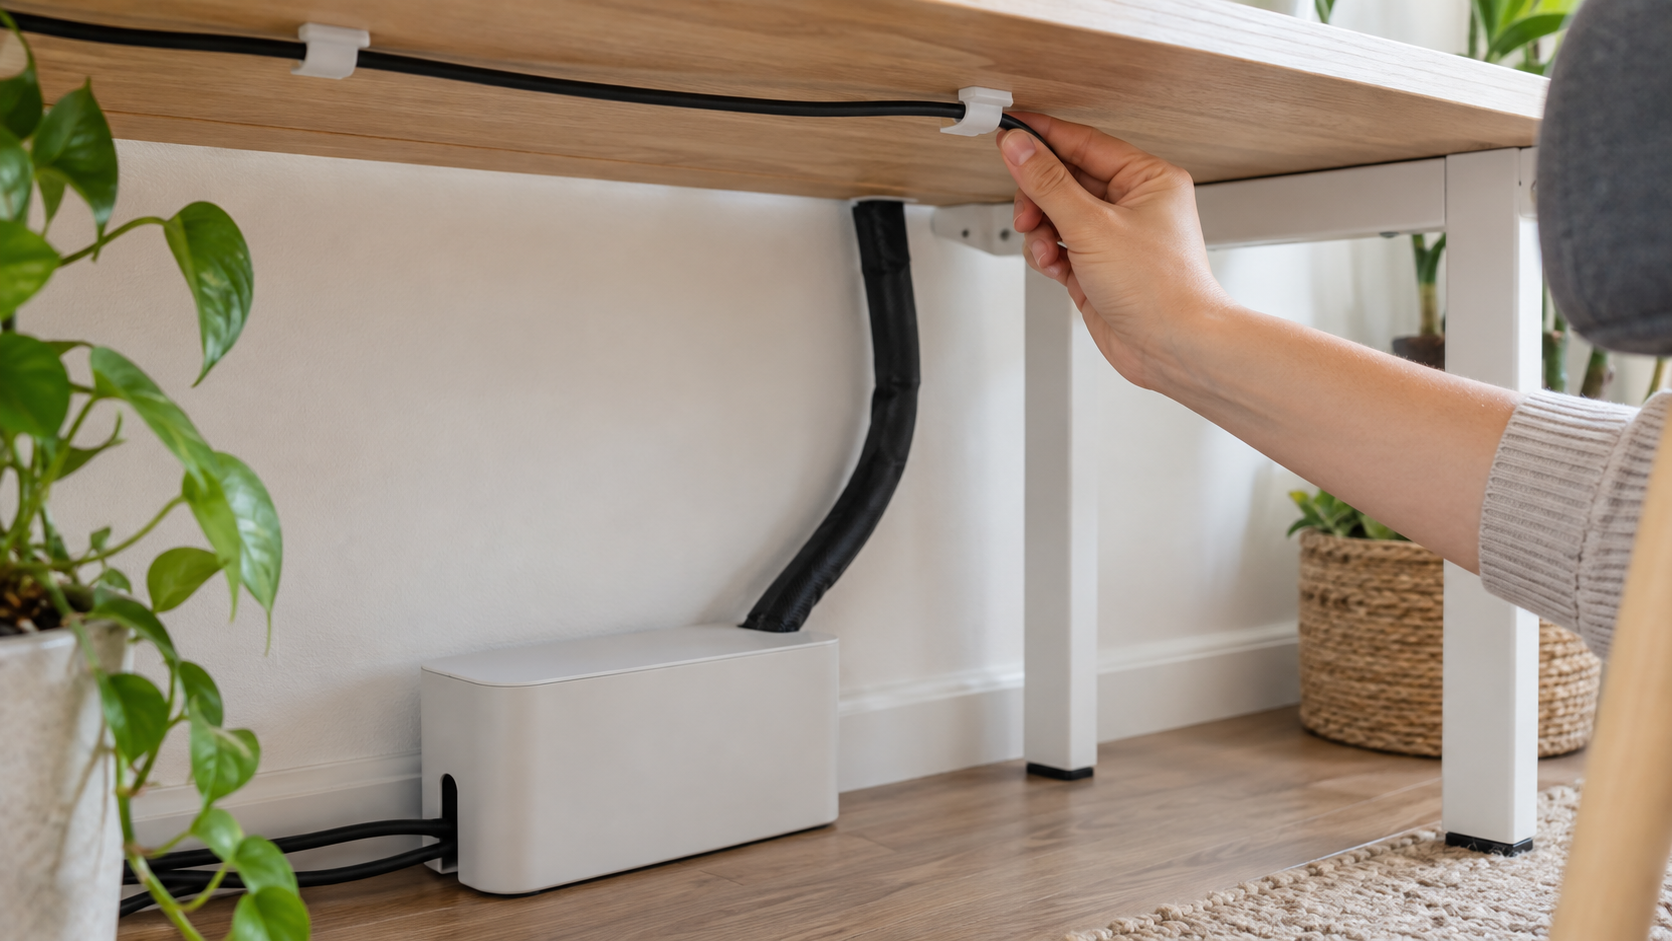
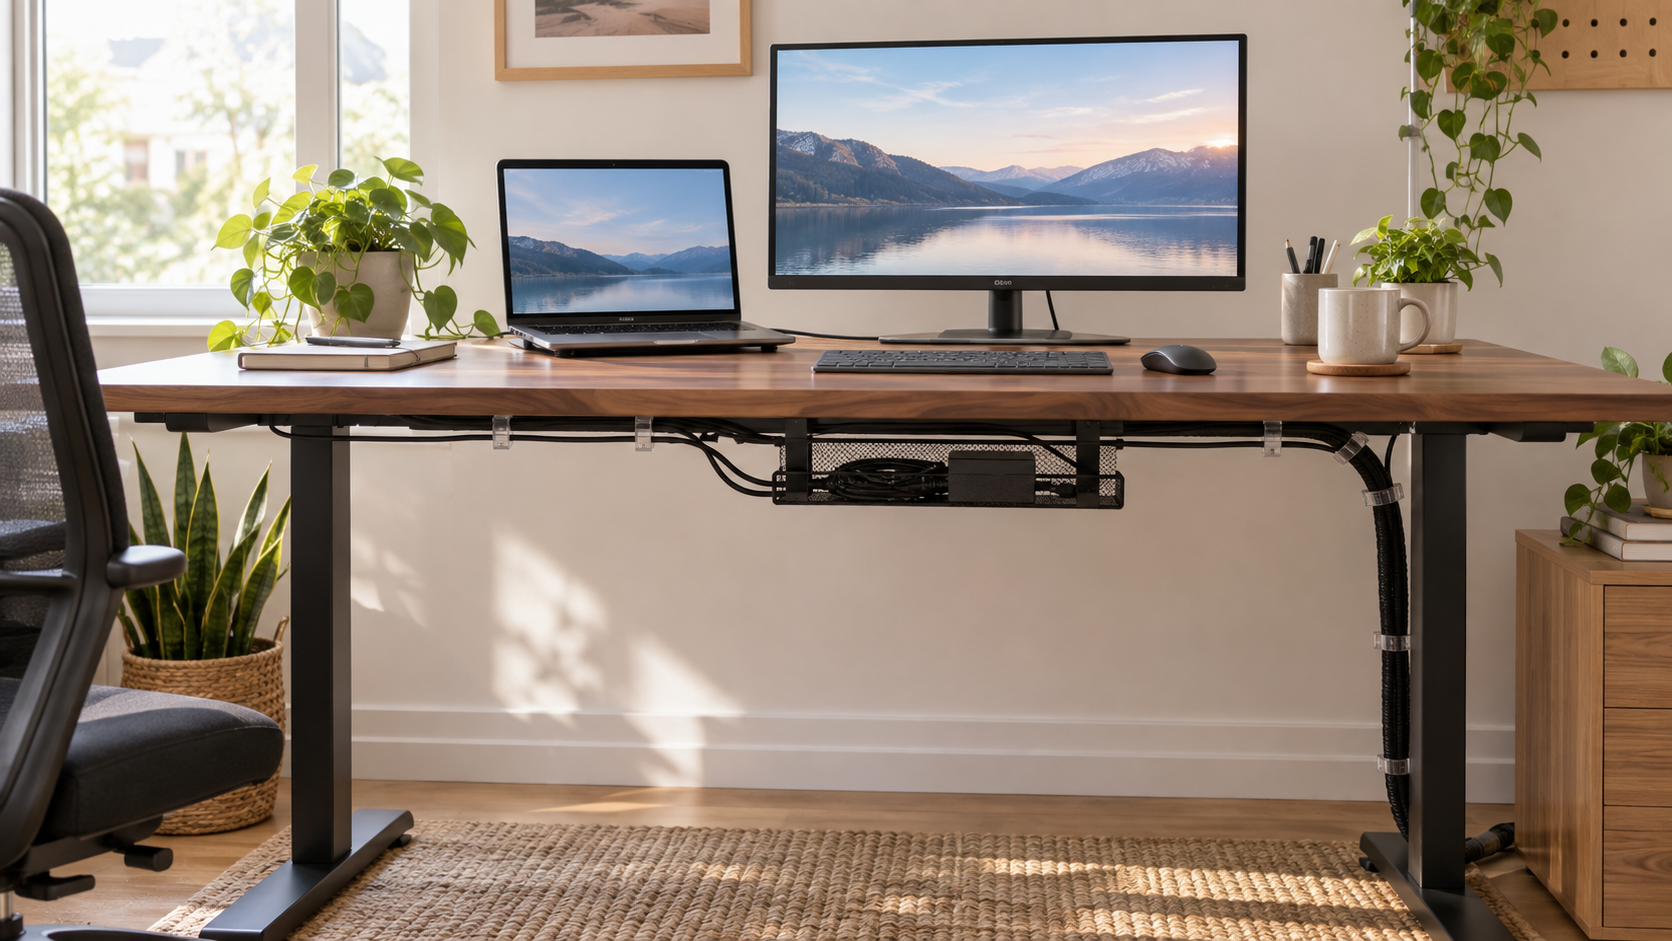
Cable management is not only about making a desk look tidy. A clear routing plan can make equipment easier to move, reduce clutter around your feet, and shorten the time needed to clean the workspace. You do not need an expensive system; start by understanding which cables you use and where they need to go.
1. Map the desk before buying organizers
Unplug and identify each cable, then note its starting point, destination, and required length. Group cables by device, such as monitor, computer, lamp, charger, and audio equipment. Keep power cables easy to distinguish from data and accessory cables. Taking a quick photo before disconnecting everything can help when you rebuild the setup.
2. Separate fixed cables from daily-use cables
Some cables stay connected for months, while phone chargers, headphones, and laptop cables move every day. Route fixed cables under or behind the desk. Keep daily-use ends within easy reach with clips or a simple desktop holder. This prevents you from pulling an entire cable bundle apart whenever you need to charge a device.
3. Choose the right type of organizer
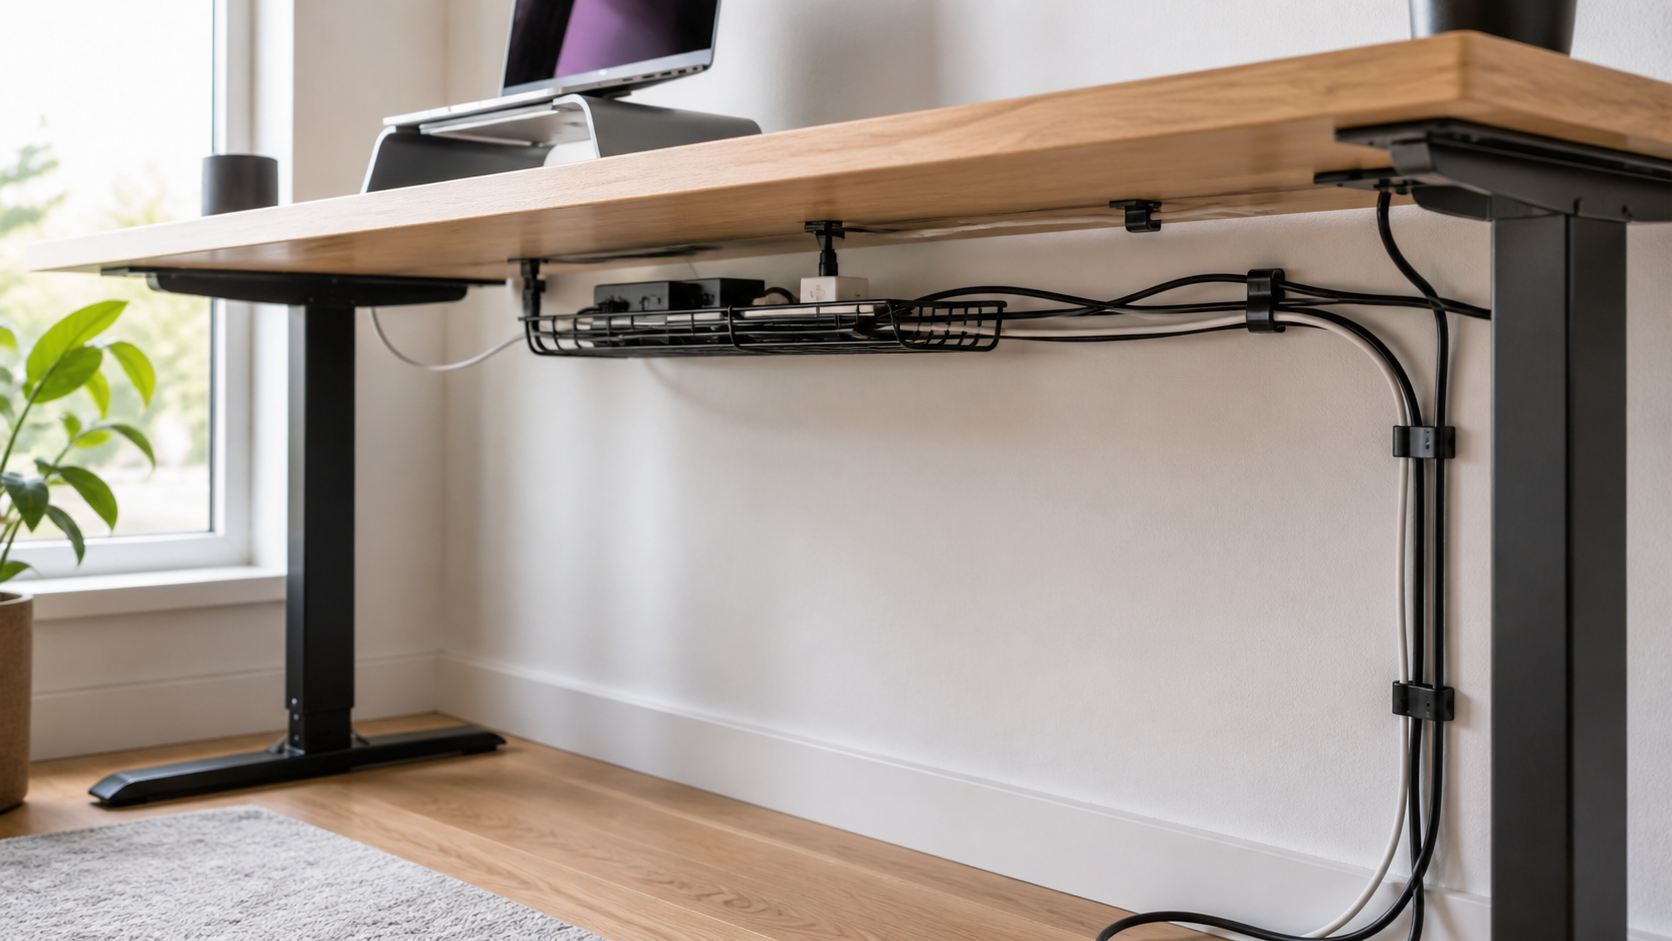
An under-desk tray holds power strips and adapters while keeping the floor clear. Adhesive clips guide one or two light cables along an edge. Reusable hook-and-loop ties are useful for bundles that may change. A cable box can hide a power strip, but it needs enough room and ventilation for the equipment inside. Choose the simplest organizer that matches the weight and number of cables.
4. Leave room for movement and maintenance
Do not pull cables tight. Leave a small service loop near devices so you can adjust a monitor, raise a standing desk, or move a laptop without stressing the connector. If the desk changes height, test the cable path at both its lowest and highest positions. Make sure no cable can catch on a drawer, chair wheel, or moving arm.
5. Keep power arrangements sensible
Follow the power strip and device manufacturers’ instructions, keep ventilation openings clear, and avoid overloading outlets or connecting power strips to one another. Mount heavy adapters securely rather than leaving them hanging by their cords. Keep connections away from liquids and from spots where feet or chair wheels can strike them.
6. Label both ends of important cables
Simple labels save time when several black cables disappear behind a desk. Label both ends with the device name, especially for monitors, network equipment, and power adapters that look similar. Use labels that can be removed cleanly so the system remains easy to update.
7. Design for easier cleaning
A good cable route keeps most cords off the floor and removes loose loops from the back edge of the desk. Leave enough access to wipe surfaces and vacuum underneath without unplugging the whole setup. Every few months, check adhesive mounts, loosened ties, dust around adapters, and cables that have shifted into moving parts.
Quick cable management checklist
Identify and test every cable before routing it.
Separate permanent connections from daily-use leads.
Use trays for weight, clips for guidance, and reusable ties for bundles.
Leave slack for monitor arms, drawers, and height-adjustable desks.
Keep power connections ventilated and protected from impact.
Label both ends and keep the floor easy to clean.
Build the layout in stages rather than tightening every tie immediately. Use the desk for a day, notice which cables still need to move, and make the final adjustments only after the routing works in real life.
Disclosure: This article contains one affiliate link. If you buy through it, Intuit Chaos may earn a commission at no extra cost to you.
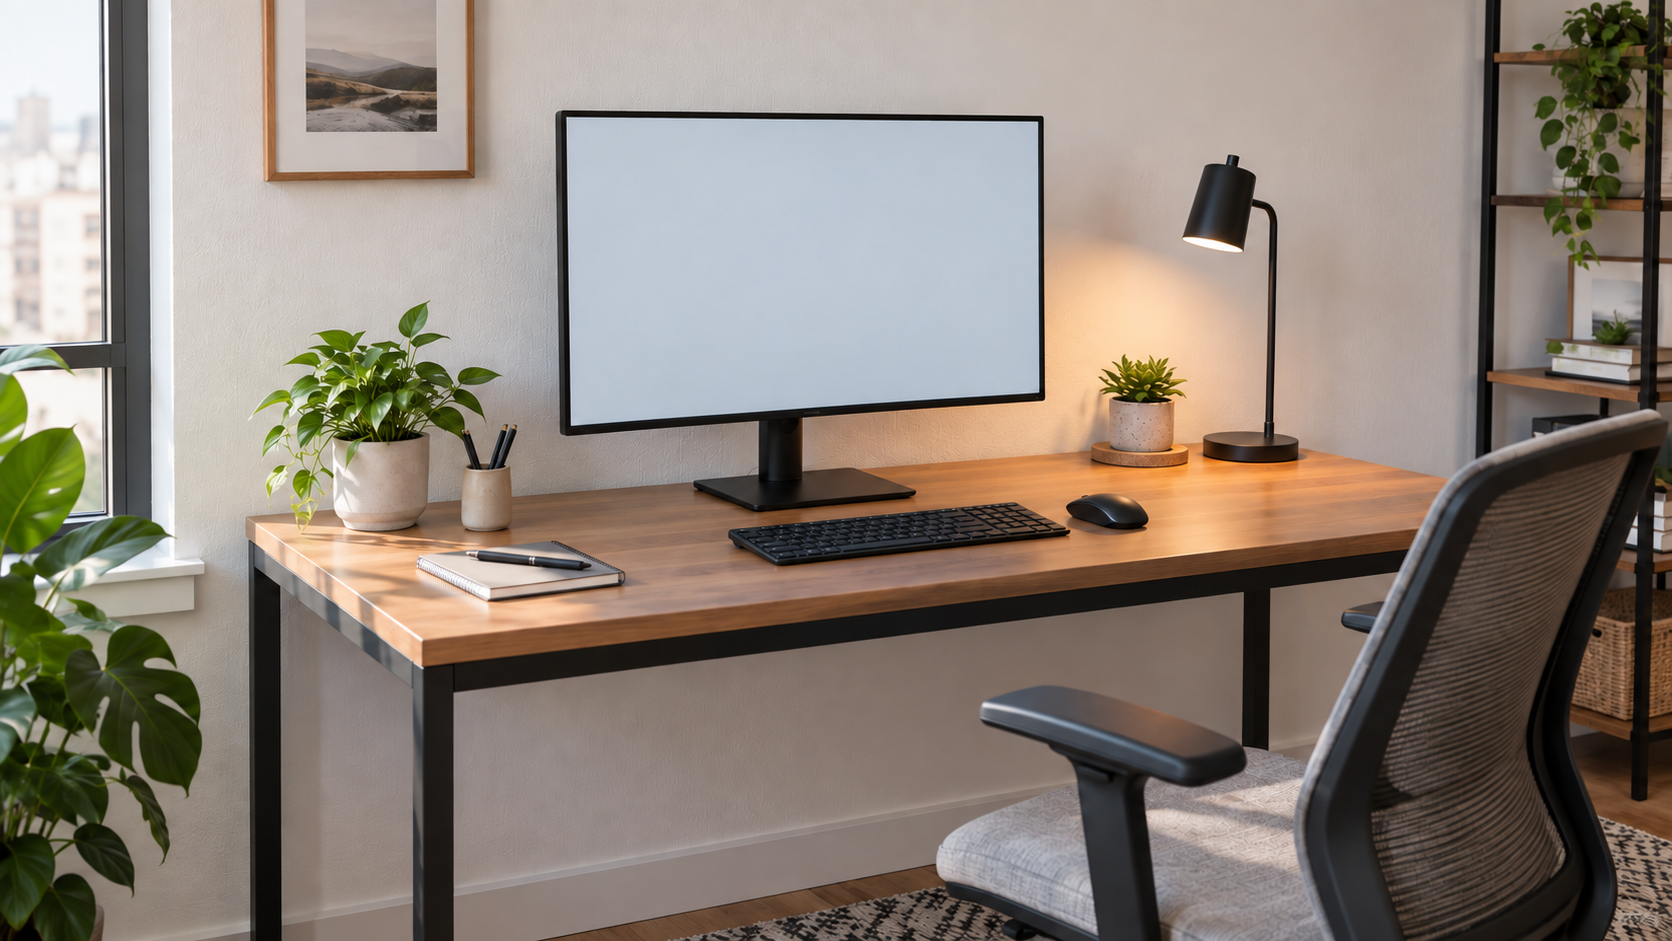
A desk lamp can make a small home office more comfortable, but the best choice is not simply the brightest model. The lamp needs to fit your desk, direct light where you need it, and work with your screen and video-call setup. Use these practical checks before you buy.
1. Match the beam to the work you do
A wide, diffused beam works well for reading documents, writing notes, and lighting a shared work surface. A narrower adjustable head is useful when you need focused light on a keyboard or notebook. If you switch between tasks, choose a lamp with a movable arm or head so you can redirect the beam without moving the base.
2. Plan the lamp position for video calls
For video calls, place the lamp slightly in front of you and off to one side. This can brighten your face without shining directly into your eyes or reflecting in the monitor. A lamp placed behind you may make your face look darker, while a very low lamp can create distracting shadows. Before buying, test the intended position with another light source and check the result in your webcam preview.
3. Look for useful dimming and color controls
Room light and screen brightness change throughout the day, so adjustable brightness is usually more useful than one powerful setting. Warm light can feel comfortable for late work, while neutral or daylight-style light can make paper and small objects easier to see. Multiple color-temperature settings are helpful, but simple controls you will actually use matter more than a long feature list.
4. Protect valuable desk space
On a compact desk, compare the footprint of the base with the space beside your keyboard and monitor. A clamp lamp can free the work surface, but you should measure the desk edge and check that the clamp will not collide with drawers, a cable tray, or a wall. Also confirm that the arm reaches the center of the work area without blocking the monitor.
5. Check controls, power, and cable reach
Buttons should be easy to reach from your normal sitting position. Touch controls look tidy, but physical buttons can be easier to find in a dark room. Check whether the lamp uses a wall plug, USB power, or a separate adapter, and make sure its cable reaches the outlet without crossing a walkway. If a lamp includes a charging port, treat it as a convenience rather than the main reason to buy.
6. Avoid glare before it becomes a daily problem
The light source should sit outside your direct line of sight. A shade, diffuser, or recessed light panel can reduce harsh glare. If you wear glasses, move the lamp higher and farther to the side, then adjust the angle until reflections disappear from your webcam image. Matte desk surfaces also tend to reflect less light than glossy ones.
Quick buying checklist
Adjustable brightness for daytime and evening work.
A head or arm that aims light away from the monitor.
A base or clamp that fits the available space.
Enough reach for your actual desk depth.
Controls that are easy to use without interrupting work.
A power cable that reaches safely and stays out of the way.
The right desk lamp supports the setup you already have. Measure first, test the likely position, and choose the controls that solve your everyday lighting problems instead of paying for features you may never use.
Disclosure: This article may contain an affiliate link. If you buy through it, Intuit Chaos may earn a commission at no extra cost to you.
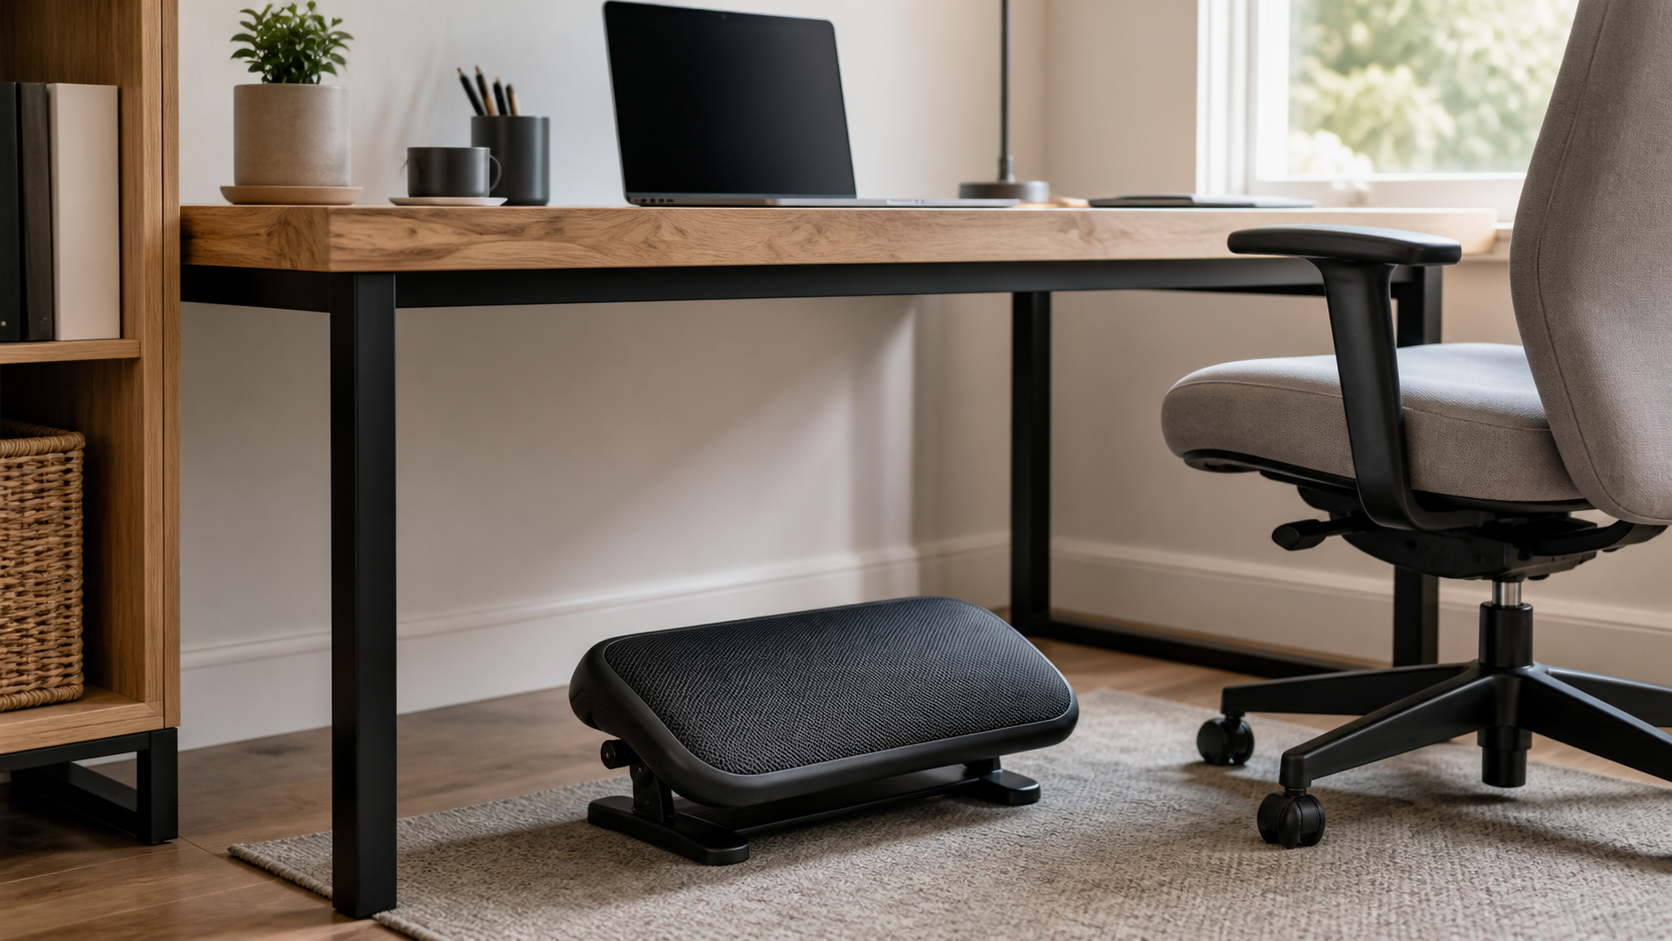
Under-desk storage can clear a small home office quickly, but the wrong drawer unit can make a desk uncomfortable to use. The most useful option preserves a natural seated position, keeps essentials close, and does not block cables or cleaning.
Measure your leg zone first
Before comparing drawers, sit at the desk and note the open area used by your knees and feet. Measure the distance from the underside of the desktop to your thighs, the clear width between desk legs, and the depth from the rear support to the front edge. This is the space a drawer must not invade.
Choose the right mounting style
Clamp-on drawers are practical when you do not want holes in the desktop, but check the thickness range of the clamp. Screw-mounted units are usually steadier for heavier items. Freestanding drawer carts offer flexibility, though their wheels and height can create a collision point under a compact desk.
Keep storage shallow and intentional
Shallow drawers work best for chargers, sticky notes, adapters, cables, and writing tools. Large bins are tempting, but they often become a catch-all and take space from your legs. Sort the items you reach for weekly and choose a drawer size that fits that group rather than every object in the room.
Leave room for cables and cleaning
Look for a location that does not cover a power strip, cable tray, or the route used by a chair. A little space around the drawer makes it easier to vacuum, retrieve a dropped item, and inspect cables. Smooth drawer movement matters more than extra compartments if the unit will be used every day.
Quick checklist
Measure knee clearance while seated.
Check desktop thickness and mounting method.
Choose a shallow unit for small essentials.
Keep power access and cable routes clear.
Test that drawers can open without hitting the chair.
A well-placed under-desk drawer should disappear into your routine: useful when you need it and invisible when you are working.
Disclosure: This article may contain an affiliate link. If you buy through it, Intuit Chaos may earn a commission at no extra cost to you.
A monitor stand can make a small desk feel calmer and more usable, but the right choice is not simply the tallest or widest model. A stand changes the height of your screen, uses part of the desktop, and can either create useful storage or introduce a new obstacle. The best approach is to measure first, then match the stand to the way you actually work.
1. Start with the desk, not the product photo
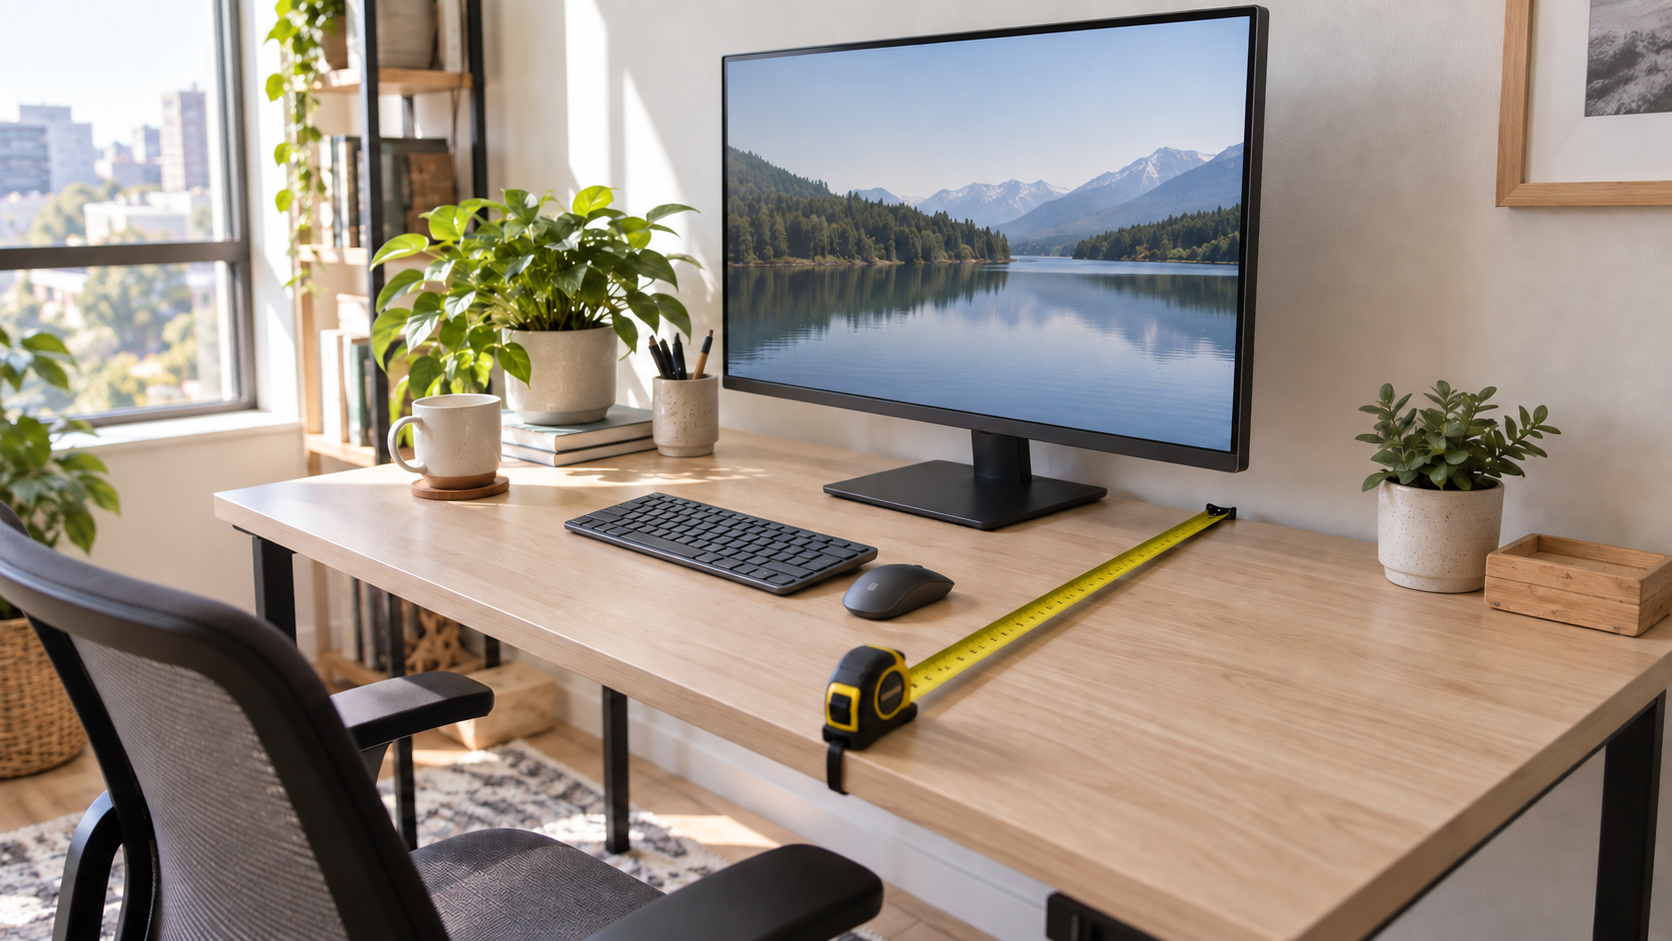
Measure the usable width and depth of your desk before comparing monitor stands. Leave room for the keyboard, mouse movement, and a notebook or drink if those are part of your normal day. A stand that looks compact in a product photo may feel oversized when its feet or side shelves reach into your working zone.
For a small desk, write down three numbers: total desk width, the clear depth between the wall and the front edge, and the width of the monitor base. These measurements make it much easier to rule out options that will crowd the surface.
2. Check the monitor base and weight limit
Most desk risers are designed for a monitor sitting on its original base. Compare the stand’s advertised weight limit with the monitor’s weight, then give yourself a sensible margin. A heavy ultrawide display, a large all-in-one computer, or a second screen can change the requirements quickly.
Also look at the shape of the monitor base. A wide V-shaped base needs a deeper platform than a small rectangular base. If the base hangs over the edge, choose a different option rather than relying on a careful balancing act.
3. Choose a height that helps your posture without forcing it
The goal is a screen position that feels natural when you sit comfortably, not a desk that looks dramatic. When you look straight ahead, your eyes should land around the upper portion of the display. Your exact preference will vary with chair height, screen size, glasses, and the kind of work you do.
A fixed riser works well when one person uses the desk most of the time. An adjustable stand is more flexible for shared spaces, but check that its legs, clamps, or adjustment mechanism do not consume more room than the fixed model would.
4. Decide whether the space underneath will be useful
Storage is one of the strongest reasons to use a monitor riser on a small desk. The open space underneath can hold a keyboard after work, a slim notebook, a docking station, or a few supplies. Treat that storage as a planned zone, though. If you fill it with loose items, the desk can become harder to clean and cables can become harder to reach.
Before buying, place the items you want to store together and measure their height and width. This simple test tells you whether an open riser, drawer-style stand, or basic shelf is the better fit.
5. Think about cable paths early
A monitor stand changes where cables fall. Look for an open rear edge or enough clearance to route a power cable, display cable, and charging cable without bending them sharply. If the stand sits flush against the wall, leave a small gap behind it so the cables are not pinched.
Keep the monitor’s power adapter accessible. A tidy desk is helpful, but hiding a power brick so completely that you cannot inspect it or unplug it easily creates a different kind of friction.
6. Match the material to your desk routine
Wood risers can feel warm and sturdy, while metal stands are often slimmer and easier to wipe clean. Glass may suit a minimal setup, but it shows dust and fingerprints more readily. There is no universal winner: choose the material that matches the desk surface, the amount of cleaning you want to do, and the weight of the equipment.
Pay attention to non-slip feet or protective pads. They help prevent the stand from sliding and reduce the chance of rubbing the desktop finish over time.
7. Leave room for the next small upgrade
A monitor stand is often the first step in a better desk setup. You may later add a desk lamp, laptop stand, cable tray, webcam, or compact speakers. A simple riser with a little open space at the sides is usually easier to build around than a highly specialized model with fixed compartments.
That does not mean you need to buy for every possible future scenario. It simply means avoiding a stand that uses every available inch on day one.
A quick decision checklist
Does the platform comfortably support your monitor base and its weight?
Will the total depth still leave room for your keyboard and mouse?
Is the height appropriate for your chair and normal seated position?
Can cables exit without sharp bends or being trapped against the wall?
Will the space underneath solve a real storage need?
Are the feet stable and gentle on the desk surface?
A good monitor stand should make the desk easier to use every day, not just more photogenic. Once your measurements and priorities are clear, choosing between materials, heights, and storage styles becomes much more straightforward.
Affiliate disclosure: As an Amazon Associate, we may earn from qualifying purchases. This helps support Intuit Chaos at no extra cost to you.
Affiliate disclosure: As an Amazon Associate, I earn from qualifying purchases. This article contains affiliate links. I may earn a commission if you buy through them at no extra cost to you.
Compatibility tip: Tech specs change quickly. Before buying, confirm your device model, ports, operating system, display limits, charging wattage, and return policy on the current product page.
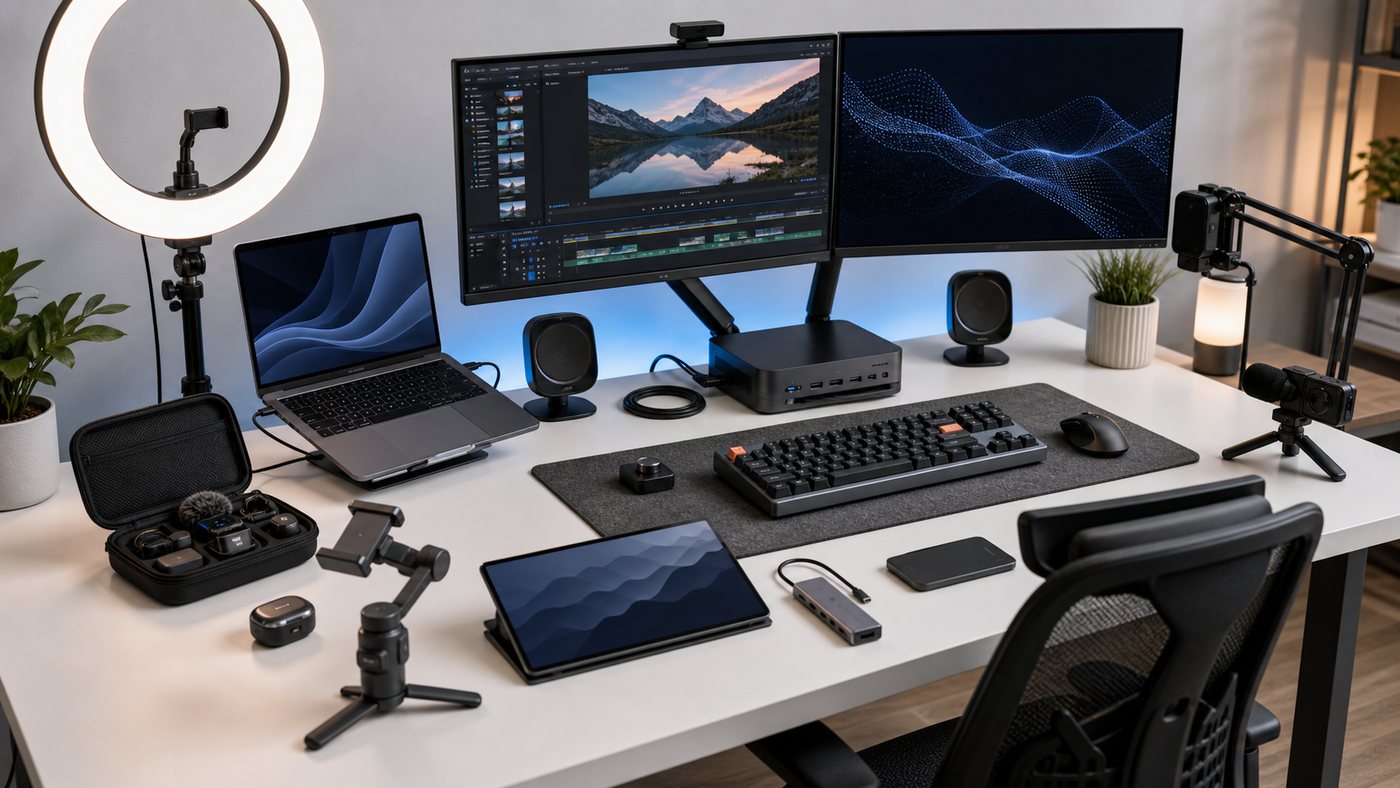
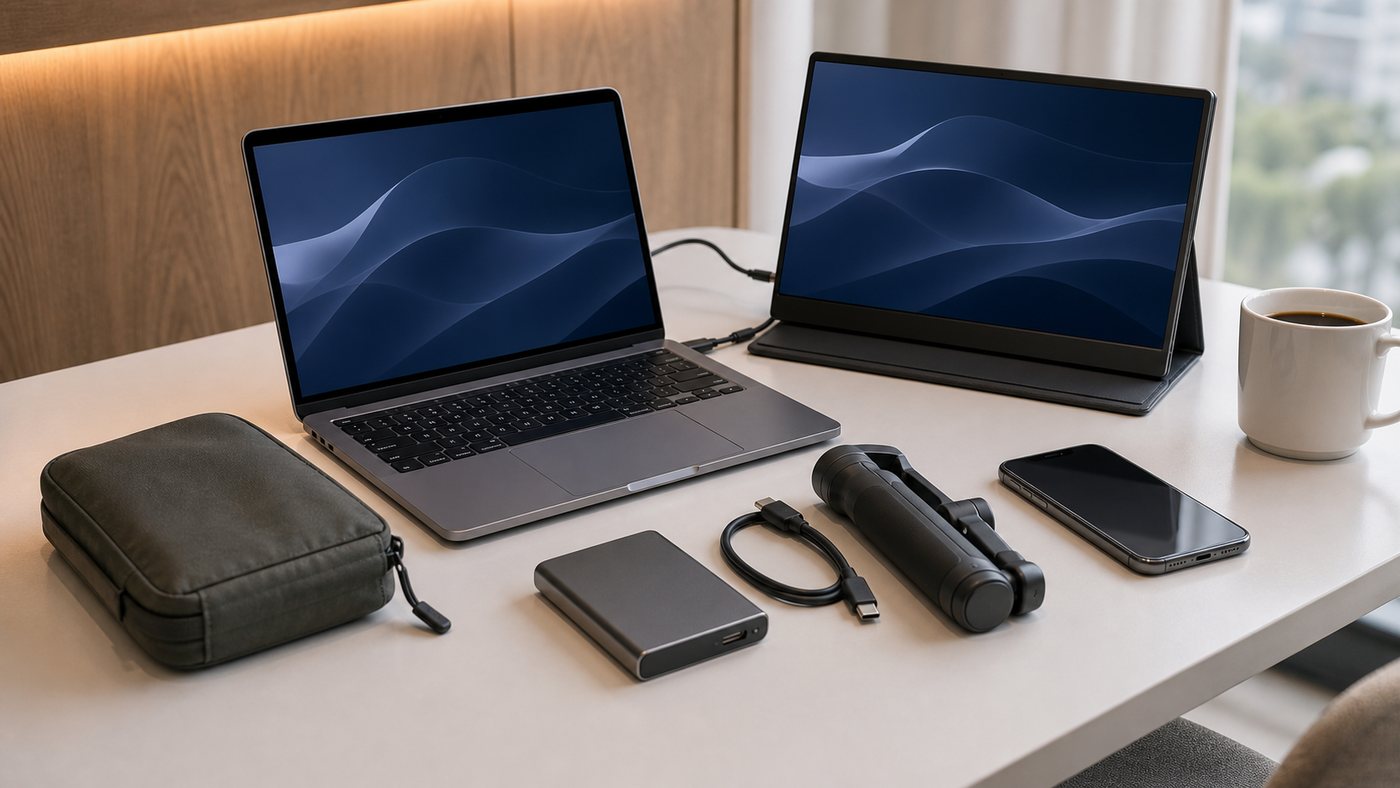
Tech accessories in 2026 are no longer minor add-ons. A good wireless lavalier microphone can make a phone video sound professional. A Thunderbolt 4 dock can turn a MacBook into a serious dual-monitor workstation. A 4TB external SSD can carry an entire 4K video project. A portable monitor can make travel work feel less cramped. The challenge is that product pages often blur important differences: USB-C versus Thunderbolt, privacy versus brightness, ring light versus panel light, gaming case versus ergonomic grip, and fast storage versus actually compatible fast storage.
This guide covers ten high-intent electronics keywords and focuses on what to check before buying. It uses Amazon affiliate search links so you can compare current options without relying on outdated prices or availability. The goal is not to buy the most expensive accessory. The goal is to buy the accessory that removes a bottleneck in your work, content creation, gaming, or travel setup.
2026 Electronics Comparison Table
Keyword
Best for
Buyer checks
Amazon
best ring light for zoom calls with glasses
Video meetings
Diffusion, side placement, brightness, color temperature
The best ring light for Zoom calls with glasses is usually not the brightest ring pointed straight at your face. Glasses reflect circles easily. Look for dimming, color temperature control, diffusion, and flexible placement. Many users get better results by placing the light slightly above and off to the side, or by using two softer lights instead of one intense ring. If you join calls daily, comfort matters: a light that causes eye strain will stay off.
A wireless lavalier microphone for iPhone content creators can improve videos more than a camera upgrade. In 2026, strong systems often include tiny transmitters, a USB-C receiver for newer iPhones, noise reduction modes, onboard backup recording, and charging cases. Check compatibility carefully if you use an older Lightning iPhone. Also listen to sample audio when possible. Heavy noise reduction can make voices sound thin, while no wind protection can ruin outdoor clips.
Good creator gear solves two common problems first: flattering light and clear voice capture.
Mac Desk Upgrades: Privacy Screens, Docks, Keyboards, and Hubs
A magnetic privacy screen protector for MacBook Pro 14 is useful in airports, offices, classrooms, and cafes, but model fit is everything. MacBook designs vary by year, camera notch, and display size. Expect some brightness reduction because privacy filters narrow viewing angles. If you edit photos or color-sensitive work, remove the filter when accuracy matters.
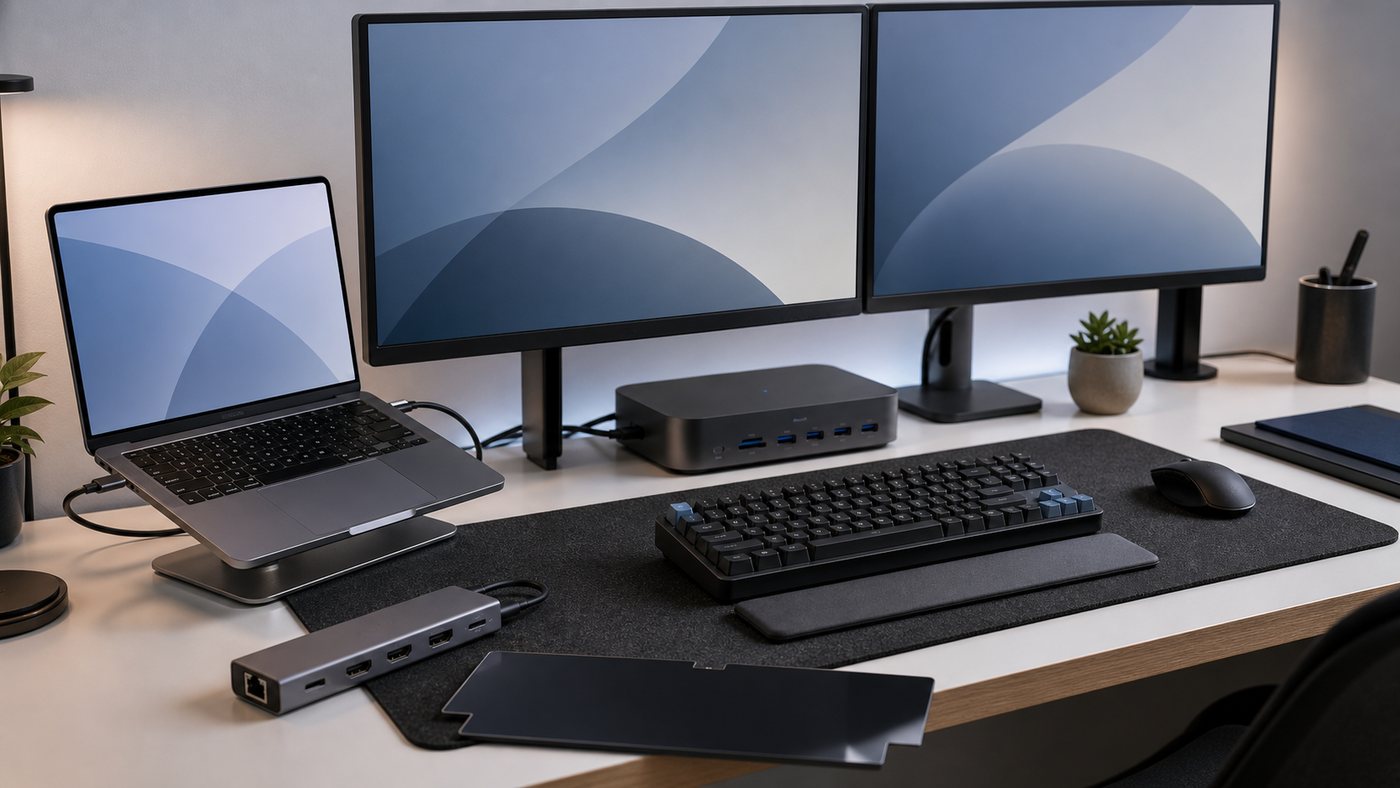
A Thunderbolt 4 dock for dual 4K monitors on Mac needs careful compatibility checking. Not every Mac supports the same number of external displays, and some USB-C hubs rely on DisplayLink software rather than native display output. USB4 and Thunderbolt share the USB-C connector, but capabilities vary. The USB-IF describes USB4 as a major update for higher bandwidth over USB-C, yet product implementation still matters. Confirm ports, power delivery wattage, monitor refresh rates, and whether your Mac model supports the setup you want.
A mechanical keyboard for Mac programming tactile should have a Mac-friendly layout, reliable key remapping, and switches you can type on for hours. Tactile switches give a bump without the loud click of clicky switches, making them a good middle ground for coding. A USB-C hub with Ethernet and dual HDMI is helpful for compact desks, but check whether both HDMI ports can run the resolution and refresh rate you expect.
With Mac accessories, connector shape is not enough. Confirm bandwidth, display support, and power delivery.
Gaming, Video Editing, Gimbals, and Portable Screens
An ergonomic protective case for Nintendo Switch OLED should protect the device without making handheld sessions awkward. Look for grip shape, button clearance, dock compatibility, kickstand access, and whether the case works with your screen protector. A case that feels great for ten minutes but heavy after an hour is not a win.
An external SSD 4TB for 4K video editing should be chosen by sustained speed, heat behavior, interface compatibility, and backup workflow. Some drives advertise high peak speeds that only happen on specific USB standards. On Macs, USB 3.2 Gen 2×2 support can be limited, so Thunderbolt or USB4 drives may make more sense for high-end editing. For serious work, never let one portable SSD be your only copy.
The best smartphone gimbal for cinematic video should balance smoothly with your phone and case, support the shots you actually use, and have an app you do not hate. Subject tracking, extension rods, magnetic mounting, and gesture controls are nice, but weight and setup speed determine whether you bring it. A portable monitor for laptop dual screen setup USB-C is similar: single-cable operation, brightness, stand quality, and power draw matter more than a long feature list.
Portable creator accessories should be fast to set up, easy to power, and compatible with the devices you already carry.
Final Take
In 2026, the best electronics accessory is the one that removes friction from work or creativity. If calls are the problem, improve light and audio. If your Mac desk is the problem, solve displays, power, and keyboard comfort. If travel productivity is the problem, choose a portable monitor and compact hub that connect cleanly. If video work is the problem, prioritize audio, stabilization, storage speed, and backups. Specs matter, but only after you know the bottleneck.
Affiliate disclosure: As an Amazon Associate, I earn from qualifying purchases. This article includes affiliate links. I may earn a commission if you buy through them at no extra cost to you.
Skin and grooming note: At-home beauty devices can irritate skin or hair when used incorrectly. Patch test products, follow manufacturer instructions, avoid unsafe areas, and ask a dermatologist or licensed professional if you have acne, scars, sensitive skin, darker skin tones, medical conditions, or unusual reactions.
Beauty and personal care tools in 2026 are more specialized than ever. You can buy a beard trimmer built for thick coarse hair, an IPL device for at-home hair reduction, an LED light therapy mask marketed for acne-prone skin, a diffuser dryer for curly travel days, or cordless clippers for self haircut fades. That variety is useful, but it also makes shopping confusing. The right question is not, “What is the most viral device?” The right question is, “What problem am I solving, and can this product solve it safely at home?”
This guide is written for shoppers who want a clean, practical comparison before clicking through to Amazon. It avoids fixed prices and star ratings because those change often. Instead, it focuses on features that matter in 2026: motor strength, guard precision, FDA-cleared claims, skin tone suitability, heat control, ingredient quality, sanitation, replacement parts, and realistic expectations. A great tool does not need dramatic promises. It needs to be safe, repeatable, and suitable for your hair or skin.
Beauty and Personal Care Comparison Table
Keyword
Best for
Buyer checks
Amazon
best beard trimmer for thick coarse hair
Dense beard grooming
Motor torque, sharp blades, guard stability, waterproofing
Grooming Tools: Beard Trimmers and Cordless Clippers
A beard trimmer for thick coarse hair needs more than a long list of guards. Dense facial hair can tug if the blades are dull, the motor is weak, or the guard flexes. Look for stainless or titanium-coated blades, a strong motor, stable length settings, easy cleaning, and enough battery life for a full trim. Waterproof designs are convenient, but blade maintenance still matters. Oil the blades if the manual recommends it, clean hair from the head, and replace worn parts before the trimmer starts pulling.
Cordless hair clippers for self haircut fades need a different kind of control. A taper lever, consistent guards, a comfortable grip, and good visibility around the blade are essential. If you are learning fades at home, start conservatively. You can always cut more, but you cannot add hair back after a rushed pass. A handheld mirror, cape, neck duster, and cleaning brush make the process easier than relying on clippers alone.
For grooming tools, precision and comfort matter more than flashy packaging.
At-Home Hair Removal, LED Masks, and Microcurrent Devices
Professional laser hair removal for home use is often used as a search phrase, but many consumer devices are actually IPL, not true professional lasers. That difference matters. Check whether the device is FDA-cleared, read the skin tone and hair color chart, and avoid using it over tattoos, irritated skin, dark spots, or areas the manual excludes. People with darker skin tones or very light hair should be especially careful because many IPL systems work by targeting pigment contrast.
An LED light therapy mask for acne scars should be judged with patience. At-home red and blue light devices may support a skincare routine, but they are not instant scar erasers. The American Academy of Dermatology explains that red or near-infrared light therapy is non-invasive and that many at-home devices are considered low risk, yet professional treatments are typically stronger. Look for eye protection, comfort, session length, and whether the mask is realistic to use several times per week.
Microcurrent facial devices for jowls require consistency and conductive gel. They may give temporary toning or a more refreshed look for some users, but results vary. Avoid microcurrent devices if the product’s contraindications apply to you, especially with implanted electronic devices, pregnancy, seizure disorders, or certain medical conditions. Read the manual first; your face is not the place for improvisation.
At-home devices should be chosen for safety instructions, fit, and consistent use, not dramatic claims.
Hair Care: Keratin, Diffusers, and Purple Shampoo
An at-home keratin treatment for curly frizz hair can smooth texture, but it can also loosen curl pattern or cause damage if used incorrectly. Read ingredients carefully, watch for formaldehyde-related warnings, ventilate the room, and do a strand test. If your goal is to keep curls but reduce frizz, a gentler smoothing treatment may be better than a strong straightening kit.
A travel size blow dryer with diffuser for curly hair should have multiple heat and speed settings, a diffuser that stays attached, and dual voltage if you travel internationally. High heat in a tiny dryer can create frizz quickly, so look for airflow control. Sulfate free purple shampoo for color treated blonde hair is useful for brassiness, but pigment strength varies. Start with short contact time and use a hydrating conditioner if your hair feels dry.
Curly and color-treated hair usually rewards gentle heat, careful timing, and product moderation.
Eye Creams and Derma Rollers
The best eye cream for dark circles men depends on why the circles appear. Pigmentation, shadows from facial structure, allergies, lack of sleep, dehydration, and thin skin can all look similar. Caffeine may help temporary puffiness; retinol may support texture over time for people who tolerate it; fragrance-free formulas are often safer around the eye area. Use sunscreen during the day if your routine includes brightening ingredients or retinoids.
A titanium derma roller for beard growth is a product category that deserves caution. Rolling needles over skin can cause irritation, infection, or worsening acne if sanitation is poor. If you use one, choose conservative needle lengths, disinfect properly, never share it, and do not roll over active breakouts. Claims around beard growth can be overstated, so keep expectations realistic.
Final Take
Beauty tools are most satisfying when they match your real routine. If you hate cleaning devices, choose simple grooming tools. If you are impatient, avoid treatments that require months of consistency. If your skin reacts easily, prioritize gentle formulas and professional advice. The 2026 beauty shelf is full of clever technology, but the best purchase is still the one you can use safely, comfortably, and honestly.
Affiliate disclosure: As an Amazon Associate, I earn from qualifying purchases. This article contains affiliate links. I may earn a commission if you buy through them at no extra cost to you.
Outdoor safety note: Always match gear to your route, weather, altitude, medical needs, and local regulations. For water safety, the CDC says boiling is the most reliable way to kill germs; filtering and disinfecting are the next best option when boiling is not practical.
Outdoor gear in 2026 is more capable than ever, but the best product is still the one that solves the problem you will actually face outside. A portable power station for CPAP camping has a different job than a tiny phone charger for backpacking. A two-person tent under three pounds has to balance comfort and storm protection. Wide waterproof hiking boots need enough toe room without sloppy heel lift. A water purifier bottle for international travel must be chosen with water risks in mind, not just bottle style. This guide turns ten buyer-intent keywords into a practical checklist for campers, hikers, overlanders, and travelers.
The biggest buying mistake is treating outdoor gear like a normal household product. In the backcountry, weak details become big problems. A battery with the wrong output can stop a medical device. A boot that feels okay in the store can hurt after five miles. A solar charger that works in perfect sun can disappoint under trees or clouds. A stove that boils water at home can struggle in wind or high elevation. Read specs, read manuals, and test gear before the trip.
2026 Outdoor Gear Comparison Table
Keyword
Best for
Critical checks
Amazon
best portable power station for cpap camping
Sleep apnea users outdoors
Watt-hours, DC adapter, pure sine wave, humidifier load
Power: CPAP Camping Stations and Solar Phone Chargers
A portable power station for CPAP camping should be chosen by math first and features second. Find your CPAP’s typical power draw, decide whether you use heated humidification, and calculate how many nights you need. Many CPAP users get much longer runtime by using a DC adapter and turning off heated humidification, but your setup may differ. Look for enough watt-hours, a reliable DC output, pure sine wave AC if you need the wall plug, and low idle drain. Test one full night at home before taking it outdoors.
Solar powered phone chargers for backpacking are useful, but they are not magic panels. Small panels charge slowly, and shaded trails can reduce output dramatically. Many hikers do better pairing a foldable panel with a power bank, charging the bank during breaks, then charging the phone from the bank. If your route depends on phone navigation, carry redundancy: offline maps, a separate battery, and a non-phone backup plan.
For CPAP camping, test runtime before the trip and do not rely on sunny weather as your only power plan.
Shelter and Sleep: Tents and Pads
A lightweight two-person tent under three pounds is appealing because every ounce matters on long climbs. The tradeoff is usually interior space, durability, or weather margin. Compare packed weight and trail weight, check whether stakes and footprint are included, and look closely at floor dimensions. Two wide sleeping pads may not fit in some ultralight two-person tents. If you often camp in wet climates, vestibule space and ventilation matter as much as weight.
An ultralight sleeping pad for side sleepers needs enough thickness to keep hips and shoulders from pressing into the ground. R-value matters in cold conditions, while noise and surface texture matter if you move a lot. Side sleepers should be cautious with ultra-thin minimalist pads. A few extra ounces can be worth it if you sleep well enough to hike safely the next day.
Ultralight gear is only successful when it still protects sleep, warmth, and weather comfort.
Footwear, Food Storage, Coffee, and Cooking
Waterproof hiking boots for wide feet men should give toes room to swell without letting the heel slide. Waterproof membranes help in mud and wet grass, but they can feel warmer and dry more slowly once soaked inside. Try boots with the socks you plan to wear and test them on slopes if possible. For truck camping, a bear proof cooler for a truck bed should be lockable, tie-down friendly, and appropriate for the rules where you camp. In bear country, follow local storage rules even if the cooler is rugged.
A portable espresso maker for camping is a comfort item, but a wonderful one for people who care about mornings. Choose based on cleanup, pressure method, water heating, and how much ground coffee it uses. A compact camping wood stove for high altitude can reduce fuel canister dependence, but fire bans, wet wood, wind, and thin air can make it challenging. Always check local rules before relying on wood fire cooking.
Navigation and Water Treatment
A GPS smartwatch for off-grid hiking should have offline maps, long battery modes, accurate satellite support, and controls that work with gloves or wet hands. Emergency SOS features may require a phone connection or subscription, so read the details carefully. A watch is a navigation aid, not a substitute for route planning.
A water purifier bottle for international travel is different from a basic hiking filter. Some filters target protozoa and bacteria but not viruses. For travel where viral contamination is a concern, choose a purifier or combine filtration with disinfection. The CDC’s water treatment guidance is simple and worth respecting: boil when you can; otherwise filter and disinfect according to product instructions.
Navigation and clean water are core safety systems, not just convenient accessories.
Final Take
The best outdoor gear for 2026 is gear you have tested before you need it. Run your CPAP from the power station at home. Sleep on the pad in your living room. Walk several miles in the boots. Try the water bottle before international travel. Practice with the GPS watch before the trailhead. Good gear gives confidence because it is familiar, not because the product page looked impressive.
Find the best laptop stand for small desks with height tips, adjustable options, airflow advice, posture support, cable clearance, and cleaner setup ideas.
A laptop stand is one of the simplest upgrades for a small home office. It raises your screen, frees space under and around the laptop, improves airflow, and makes a compact desk feel more intentional. The best laptop stand for a small desk is not always the biggest or most expensive one. It is the stand that lifts your screen to a better height without taking over the whole workspace.
Affiliate disclosure: As an Amazon Associate, I may earn from qualifying purchases. This does not change the price you pay, and it helps support Intuit Chaos.
Quick Answer: Which Laptop Stand Should You Choose?
If your laptop is your main work screen, choose an adjustable laptop stand with enough height range to bring the screen closer to eye level. If you move between rooms or travel often, a foldable stand is easier to store. If you use your laptop closed with an external monitor, a vertical laptop stand saves the most desk space.
Small desks have two common problems: the screen is too low, and the laptop takes up the center of the work surface. A stand helps both. It lifts the screen and can create space underneath for a keyboard, notebook, docking hub, or small accessories.
A laptop stand works especially well when paired with a clean desk layout. Use a desk mat to define your work zone, a desk lamp for softer lighting, and cable routing so the setup stays calm after the first week.
How High Should a Laptop Stand Be?
The goal is not to make the laptop tall just for the sake of it. The goal is to bring the top third of the screen closer to eye level, so you do not spend the whole day looking down. Once the laptop is raised, use a separate keyboard and mouse whenever possible.
If you raise the laptop but keep typing on the built-in keyboard for long sessions, your wrists and shoulders may still feel awkward. A stand is best when it turns the laptop into a better screen, not when it forces your hands into a steep angle.
Best Laptop Stand Types for Small Desks
Adjustable Laptop Stands
Adjustable stands are the best choice for most daily home office setups. They let you change the height and angle, which is useful if your chair, desk height, or laptop size changes. Look for a sturdy base, grippy pads, and enough clearance for airflow.
Foldable stands are better for flexible spaces. They are easy to put away, carry to another room, or pack for travel. They may not feel as stable as a heavier desktop stand, but they are practical if your desk has to reset at the end of the day.
A vertical stand is useful if you connect your laptop to an external monitor and use it in closed mode. It keeps the laptop upright, saves horizontal desk space, and can make the setup look much cleaner. This is not the best choice if you need the laptop screen open all day.
What Features Are Worth Paying For?
Stable base: A wobbly stand becomes annoying quickly.
Height adjustment: More useful than decorative design.
Open-frame airflow: Helps laptops that run warm.
Grippy pads: Keeps the laptop from sliding.
Space underneath: Useful for storing a keyboard or notebook when not in use.
Foldability: Worth it if you work in shared spaces or travel.
A laptop stand is best when the laptop itself is the screen you use. A monitor stand is better if you use an external monitor and need storage underneath. If you work with both a laptop and monitor, you may use a laptop stand on one side and a monitor stand in the center.
Buying a stand that is too low: It may improve airflow but not posture.
Ignoring keyboard comfort: A raised laptop needs a separate keyboard for long sessions.
Choosing a wide stand for a tiny desk: Measure before buying.
Blocking vents: Avoid stands that cover laptop cooling areas.
Letting cables hang in front: Route charging and hub cables behind the stand.
FAQ
Are laptop stands worth it for small desks?
Yes. A laptop stand can raise the screen, improve airflow, and create more usable desk space. It is one of the easiest upgrades for a compact home office.
Do I need a separate keyboard with a laptop stand?
For long work sessions, yes. Raising the laptop makes the screen more comfortable, but typing on the raised laptop keyboard can strain your wrists and shoulders.
Is an adjustable or foldable laptop stand better?
An adjustable stand is better for a fixed daily desk. A foldable stand is better if you move around, travel, or need to put the setup away often.
Can a laptop stand help with overheating?
It can help if the stand improves airflow under the laptop. Open-frame aluminum stands are usually better for airflow than solid platforms.
Final Thoughts
The best laptop stand for small desks should lift the screen, stay stable, allow airflow, and leave enough room for a keyboard and mouse. Choose an adjustable stand for daily work, a foldable stand for flexible spaces, or a vertical stand for closed-laptop setups. When combined with a desk mat, clean cable routing, and better lighting, it can make a small home office feel far more comfortable.
Find the best under desk storage drawer for small home offices with placement tips, size advice, clutter control, cable clearance, and cleaner setup ideas.
An under desk storage drawer is a simple way to hide small daily items without adding another tray, box, or organizer on top of your desk. For a small home office, that matters. Pens, chargers, sticky notes, earbuds, remotes, and adapters can make a clean desk feel messy fast. A good under desk drawer keeps those items close, but out of sight.
Affiliate disclosure: As an Amazon Associate, I may earn from qualifying purchases. This does not change the price you pay, and it helps support Intuit Chaos.
Quick Answer: Who Should Buy an Under Desk Drawer?
An under desk drawer is best for people who want a cleaner desktop but still need small items within easy reach. It is especially useful if your desk has no built-in drawer, if you work on a narrow tabletop, or if your desk mat and monitor stand already take up most of the surface.
Why Under Desk Storage Works So Well in Small Offices
Small desks do not usually fail because they lack one big organizer. They fail because daily items keep returning to the surface. A drawer under the desk solves a different problem: it creates hidden, reachable storage for the small things you use often.
This works especially well with a clean surface strategy. Use a desk mat to define your active work zone, a monitor stand with storage for larger desktop structure, and an under desk drawer for small loose items.
What to Store in an Under Desk Drawer
The best use for an under desk drawer is not long-term storage. It should hold small items you reach for every week. If you fill it with things you rarely use, it becomes hidden clutter instead of useful organization.
Pens and markers: Keep one or two favorites, not every pen you own.
Charging cables: Store short cables or adapters you use often.
Sticky notes: Keep a small pad nearby without leaving it on the desk.
Earbuds: A drawer keeps them close for calls without visual clutter.
Remote controls: Useful for lights, fans, or monitor controls.
Cable clips: Small accessories stay easier to find.
Adhesive drawers are popular because they are simple. Clean the underside of the desk, attach the drawer, and let the adhesive settle before loading it. They are best for light items such as pens, sticky notes, adapters, and earbuds.
The tradeoff is weight. Adhesive can fail if the drawer is overloaded or if the desk surface is dusty, textured, or uneven. If you choose adhesive, keep the drawer light and avoid storing heavy tools or large power bricks.
Screw-Mounted Drawers
Screw-mounted drawers are more secure. They make sense if you want stronger storage or if your desk surface can handle hardware. They are usually better for heavier daily items, but they take more work to install.
Placement matters more than people expect. A drawer in the wrong spot can hit your knees, block a cable tray, or make it awkward to reach. Before installing anything, sit at the desk normally and move your hands under the surface. The best location is usually near your dominant hand, slightly off-center.
Avoid the center knee area unless the drawer is very shallow. If you already use an under desk cable management tray, place the drawer on the opposite side or slightly forward so cables and storage do not fight for the same space.
Best Features to Look For
Low-profile depth: A shallow drawer protects knee space.
Smooth slide: The drawer should open without shaking the desk.
Rounded front edge: More comfortable if your knees or hands brush near it.
Dividers: Helpful for small items such as clips and adapters.
Strong adhesive or mounting hardware: Match this to how much weight you store.
Quiet open/close: Useful for calls and shared spaces.
Empty the desk area and sit in your normal working position.
Mark the knee space you need to keep clear.
Check where cables, cable trays, and power strips run under the desk.
Clean the underside of the desk before using adhesive.
Test the drawer location with tape before final mounting.
Load only small items at first and check that the drawer stays stable.
After installation, reset the desktop. Keep active items on the desk mat, hide small accessories in the drawer, and route cables away from the drawer path. For a full cable cleanup plan, see Cable Management Ideas for a Cleaner Desk Setup.
Common Mistakes to Avoid
Mounting too close to your knees: Comfort matters more than storage volume.
Overloading adhesive drawers: Heavy items can pull the drawer loose.
Blocking cable access: Leave room to unplug or move cables later.
Storing rarely used items: Use the drawer for weekly tools, not forgotten clutter.
Skipping the test fit: Tape the drawer in place temporarily before committing.
FAQ
Are adhesive under desk drawers strong enough?
They can be strong enough for light office items such as pens, sticky notes, earbuds, and small adapters. For heavier items, screw-mounted drawers are usually safer.
Where should I put an under desk drawer?
Place it slightly to the side of your normal knee space, near the hand you use most. Avoid cable trays, power strips, and any area where your knees naturally move.
Can an under desk drawer damage my desk?
Adhesive may leave residue, and screws create permanent holes. Check the desk material first, especially if the desk is rented, very thin, or made from delicate laminate.
Is an under desk drawer better than a desktop organizer?
It depends on the goal. A desktop organizer keeps items visible and easy to grab. An under desk drawer keeps the surface cleaner. For small desks, hidden storage is often better.
Final Thoughts
The best under desk storage drawer for a small home office should be shallow, easy to reach, and strong enough for the items you actually use. Keep it light, avoid knee space, and use it for weekly essentials. When paired with a clean desk mat, better cable routing, and a simple lighting setup, it can make a small workspace feel much calmer.
Find the best desk mat for small home offices with size tips, material comparisons, cleaning advice, surface protection, mouse control, and cleaner setup ideas.
A desk mat is one of the easiest upgrades for a small home office. It protects the desktop, gives your keyboard and mouse a defined work zone, makes the setup look cleaner, and can make daily writing or mouse movement feel smoother. The best desk mat for a small desk is not always the biggest one. It is the one that fits your layout without swallowing the whole surface.
Affiliate disclosure: As an Amazon Associate, I may earn from qualifying purchases. This does not change the price you pay, and it helps support Intuit Chaos.
Quick Answer: What Desk Mat Should You Buy?
If you want a simple first pick, look for a waterproof PU leather desk mat in a medium size. It is easy to wipe clean, works with most optical mice, and usually looks neat in small spaces. If your desk is narrow, choose a shallow rectangular mat instead of a very large gaming-style pad.
Small desks get messy quickly because every item competes for the same limited surface. A desk mat creates a visual boundary. Your keyboard, mouse, notebook, and daily tools stay inside one work zone, while the rest of the desk feels more open.
This is the same reason monitor stands and cable trays help a compact workspace. They do not simply add accessories; they give the setup structure. If you are building the full small-office cluster, start with the pillar guide: Best Desk Organization Products for Small Home Offices.
How to Choose the Right Desk Mat Size
The best size depends on your keyboard, mouse, and writing habits. A mat that is too small feels cramped. A mat that is too large can make a small desk look heavier than it needs to be.
Small Desk Mat
A smaller mat is best if you use a compact keyboard, a laptop stand, or a very narrow desk. It keeps the mouse area organized without taking over the whole surface. This is a good choice for minimal setups where you still want a little protection and structure.
Medium Desk Mat
A medium desk mat is the safest all-around size for most home offices. It usually fits a keyboard and mouse with enough room for a small notebook or phone. If you are unsure, choose medium before going oversized.
Narrow Long Desk Mat
A narrow long desk mat is useful for shallow desks. It gives your keyboard and mouse a clean line across the desk while leaving space behind for a monitor stand or lamp. This can work especially well with the setup ideas in Best Monitor Stands With Storage for Small Desks.
Best Desk Mat Materials
Material matters because it changes how the desk feels every day. Some mats are best for easy cleaning. Some are better for writing. Others make typing quieter or give the desk a softer visual style.
PU Leather Desk Mats
PU leather desk mats are popular because they are simple, affordable, and easy to clean. They are a practical first choice if you drink coffee at the desk or want something that can be wiped down quickly. Many also come in reversible colors.
Felt desk mats feel softer and quieter. They can make a work area look warmer and more relaxed. The tradeoff is cleaning. Felt is not as simple to wipe down as waterproof materials, so it is better for desks that stay relatively dry and tidy.
Cork hybrid mats can feel more natural and grippy. They often work well for writing because the surface has a little texture. They are a good fit if you want a warmer look without going fully fabric.
What Features Are Worth Paying For?
Non-slip backing: Keeps the mat from moving when you type or use the mouse.
Water resistance: Makes daily cleaning much easier.
Stitched or finished edges: Helps the mat look better over time.
Enough mouse space: Prevents the mouse from sliding off the usable area.
Flat shipping or good packaging: Reduces curling at the edges.
Low-glare surface: Helps the desk look calmer under a lamp.
Start by placing the desk mat where your hands naturally rest. Then center the keyboard on the mat and leave enough space for the mouse to move without hitting the edge. If your monitor stand has storage, let the mat stop before the stand so the surface still has layers.
Lighting also matters. A desk mat can look different under a warm lamp or cool lamp. If glare is a problem, position your lamp to the side and use a softer brightness. For that setup, see Best Desk Lamps for Video Calls and Eye Comfort.
Buying too large: An oversized mat can make a small desk feel crowded.
Ignoring cleaning: Felt looks great, but it is not ideal for every coffee-heavy desk.
Choosing a glossy surface: Glossy mats can create distracting reflections under bright lights.
Letting the mat curl: If the edges curl after shipping, flatten it before building the setup around it.
Blocking storage: Do not cover drawer access, cable holes, or monitor stand storage.
FAQ
What size desk mat is best for a small home office?
A medium mat is best for most people because it fits a keyboard and mouse without covering the whole desk. For narrow desks, choose a long shallow mat instead of an oversized square pad.
Are desk mats worth it?
Yes, if you want a cleaner work zone, smoother mouse movement, and basic surface protection. A desk mat is a low-cost upgrade that can make a small workspace feel more intentional.
Is PU leather or felt better for a desk mat?
PU leather is better for easy cleaning. Felt is better for a softer, quieter, warmer-looking desk. If you eat or drink at your desk often, PU leather or a waterproof desk pad is usually safer.
Can a desk mat reduce clutter?
It can help by defining where your active work items belong. It will not replace storage, but it can make the desk easier to reset at the end of the day.
Final Thoughts
The best desk mat for small home offices should fit your actual desk, support your keyboard and mouse, and match how you clean and work. Start with a medium waterproof mat if you want the safest first choice. Choose felt for a softer look, or cork hybrid if you want a natural surface for writing.